Installing Swift Executables From Source With Mise
In a previous post, Distribute Your Swift CLIs for macOS, Pedro Piñera explained how to build Swift executables for macOS and distribute them as pre-compiled binaries. Unfortunately, as this is not a straightforward process, and many developers choose instead to distribute their Swift executables as source code, leaving the build process to users themselves.
In that same post, Pedro also showed how one can use Mise, a Universal Binary Installer (UBI), to download and install pre-compiled binaries from a GitHub release (or other Git forges). If you didn’t read Pedro’s post, Mise (pronounced meez, as in mise en place) is a powerful development environment manager that handles tool installation in a deterministic way, among other development tasks.
With its SPM (Swift Package Manager) backend, Mise can get the source code, build it, and install the executable in your environment. This post will walk you through installing Swift executables without the need for a pre-compiled binary, using Mise, just with the repository URL or shorthand. As an example, you’ll install tree.swift, a Swift clone of the tree command for visualizing directory trees.
Installing Mise
There are two pre-requisites for this post: Swift (which you probably already have installed) and Mise. To install the latter, installing via curl is the easiest way. If you’re afraid of piping curl to your shell, you can use Homebrew instead:
curl https://mise.run | sh

# If you prefer Homebrew (on macOS):
brew install mise
After the installation, you’ll need to activate Mise in your shell. This will allow you to use tools installed with Mise without prefixing them with mise exec in every command:
# Adds to your shell profile (~/.zshrc, ~/.bashrc, etc.)
echo 'eval "$(mise activate zsh)"' >> ~/.zshrc
Finally, reload your shell to apply the changes:
source ~/.zshrcTo check if Mise is installed correctly, run mise doctor. When the installation is successful, Mise prints different information about your environment, its current path the available backends, with a message at the bottom: No problems found.
Package.swift Requirements
Mise requires a Package.swift file at the root of the repository, and it should contain at least one executable product. Pay attention that it is not enough to have an executableTarget under the targets array: it needs to be a .executable(...) under the products array:
// Package.swift
let package = Package(
    name: "my-package",
    products: [
        .executable(name: "my-executable", targets: ["my-executable-target"])
    ],
    // dependencies
    targets: [
        .target(name: "my-executable-target")
    ]
)
The name my-executable will be the name of the executable when installed, through which you can run it.
Installing Swift Executables
The SPM backend in Mise is still considered experimental. To allow it, you’ll need to first run the following command:
mise settings experimental=trueAfter that, Mise can use the SPM backend to install Swift executables from remote Git repositories. Different syntax formats, but start with the simplest one:
# Installs latest version globally
mise use -g spm:SwiftToolkit/tree.swift
Notice a few things in the command above:
- The
-gflag installs the tool globally, so it can be used from any path - The tool name is prefixed with
spm:, indicating that the SPM backend is required to build it - When using the shorthand format, Mise will look for it in GitHub.
- When no version is specified, the latest version is used
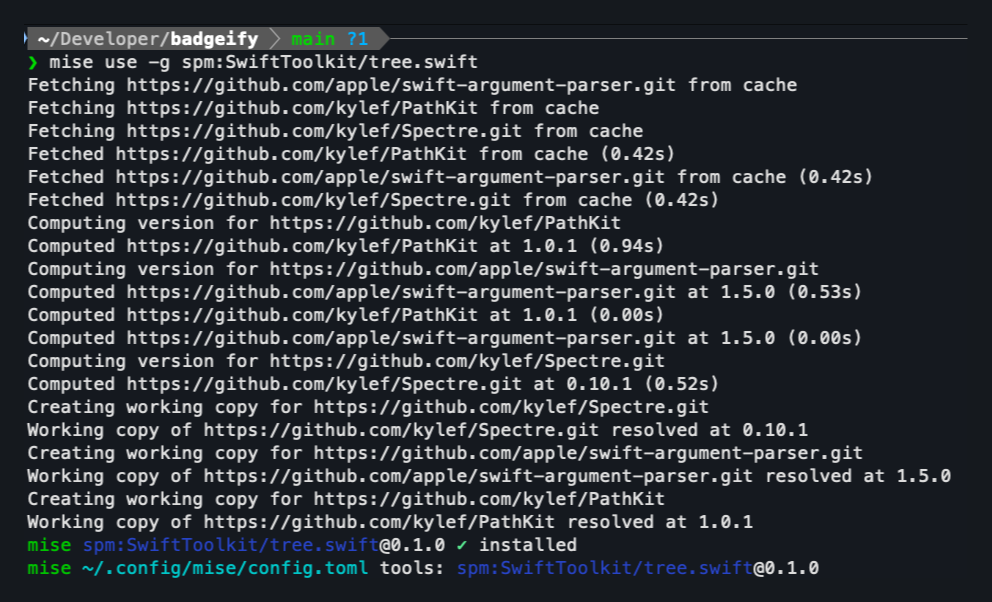
This is the output when installing tree.swift with Mise:


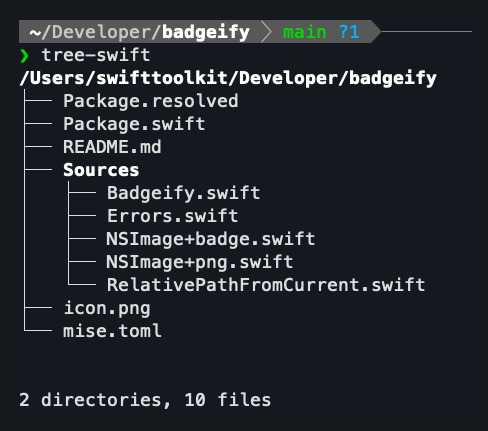
Then, swift-tree is available in your path for you to use. If you haven’t activated Mise in your shell, you’ll need to prefix the command with mise exec to run it.


And to confirm where it’s installed, you can run the which command. Notice how the path is managed by Mise.


Global Installations
In the examples above, the tool is installed globally. You can confirm it in two ways. The first one is to run the ls command, which will list the installed tools:
mise ls

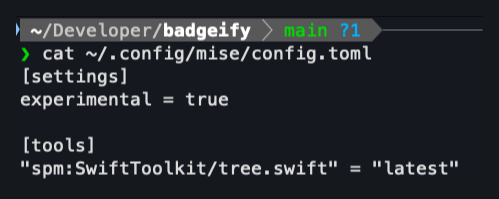
If you look into the output above, you’ll find out the second way to check the globally-installed tools. Mise stores this information in the ~/.config/mise/config.toml file:


Installing Tools Locally
Up until now, we saw how to install tools globally. A common scenario is when you want to install a tool for the current project only, and not globally. This is very useful when you want all team members to use the same versions of different tools, without relying on the ones installed in their own machines. This is a significant advantage of Mise over tools such as Homebrew.
mise use swiftlint@0.59.1
mise use swiftformat@0.56.2
In the commands above, there is no need to specify the SPM backend for SwiftLint and SwiftFormat, as they are distributed as pre-compiled binaries on GitHub releases.
You can see all of them in the mise.toml file:
[tools]
"spm:SwiftToolkit/tree.swift" = "latest"
"swiftformat" = "0.56.2"
"swiftlint" = "0.59.1"
For teams that want to stay aligned in the tools they use, adding the mise.toml file to the Git repository is a great idea, along with pinned versions instead of just using latest.
This way, when a new team member joins (or when a tool is updated), running mise install will install all the tools listed in the file.
Supported Syntax Formats
Mise supports different syntax formats when installing tools.
To install a specific version, you should use @ sign followed by the version number:
# Installs a specific version:
mise use -g spm:SwiftToolkit/tree.swift@0.1.0
If you want to install a tool which is not on GitHub, you can use the full URL instead:
mise use -g spm:https://github.com/SwiftToolkit/tree.swift.gitAlternatives
Mise is not the only tool that can install Swift executables from source. Created and maintained by Yonas Skolb, mint is another option.
Overall, Mise has the advantage of having other backends (such as Node, Python, Rust), besides Swift only. This way, you can have a single tool to install and manage all your tools, regardless of the language they were written in.
Explore Further
Thanks for following along and reading this post until the end!
Mise has other advantages besides the ones mentioned in this post, which this post doesn’t cover, but it’s worth highlighting:
- Environment: specify environment variables used for different projects
- Tasks: Define project-specific tasks in mise.toml or shell scripts for running linters, tests, and other automation. Tasks automatically inherit the mise environment configuration.
Kudos to Jeff Dickey, aka @jdx, for creating such a great tool!
If you have any questions or feedback on this post, ping us on X @SwiftToolkit or Mastodon.
See you at the next post. Have a good one!
