Interactive & Beautiful CLI Tools with Noora
When compared to regular applications, command line tools have a limited graphic interface: the terminal. However, that doesn’t mean they should be boring, hard to read, with no colors, and not interactive.
Previously, we explored how you can use methods such as readLine(), to accept user input, or how to add custom colors and styles to terminal output.
In this post we’ll explore a package that allows adding interactive features and well-designed components to your CLI tools: Noora. It is created and maintained by Tuist, the same authors of Command and XcodeProj. Although the project is still in an early stage of development, and things might change, it contains great features that you can use in your tools.
Adding the Package
To start using Noora, first add the package dependency to your Package.swift file:
dependencies: [
	.package(url: "https://github.com/tuist/Noora", .upToNextMajor(from: "0.17.0")),
]
Then, add the target dependency to your executable target:
targets: [
	.executableTarget(
		name: "my-cli",
		dependencies: [
			.product(name: "Noora", package: "Noora"),
		]
	)
]
Alerts
The most simple component you can use in Noora is an alert. Instead of printing a message in plain text, you can display success, warning or error messages that stand out visually. To display a success message, for example, you can use the following code:
Noora().success(
    .alert("Your app was submitted successfully!")
)
This will display a green success message with a checkmark icon:


Additionally, you can use the warning and error methods to display warning and error messages respectively. Usually, in these situations, you might instruct the user to take certain actions to resolve the issue. For that, you can use the nextSteps parameter:
Noora().error(
	.alert("Deployment failed: invalid token",
			nextSteps: [
			"Run `my-cli login` to refresh the token",
			"Use the browser to get a new token"
			]
	)
)
This will display the following error message, with actionable instructions:


You can also use the .warning() method to display warning alert messages, which are displayed in yellow.
Yes or No Question
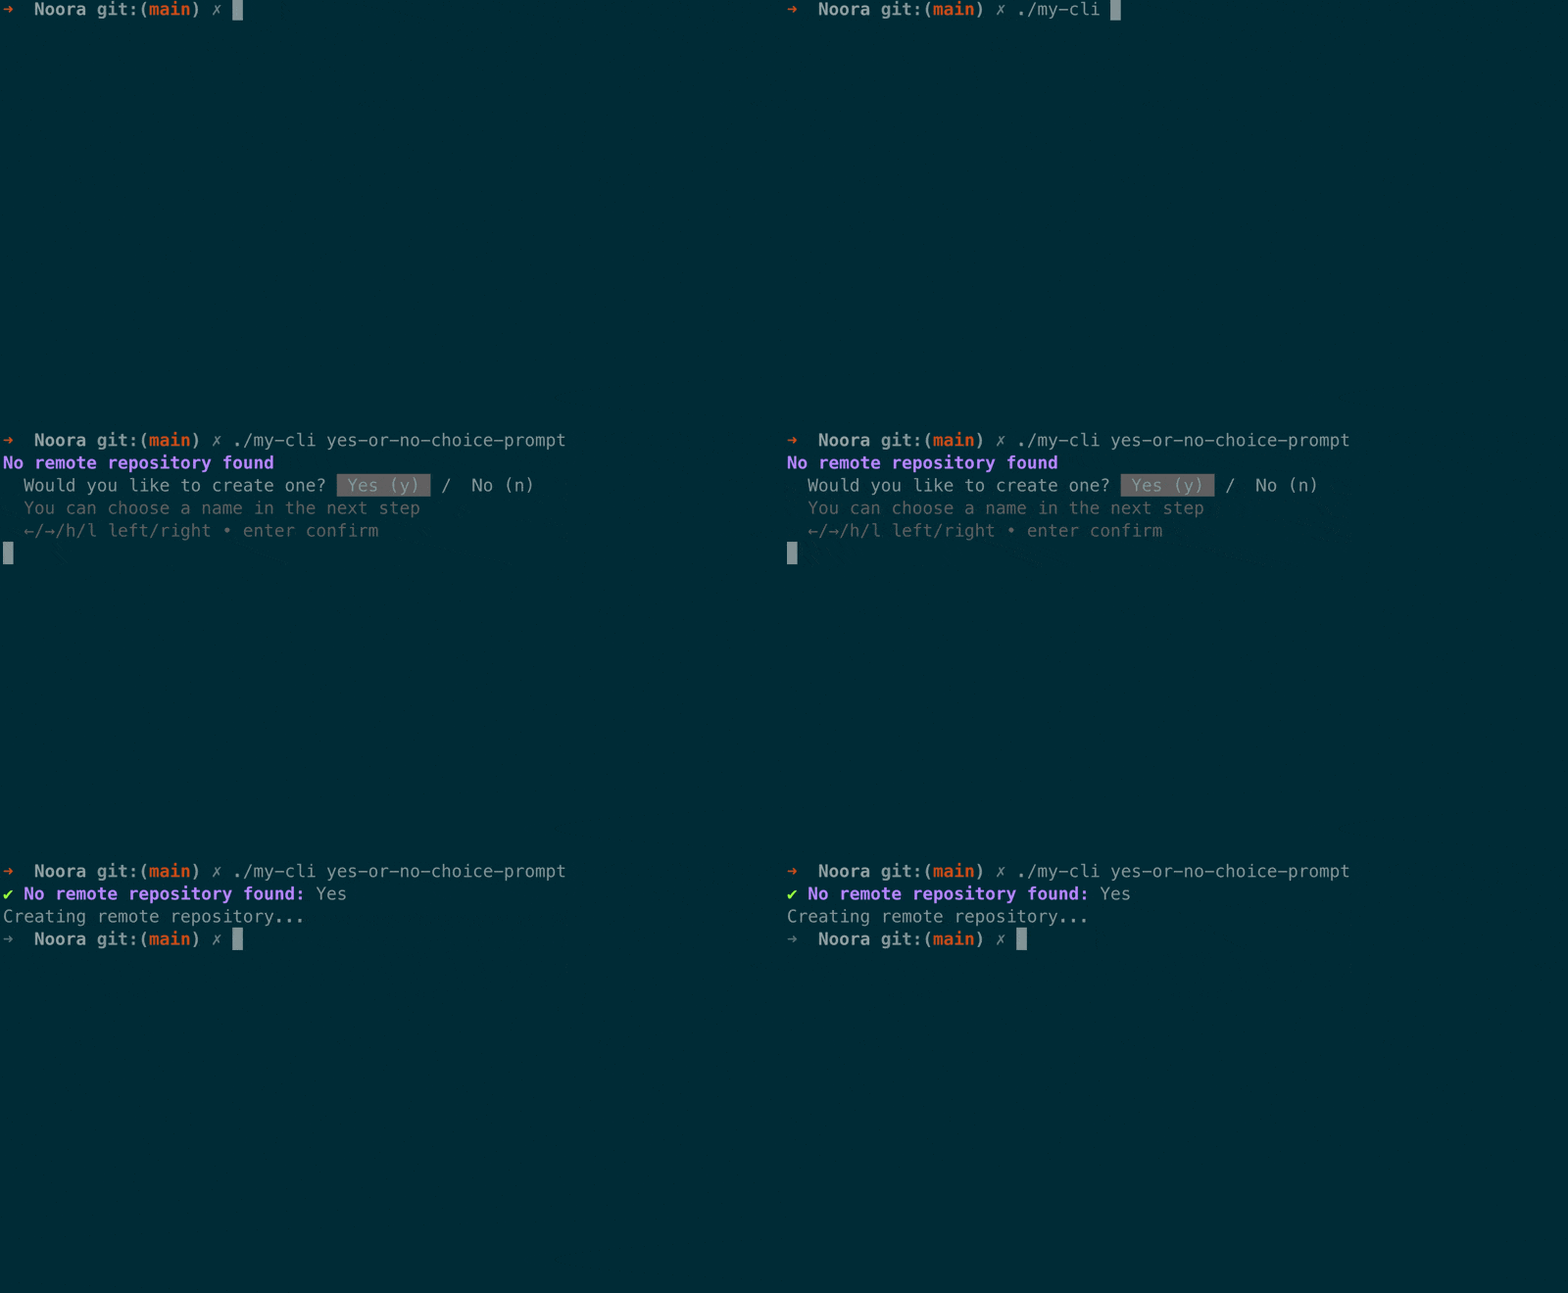
Moving to interactive components, Noora comes with the ability to ask the user a question that can be answered with a “yes” or “no” response. To do ask such a question, you can use the .yesNoQuestion() method:
let createRepo = Noora().yesOrNoChoicePrompt(
	title: "No remote repository found",
	question: "Would you like to create one?",
	description: "You can choose a name in the next step",
	collapseOnSelection: true
)

if createRepo {
	print("Creating remote repository...")
}
Once the user answers the question, the prompt will collapse, and the method returns a boolean value, which you can use as a condition in your code.
The user can move the selection with the arrow keys, and select the option by pressing Enter, or by pressing the Y or N keys. This is how it looks like:

Single Choice Prompt
Moving to a more complex component, you can use the .singleChoicePrompt(). It allows asking the user to select one option from a list.
To use it, start by defining a String enum that conforms to both CustomStringConvertible and CaseIterable protocols:
enum Cloud: String, CaseIterable, CustomStringConvertible {
	case aws = "AWS"
	case google = "Google Cloud"
	case azure = "Azure"

	var description: String {
		rawValue
	}
}
Then, use the singleChoicePrompt() method to ask the user to select an option:
let cloud: Cloud = Noora().singleChoicePrompt(
	title: "Cloud Provider",
	question: "To which cloud provider would you like to deploy?",
	description: "Select only one choice"
)

print("Chosen provider: (cloud)")
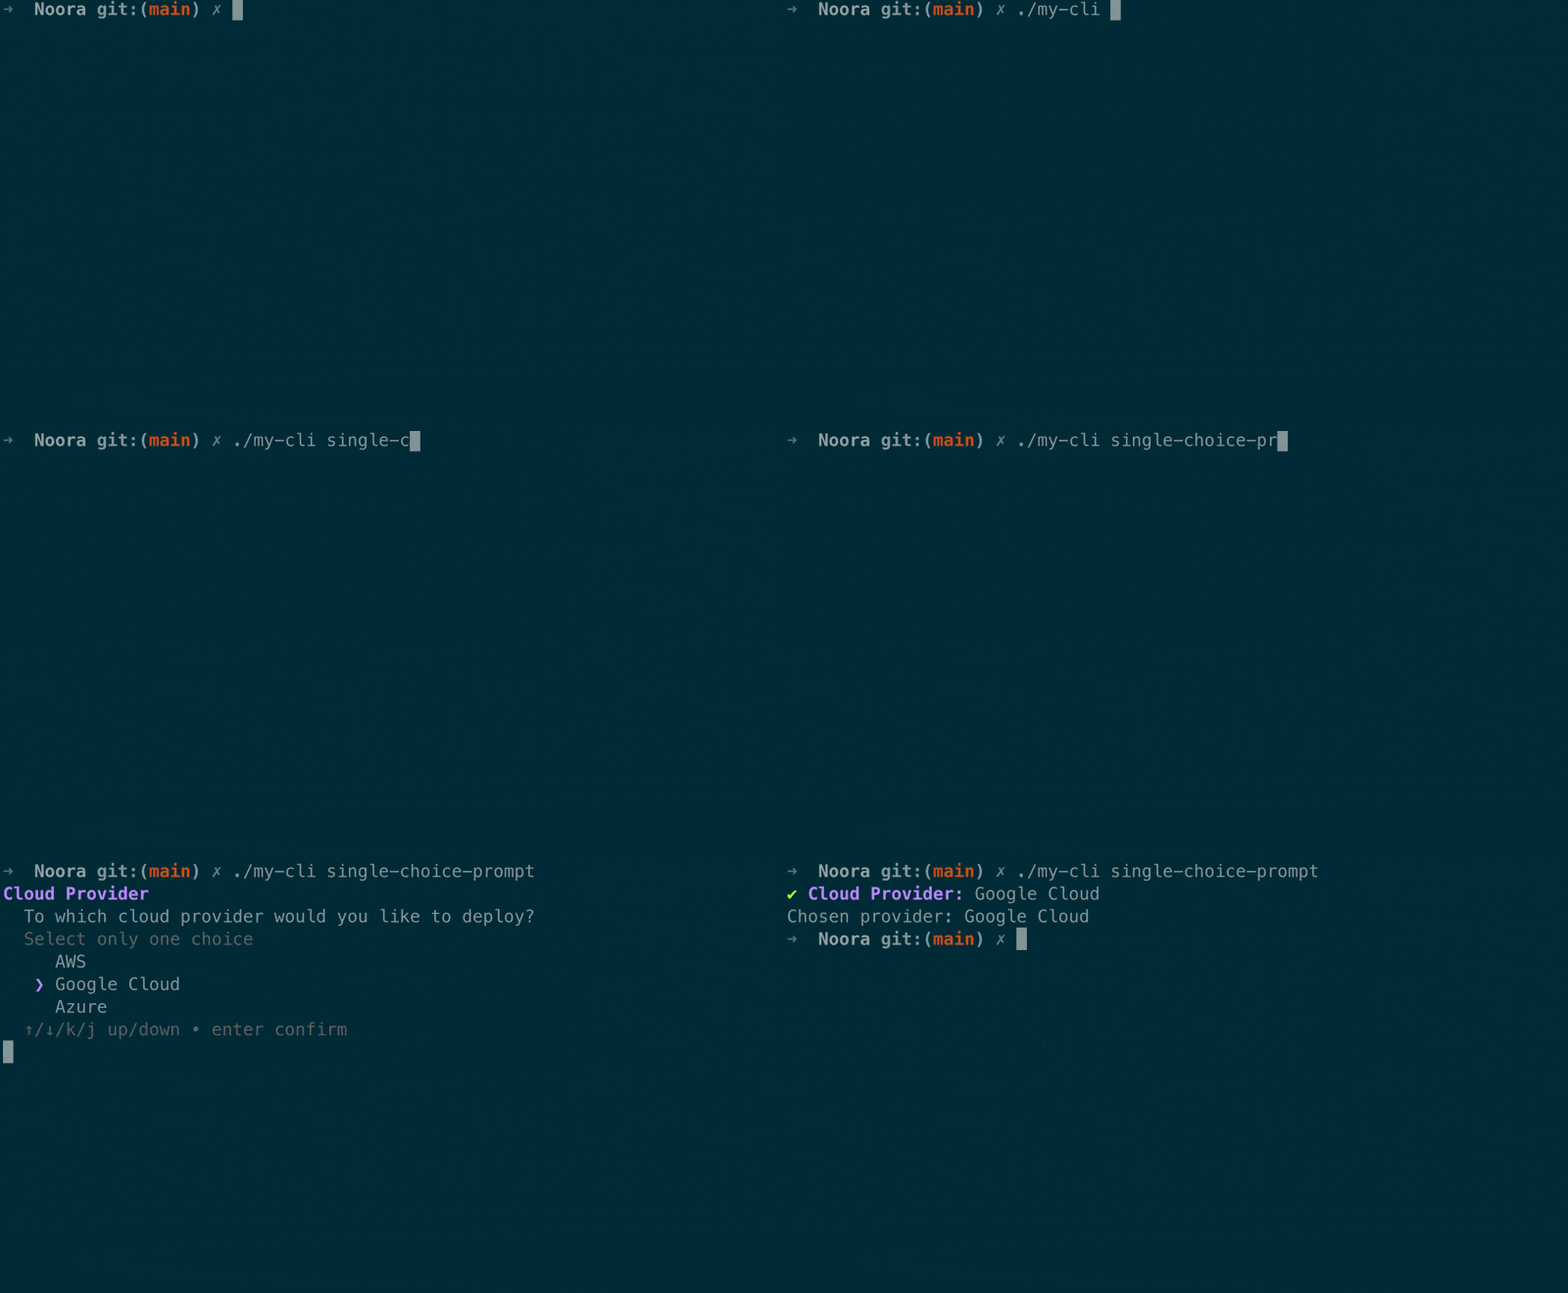
The code above displays the question, allowing the user to select one option. Notice how, due to the usage of generics, you have to explicitly specify the type of the variable that will store the result - in this case, Cloud.
And this is the result:

Progress Indicator
In the same way that an iOS app shows a progress indicator when an operation is in progress, so the user feels something is happening, CLI tools ideally should do the same. Not knowing if something is happening is frustrating, and it makes the tool feel unresponsive.
To display a progress indicator, you can use the .progressStep() method. Besides the message, you must pass an async throws closure that will the operation the tool will perform.
let noora = Noora()

try await noora.progressStep(message: "Creating Project") { _ in
	try await createProject()
}

try await noora.progressStep(message: "Building") { _ in
	try await build()
}
Additionally, you can also pass a success message that is displayed once the operation is finished:
try await Noora().progressStep(
	message: "Deploying Function",
	successMessage: "Deploy is live at (cloud)"
) { _ in
	try await deploy()
}
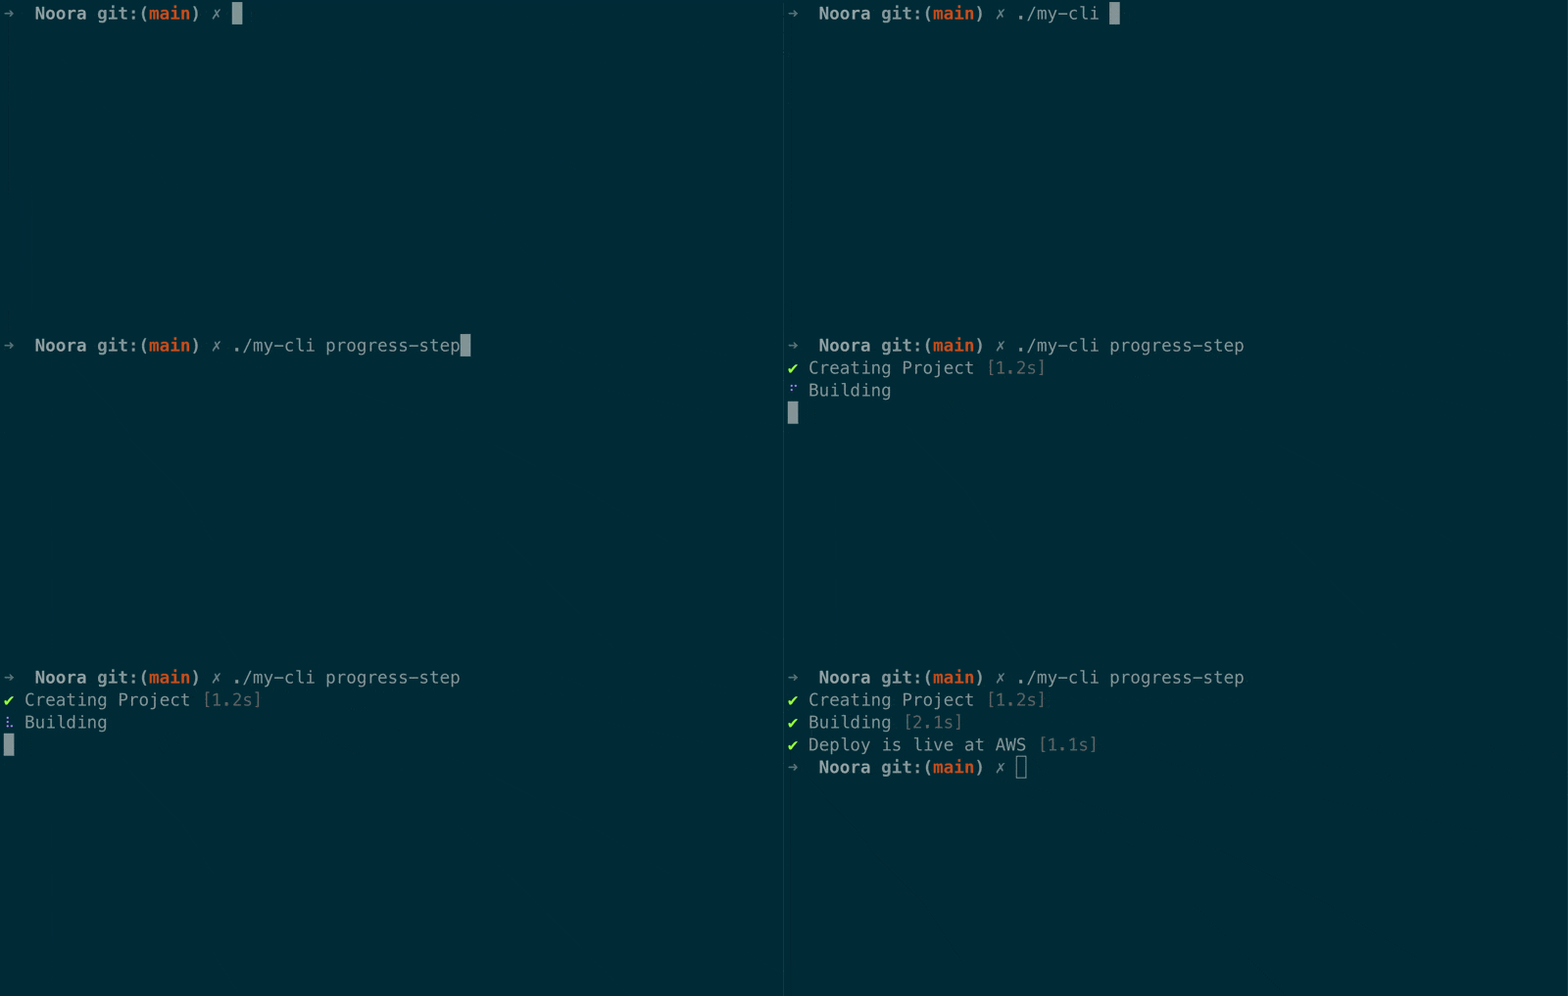
This will display a progress indicator with a spinner, and a message indicating the current step, as you can see below:

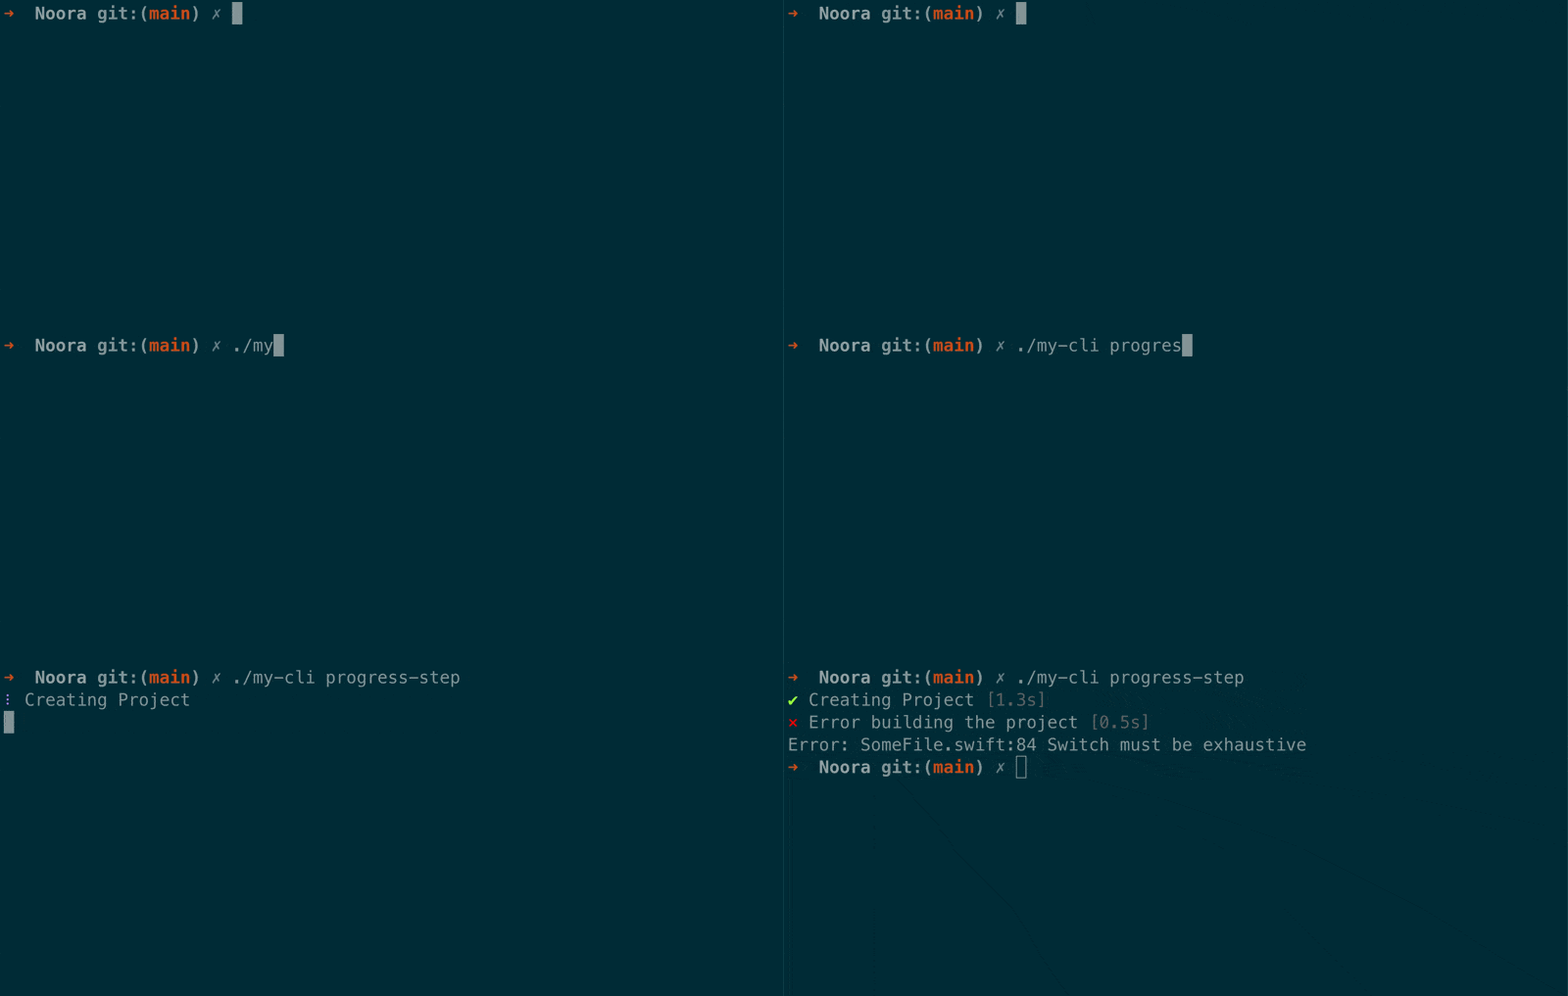
Besides a success message, you can also pass an error message, in case the operation fails. If the closure throws an error, the error message is automatically displayed:
try await noora.progressStep(
	message: "Building",
	errorMessage: "Error building the project"
) { _ in
	try await build()
}
This will display a progress indicator with a spinner, and a message indicating the current step, as you can see below:

Customizing the Theme
As you noticed from all of the images and GIFs above, Noora comes with a default theme. When initializing the Noora instance, by default this is the theme it will use.
You can create your own theme, by initializing the Theme struct with HEX colors, and passing it when initializing a Noora instance:
let swiftToolkit = Theme(
	primary: "EC7844",
	secondary: "5576A3",
	muted: "505050",
	accent: "FFFC67",
	danger: "FF2929",
	success: "3DFF7E"
)

let noora = Noora(theme: swiftToolkit)
// use the themed Noora instance
Now, instead of purple being the primary color, it will be the primary color you defined in the theme, in this case, orange:

Argument Parser
Although Noora is a package that doesn’t depend on the argument parser, you can find a way to make them both work together:
import Noora
import ArgumentParser

struct MyCommand: ParsableCommand {
	@Option(name: .customLong("cloud"))
    var _cloud: Cloud?

    var cloud: Cloud {
        _cloud ?? askCloud()
    }

    func run() throws {
        print("Using (cloud.rawValue)")
    }

    func askCloud() -> Cloud {
        Noora().singleChoicePrompt(
            title: "Cloud Provider",
            question: "To which cloud provider would you like to deploy?"
        )
    }
}
By making the Cloud type conform to ExpressibleByArgument, you can use it as an argument in your command. And by making it optional, you can ask the user instead of making it a required argument. Notice what happens when you run the command with or without the argument:

Explore Further
Customizing your tools with standardized colors and adding interactivity to them, makes them feel more polished, professional, and overall provides a better developer experience.
If you would like to understand how it works behind the scenes, check the Noora GitHub repository out.
Another project worth mentioning, which has been around for a while, is ConsoleKit, by Vapor, more especifically its ConsoleKitTerminal target, which contains many components.
In case you have any suggestions, comments or questions, reach us at X or Mastodon.
See you at the next post. Have a good one!
