Releasing Swift Binaries with GitHub Actions
In a previous post, we detailed some of the approaches one can use when building Swift binaries, for different operating systems and architectures. In this post, you will learn how to use GitHub Actions to automate building the executables for both macOS and Linux, and publishing them at a GitHub Release of a repository.
Note: Dave Verwer linked to the post mentioned above in iOSDevWeekly, and he added an interesting comment about Makefiles:
“Adding a Makefile is a great way to manage build commands and other common scripts you might run. Makefiles may not be the newest technology, but they work very well and can serve as a ‘menu’ to show other developers what they can do with your repository.”
They are definitely a great choice, worth checking out if you haven’t used it before. For the sake of simplicity and readability, we will choose different shell scripts, although a Makefile could be used here as well.
This post will contain two sections: first, on the scripts that will build and bundle the binary files. Then, the second section will focus on a GitHub Actions workflow that calls the scripts.
Building via Scripts
Having a folder with different scripts offers your team members (and your future self) a variety of operations that one can execute with a single command. In this case, there will be two operations.
One script will build a universal macOS binary, supporting both Intel (x86) and Apple Silicon (arm64). The second one will serve for building just for the current architecture, and will be used inside a Linux container, when building for Linux. After building, both will copy the resulting binary to a hardcoded destination.
Initial Sample Project
As a starting point, this article will use a sample project from a previous post: XcodeProjectAnalyzer.
To follow along, you can start by cloning the repository, and checking out the initial commit:
git clone https://github.com/SwiftToolkit/XcodeProjectAnalyzer
cd XcodeProjectAnalyzer
git reset --hard 4729fe421371aec966ed63c98b19914ee7cd070d
1st Script: Build for macOS
To start, create a directory named scripts, and inside it script named build-universal-macos.sh. You can run these commands to do so:
mkdir scripts
touch build-universal-macos.sh
Then, in your preferred text editor, add the following lines.
#!/bin/sh

#1
set -e

#2
swift build -c release --arch x86_64 --arch arm64
BUILD_PATH=$(swift build -c release --arch x86_64 --arch arm64 --show-bin-path)
echo -e "\n\nBuild at ${BUILD_PATH}"

#3
DESTINATION="builds/ProjectAnalyzer-macos"
if [ ! -d "builds" ]; then
    mkdir "builds"
fi

cp "$BUILD_PATH/ProjectAnalyzer" "$DESTINATION"
echo "Copied binary to $DESTINATION"
Bit by bit, this is what this script does:
- If any of the commands fails with an error, make the script exit early with an error, by using the
set -ecommand. - Build the single executable target, in the release configuration, for both
arm64andx86_64architectures. Following that, use the--show-bin-pathargument to store the path where the resulting binary will be at. - Define the destination path, where you’ll place the executable at. Create the builds folder if necessary, and use the
cpcommand to copy it.
Before running the script locally to test it, make sure to add executable permissions to it:
chmod +x scripts/build-universal-macos.shNow, you can run it to check it builds and stores the binary in the correct location. Because the first line contains the shebang in the first line (#!/bin/sh), you can ommit the sh prefix:
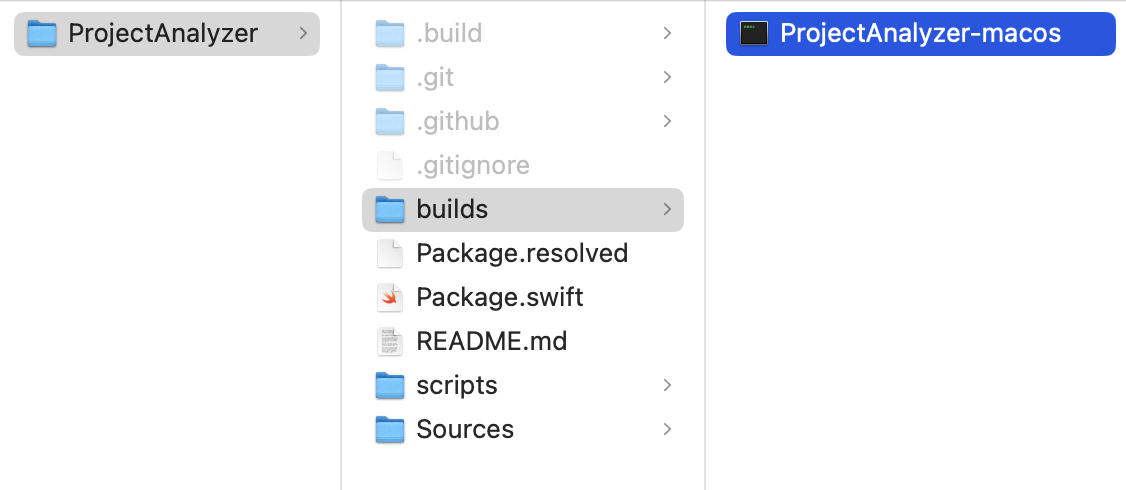
./scripts/build-universal-macos.shAfter SPM resolves dependencies and builds it, you should see the success message. Verify that the binary is indeed at the desired location:
2nd Script: Build for Linux
The second script will be almost identical to the previous one, with two changes:
- It will build for the current architecture (in this case,
x86_64) - It will place the executable at a different path.
Create another script file, and name it build-linux.sh:
touch scripts/build-linux.shPlace the contents below. Notice the differences between this, and the previous script:
#!/bin/sh

set -e

swift build -c release
BUILD_PATH=$(swift build -c release --show-bin-path)
echo -e "\n\nBuild at ${BUILD_PATH}"

DESTINATION="builds/ProjectAnalyzer-linux"
if [ ! -d "builds" ]; then
    mkdir "builds"
fi

cp "$BUILD_PATH/ProjectAnalyzer" "$DESTINATION"
echo "Copied binary to $DESTINATION"
Don’t forget to add executable permissions also to this file:
chmod +x scripts/build-linux.shWriting the GitHub Actions Worfklow
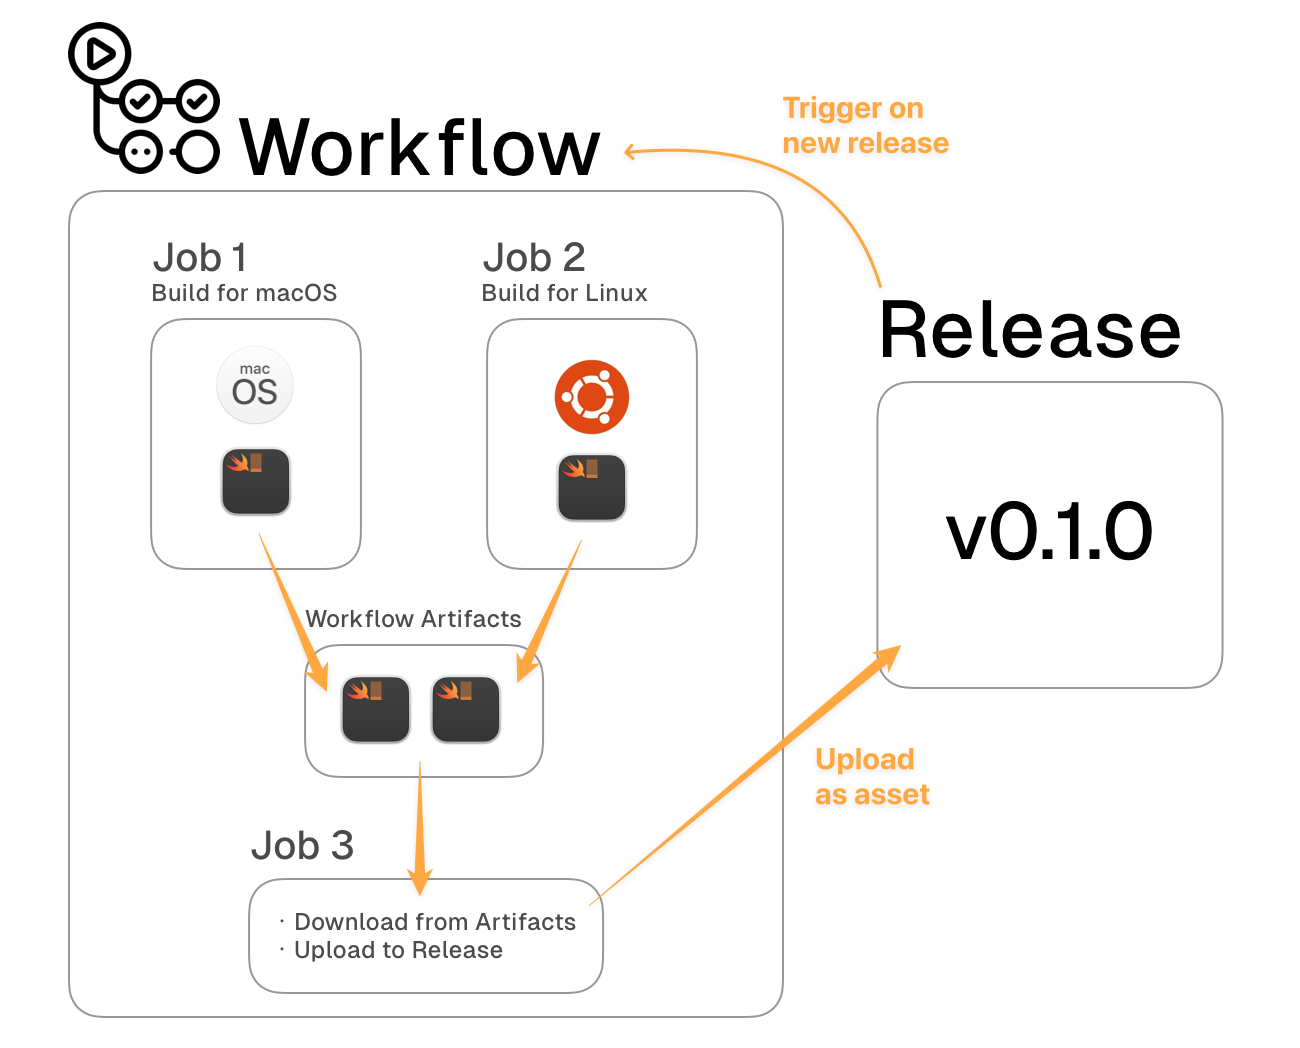
The goal of the second section of this article is to write a GitHub workflow that will have the following characteristics:
- Be triggered when creating a new release in your repository
- Execute both scripts from the previous section, in a macOS and Linux machine.
- Upload both builds to the respective release page.
Representing this in a diagram, for an easier visualization:
Start by creating a workflow file, in the .github/workflows folder:
mkdir -p .github/workflows
touch .github/workflows/build-and-release.yml
Before diving into the jobs of the workflow, declare the trigger (new release published), and the workflow name:
on:
  release:
    types: [published]

name: Build Release Artifacts
1st Job: Build for macOS
Now is the time to actually call the scripts from the previous section. Start by declaring a job that builds the macOS binary, below the last line, the name declaration:
jobs:
  #1
  build-macos:
    name: Build macOS Executable
    #2
    runs-on: macos-latest
    steps:
      #3
      - name: Checkout
        uses: actions/checkout@v3
      - name: Build macOS binary
        run: scripts/build-universal-macos.sh
      #4
      - name: 'Upload macOS Build Artifact'
        uses: actions/upload-artifact@v4
        with:
          name: ProjectAnalyzer-macos
          path: builds/ProjectAnalyzer-macos
To help understand this part of the yaml file, check what each portion does:
- Define the job identifier, and add a humana readable name
- To run it in a macOS machine, set the
runs-onvalue tomacOS-latest - Use the
checkoutaction to clone the repository on that machine, and run thebuild-universal-macos.shscript - Finally, use the
upload-artifactaction to store the resulting binary in the workflow. This is not the part where we upload the binary to the release yet.
One job down, two to go!
2nd Job: Build for Linux
In the same way that both scripts are similar, also the jobs that execute them are similar, except for the runner machine, the script path, and the binary path.
Append the following lines to the workflow file. Pay attention to the indenting, so the yaml file is still valid.
  build-linux:
    name: Build Linux Executable
    runs-on: ubuntu-latest
    steps:
      - name: Checkout
        uses: actions/checkout@v3
      - name: Build it
        run: scripts/build-linux.sh
      - name: 'Upload Linux Build Artifact'
        uses: actions/upload-artifact@v4
        with:
          name: ProjectAnalyzer-linux
          path: builds/ProjectAnalyzer-linux
You’re almost there, now to the last piece of the workflow!
3rd Job: Upload Artifacts to the Release
The final job of the workflow has all it needs: both binaries are built. Because they’re different jobs, running in different machines, it needs to (1) wait for the previous jobs to finish, and (2) download the executables uploaded as workflow artifacts, so it can now upload to the release.
Append the final job to the workflow file:
  #1
  upload:
    name: Upload release artifacts
    runs-on: ubuntu-latest
    #2
    needs: [build-macos, build-linux]
    #3
    steps:
      - uses: actions/download-artifact@v4
        with:
          path: .
      #4
      - name: List downloaded files
        run: ls -R
      #5
      - name: Upload to Release
        uses: softprops/action-gh-release@v2
        with:
          token: ${{ secrets.GITHUB_TOKEN }}
          tag_name: ${{ github.event.release.name }}
          files: ./*/*
          fail_on_unmatched_files: true
This job is a bit longer and has some more details that require attention, but nothing too scary:
- Declare the job identifier, name, and runner
- Because this job needs to use the binaries from the previous jobs, add a dependency on them. This will make this job only start when both have finished.
- Declare the job’s steps. The first is the
download-artifactaction, which will download both files, and save them at the root directory (represented by the.path). - To make it easier to understand where each file was saved, list them. This is important for the next step.
- Finally, use an action to upload the binaries to an existing release. The
withkey contains a dictionary with all the parameters this step needs: (1) the GitHub token to authenticate when uploading the files, (2) the tag of the release (taken from the workflow trigger), (3) the glob patterns where the files are, and (4) a flag to fail the step if it doesn’t find the files. This is very handy when debugging, and knowing where the files are is extremely important to pass the correct path.
Adding Permissions to the Workflow
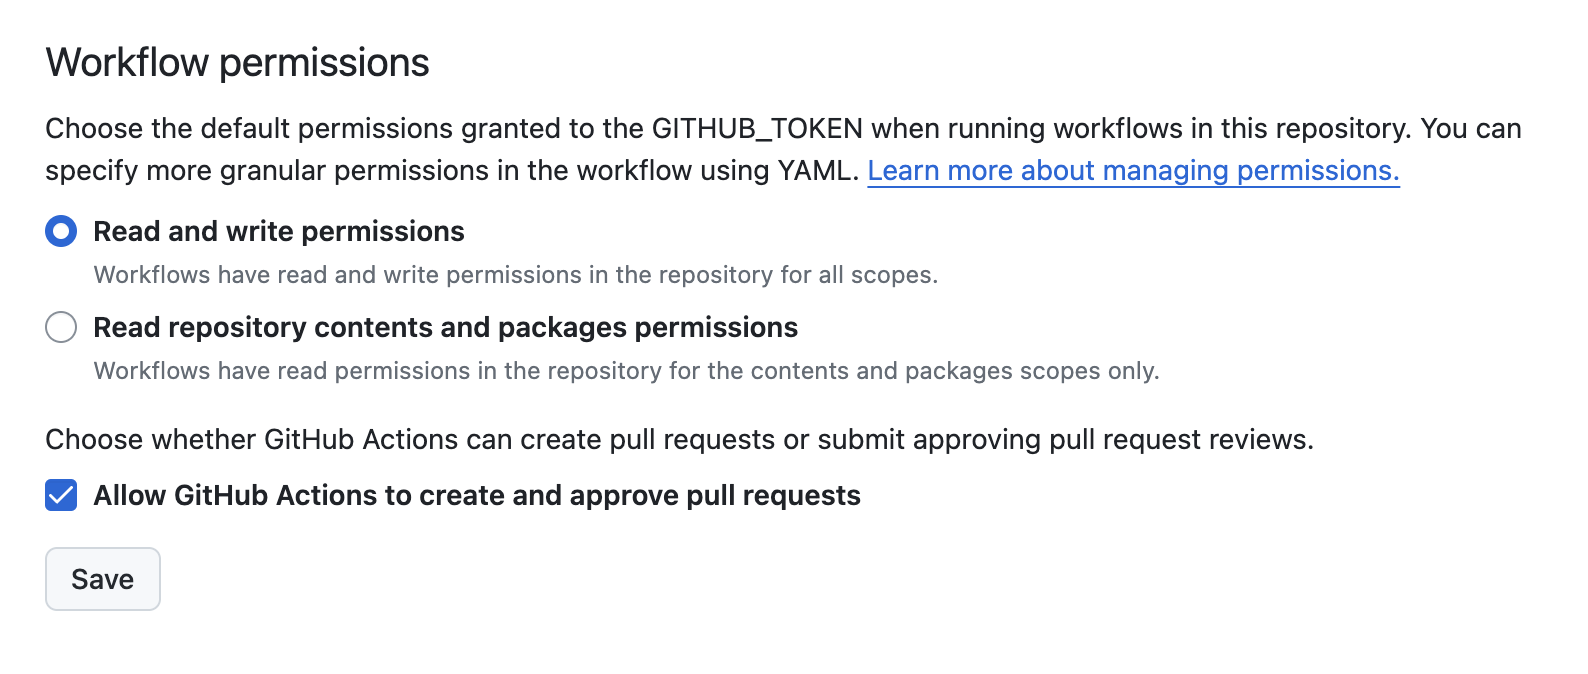
Before publishing a release and running the workflow, there is an important detail. In order to change a release, by uploading a file, the workflow needs to have write access.
To enable it, go to the repository settings, and under Actions, look for Workflow Permissions. Then, select Read and Write Permissions, and save it.
Publishing a Release
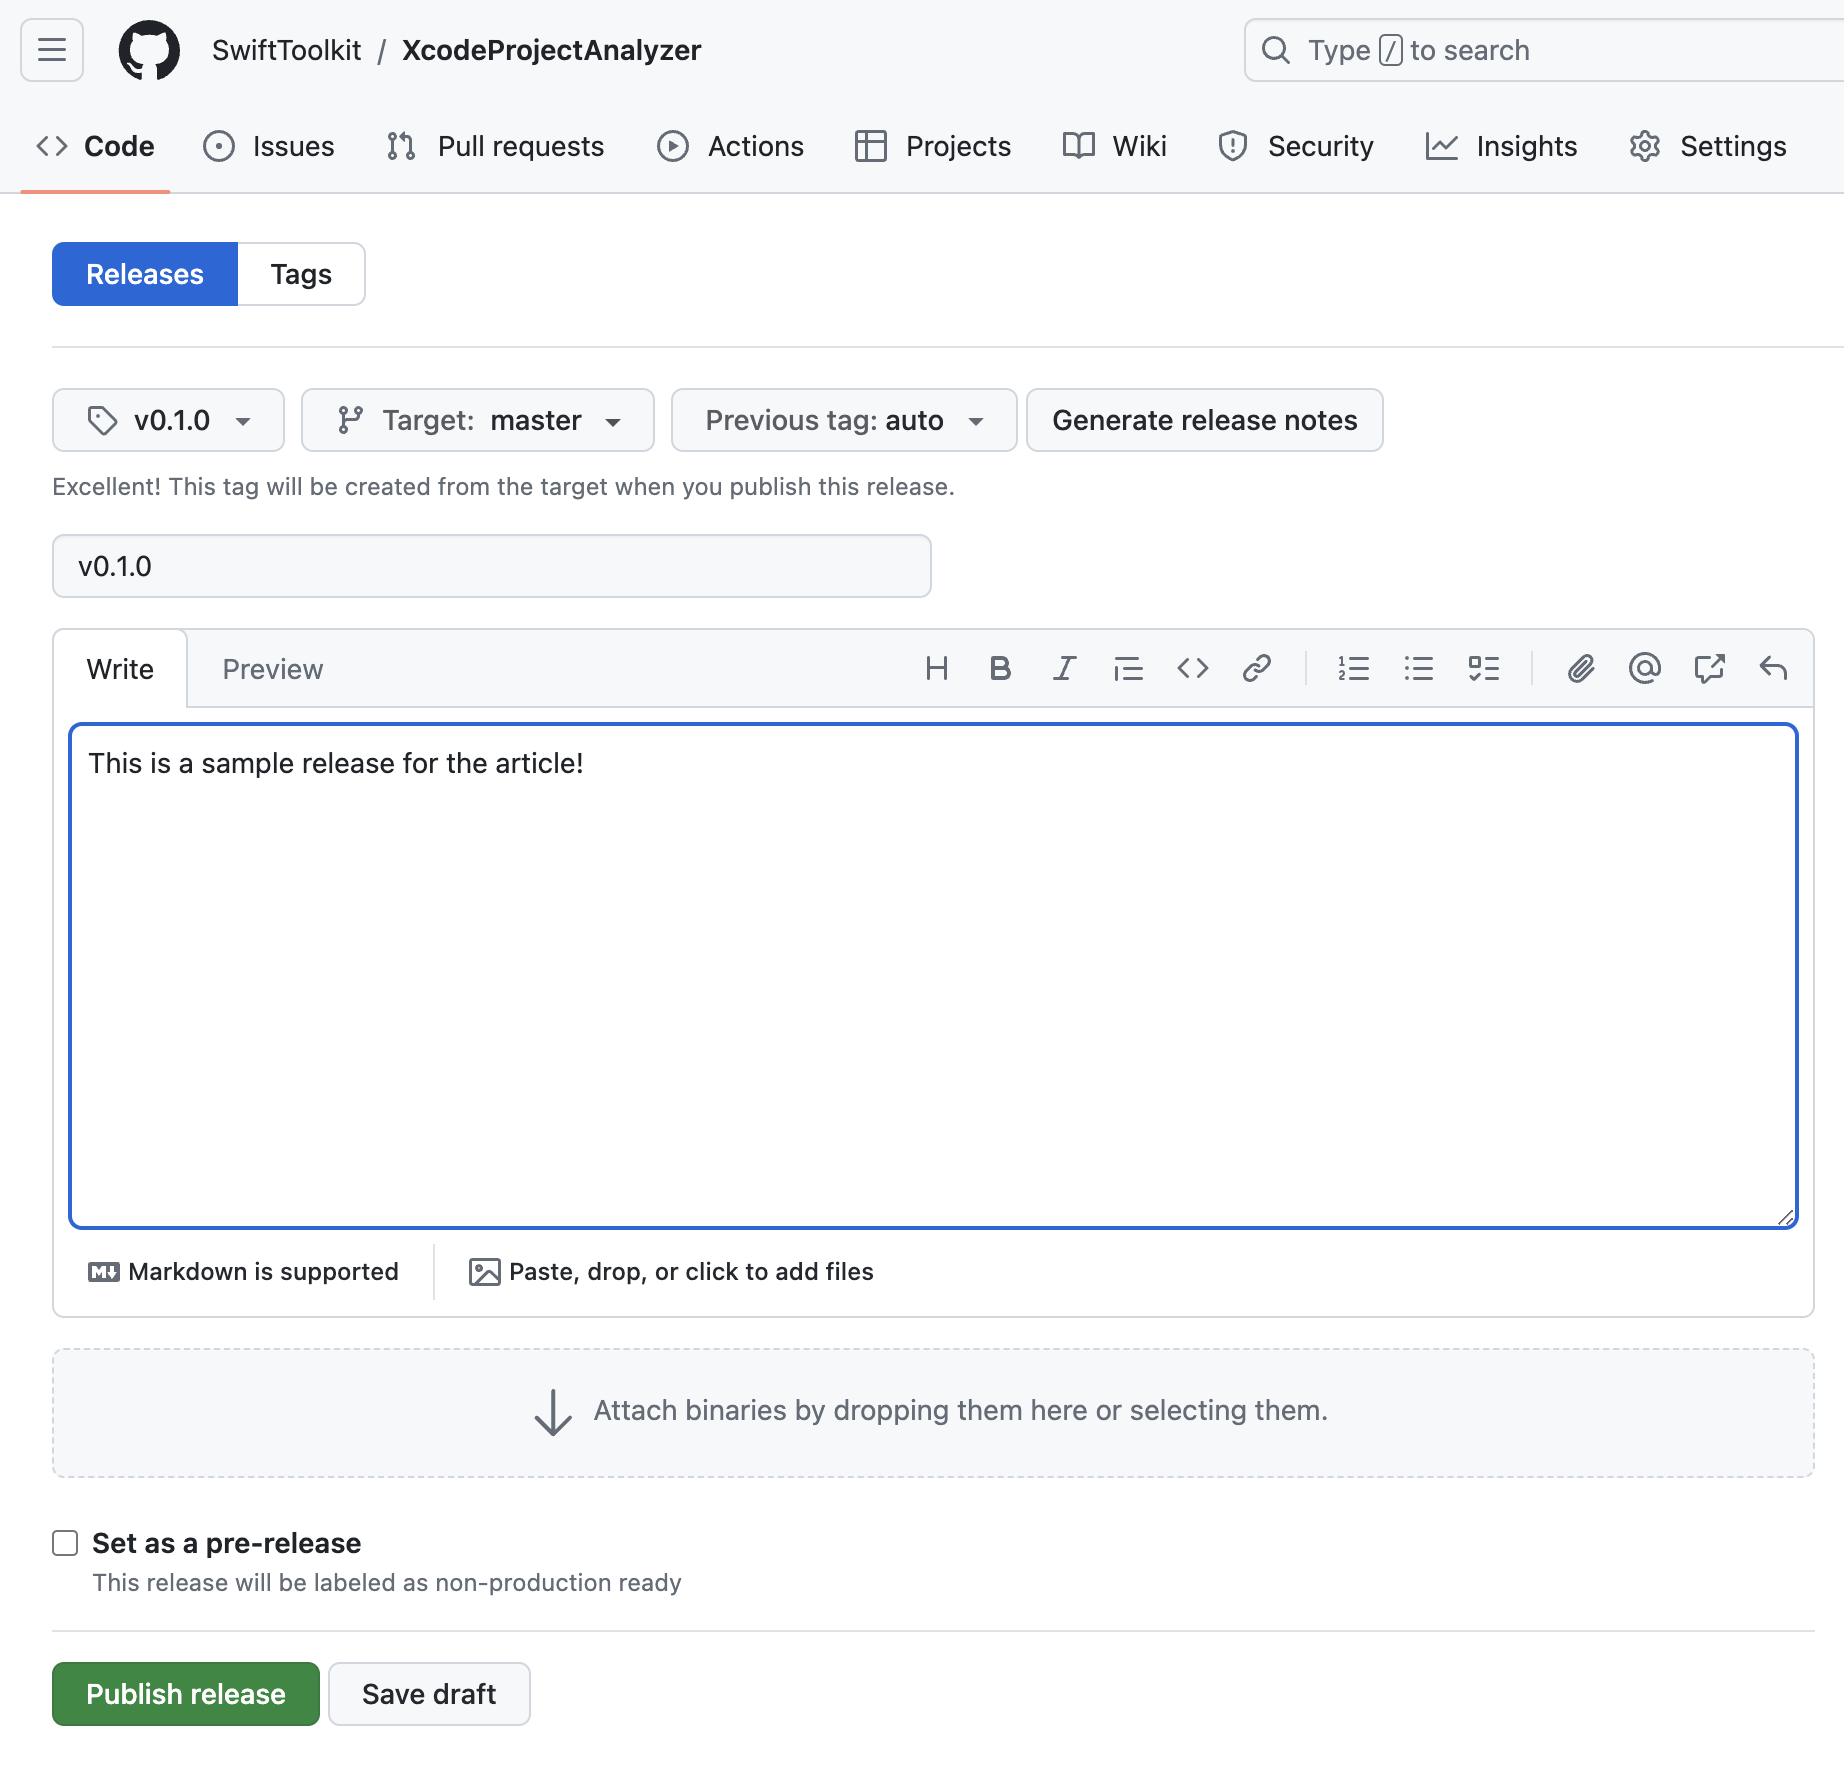
After you commit the scripts and the workflow file, and push the changes, you can create a new release. On the GitHub repository, click on releases in the right side of the repository, and then Create a new release.
There, create a new tag, add a title and a description to the release:
Now, if you head over to the Actions tab, you’ll se the new release triggered the workflow:

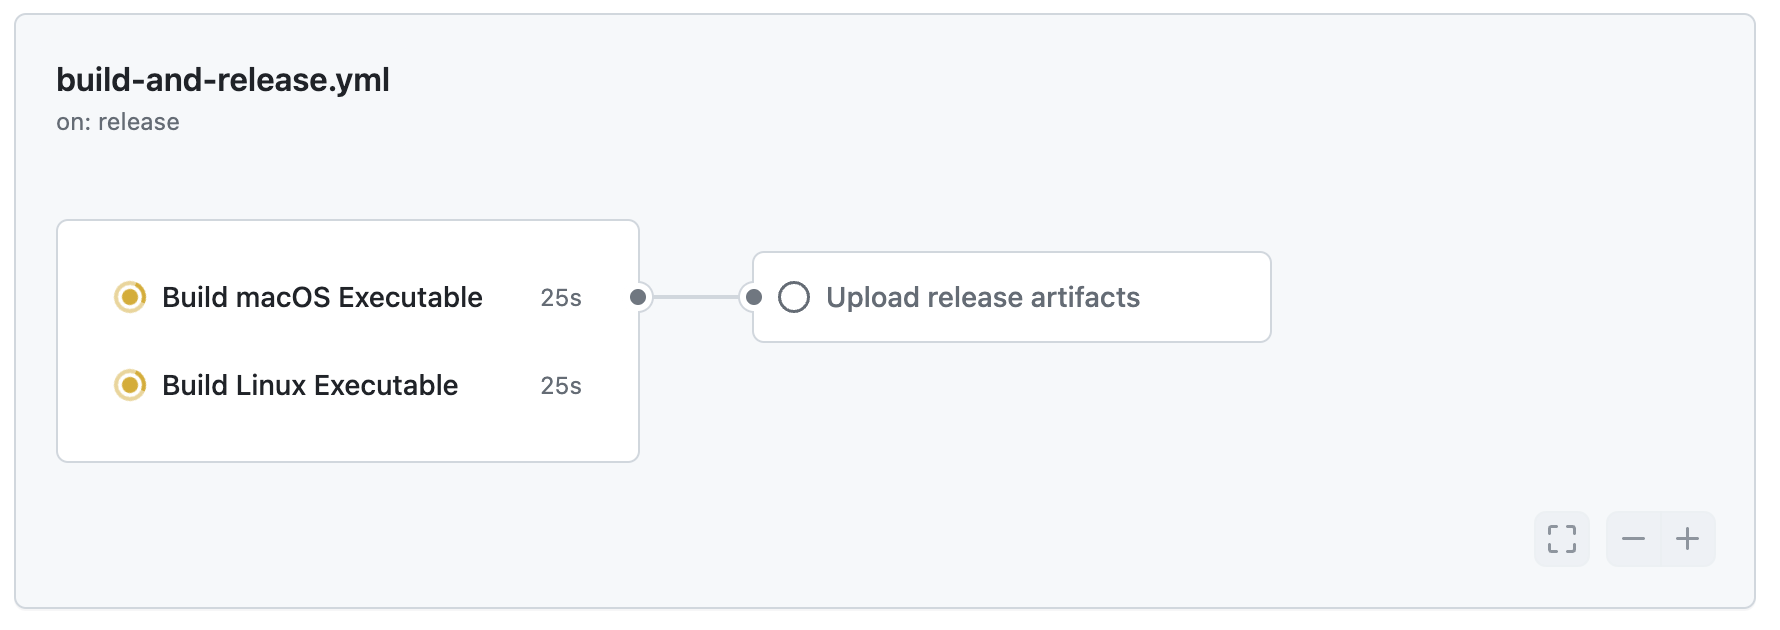
After a few seconds, you’ll see that both building jobs are already at work, while the upload job is waiting for them, just as we wanted:
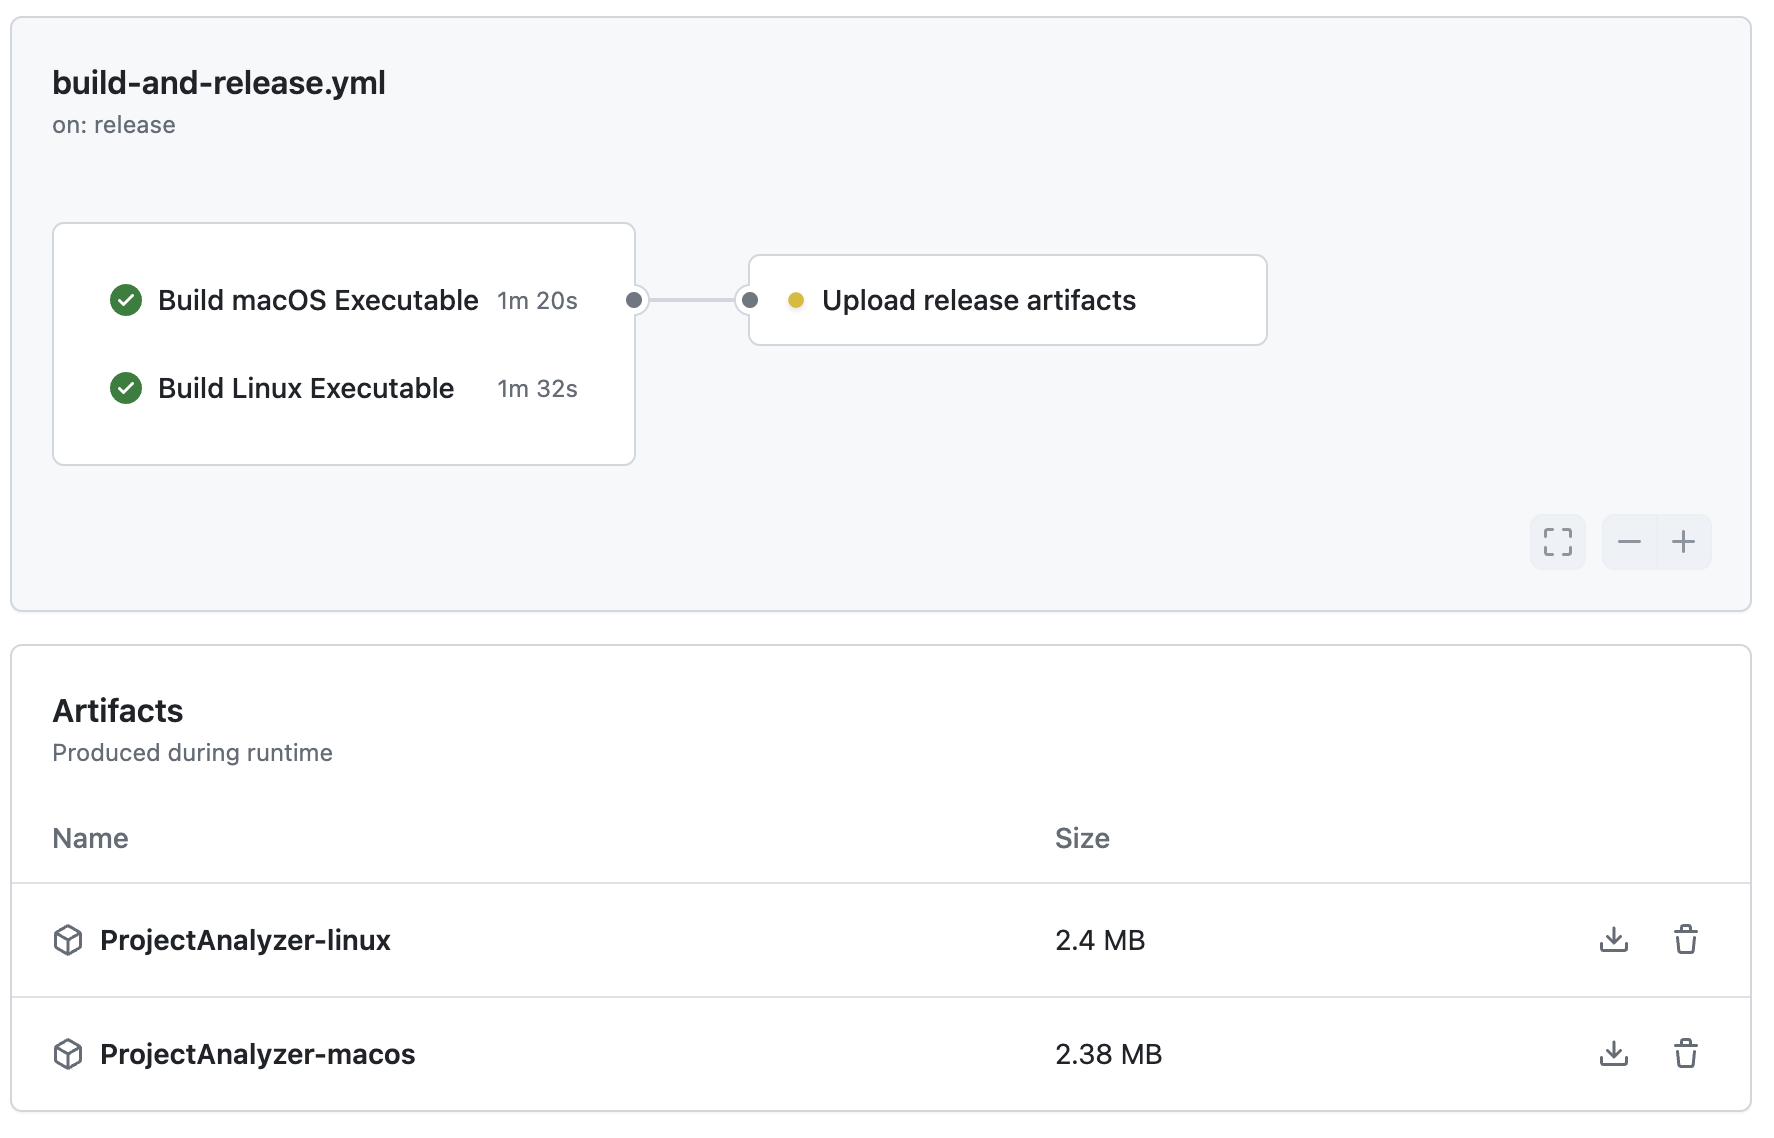
After the building jobs finished, and before the upload job even started, the artifacts are available in the workflow, but not yet in the release.
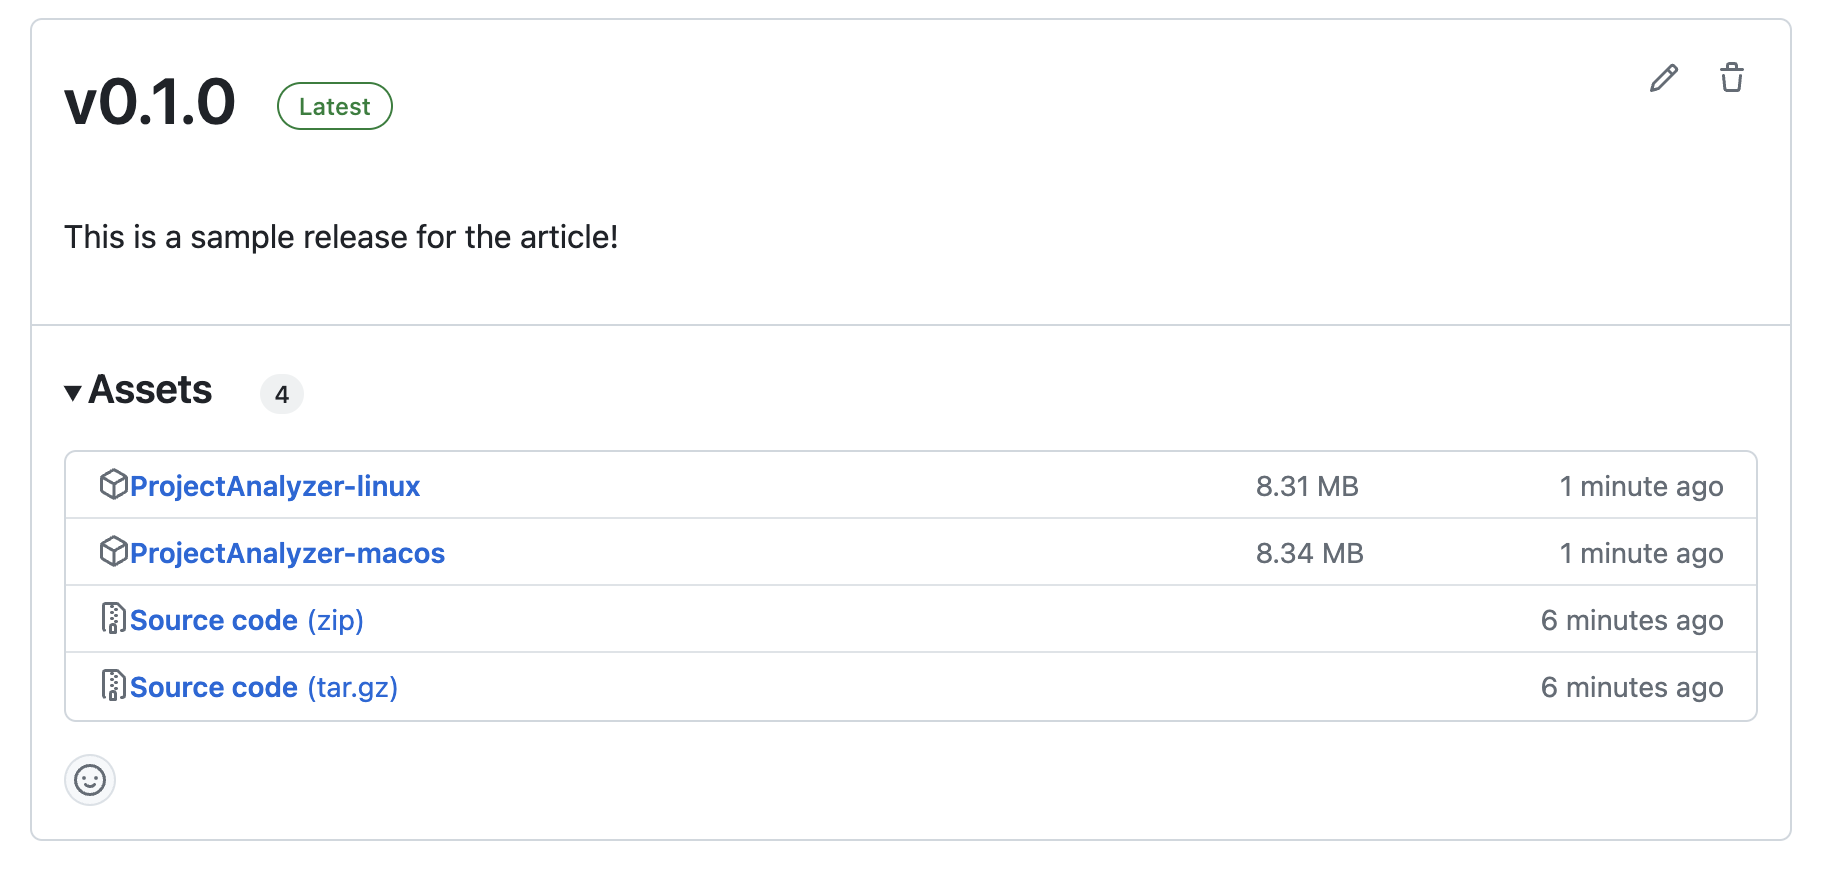
Deserving a huge finally, both our binaries are present as assets in the release!
Explore Further
Phew! This tutorial took many steps, so if you’re still here, thank you and congrats for following along. Leave us your comments or questions at X or Mastodon.
You can find all the code from this article in the sample project repository.
This tutorial used used simplified scripts and steps in the workflow. The scripts used hardcoded paths and the workflow relied on these assumptions, so here’s how you could improve them:
- Pass parameters to scripts, instead of relying on hardcoding the path
- Use a single script for building on both platforms, and use parameters as conditions for the target architectures
- Add additional files to the release
- Use the release tag (
github.event.release.name) or other properties of the trigger in the workflow.

