Techniques for Engaging CLIs with the Terminal Utilities Package
Over the upcoming Let’s Build posts, we’ll be building fun CLI applications. They will have to read information from the terminal - such as the window size - and also be able to simulate animations on the terminal, requiring interesting techniques!
To help both scoping the contents of these posts, but most importantly to make the code reusable, I created a tiny package: Terminal Utilities. In this post, you’ll learn how it works behind the scenes, and how to use it to build engaging CLI components and applications.
How to Read Terminal Information
Most terminal information is accessed via C APIs. On macOS, they’re defined in the Darwin module, while on Linux they’re part of Glibc. As the functions signatures are the same, the only conditional code is the module name:
#if canImport(Darwin)
import Darwin
#else
import Glibc
#endif
An alternative conditional check could be based on the platform name instead:
#if os(Linux)
import Glibc
#else
import Darwin
#endif
With the correct import, we can now start accessing the terminal information.
Obtaining Window Size
One useful piece of information is the window size. While in AppKit, UIKit and SwiftUI, view sizes are expressed in screen points, in the terminal they mean the available number of characters per line, and lines in a given window.
The Darwin module declares the winsize struct, which contains two properties: ws_col and ws_row, representing the width (columns) and the height (rows), in characters and lines. The code below shows how to obtain the window size:
// 1
public enum Terminal {
    public static func size() -> Size {
        // 2
        var size = winsize()

        // 3
        let windowSizeResult = ioctl(STDOUT_FILENO, UInt(TIOCGWINSZ), &size)

        // 4
        guard windowSizeResult == 0,
              size.ws_col > 0,
              size.ws_row > 0 else {
            return .zero
        }

        // 5
        return Size(columns: size.ws_col, rows: size.ws_row)
    }
}
There are a lot of abbreviations in acronyms in the code above, making it hard to understand at first. Let’s break it down:
- The central type of this package is the empty
Terminalenum, exposing static functions (or properties). This one returns aSizestruct, which contains the width and the height of the terminal. - Initialize an empty
winsizestruct. ioctlstands for “Input/Output Control”, and is a function to manipulate the underlying device parameters - in this case, the terminal. The first parameter describes the standard output file descriptor; the second,TIOCGWINSZis a constant that represents the command to get the window size; finally, the third parameter is the pointer to thewinsizestruct already initialized.- This
ioctlfunction returns 0 if successful, and fills the struct with the window size. In the guard statements, check that the result is successful, and that the window size is valid. - Return the window size.
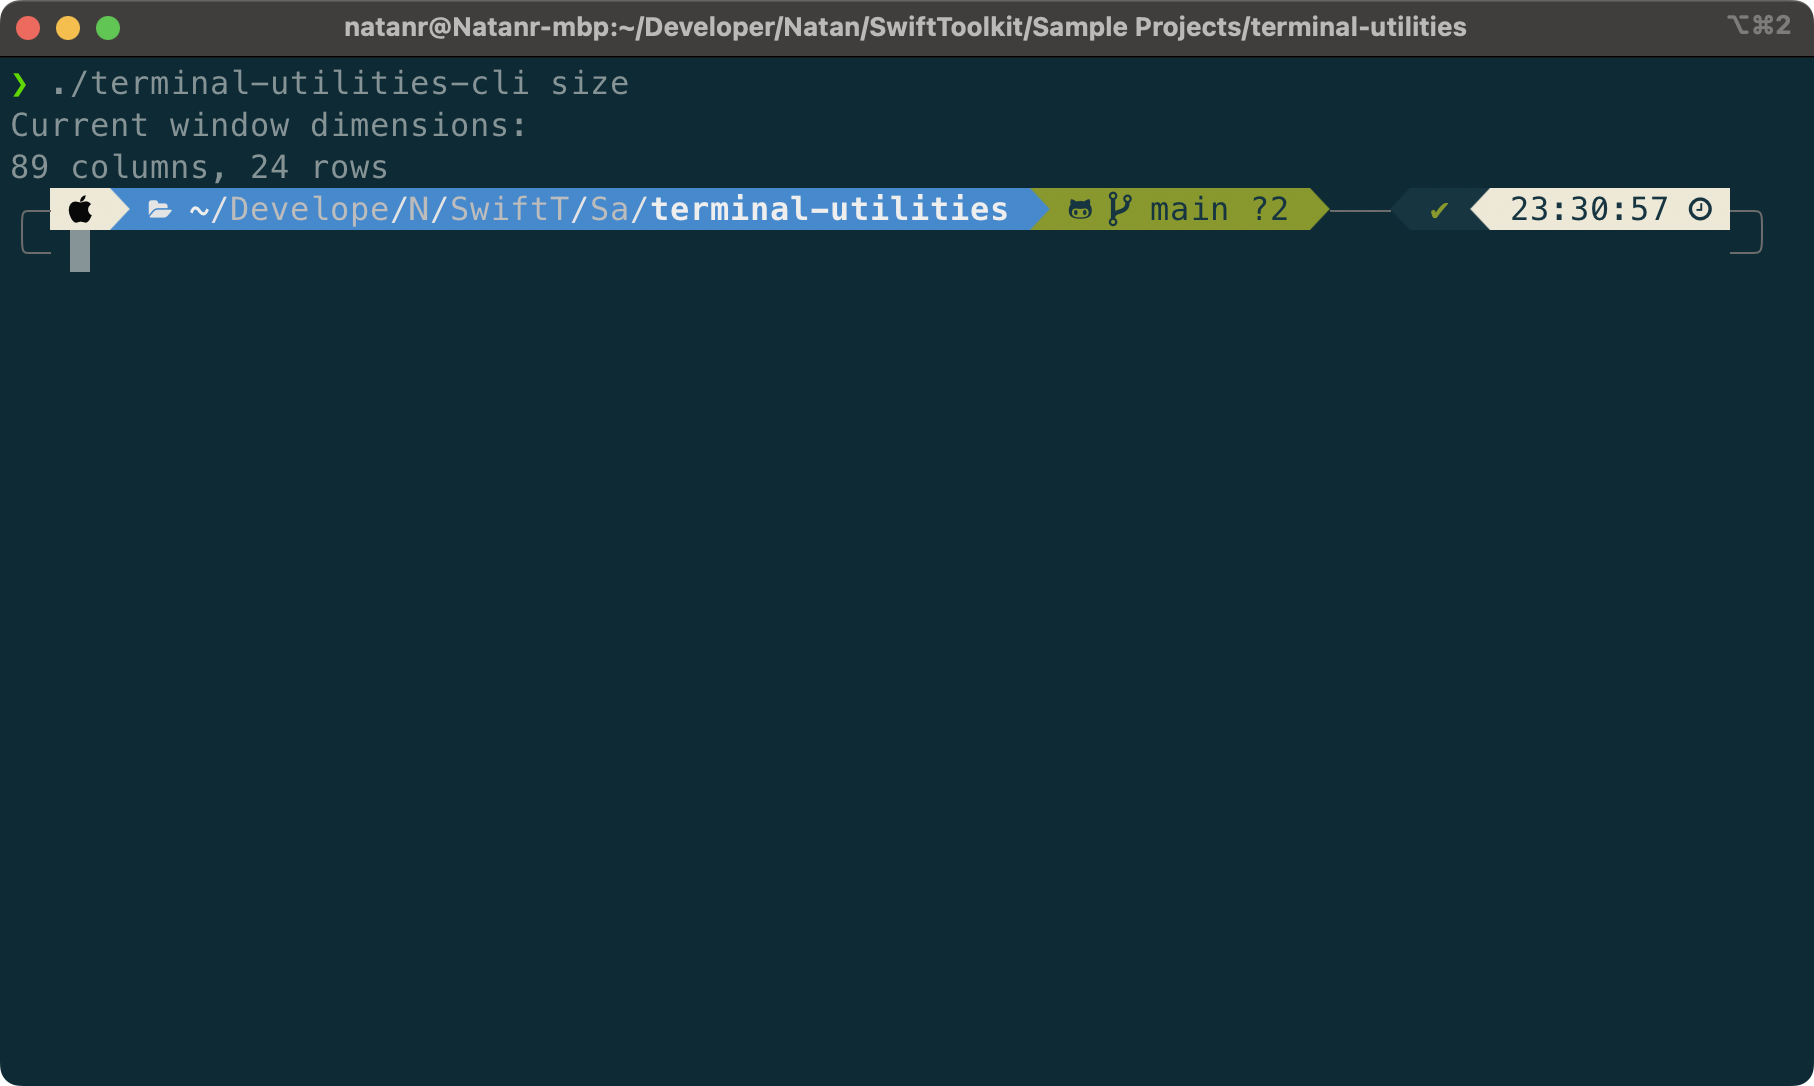
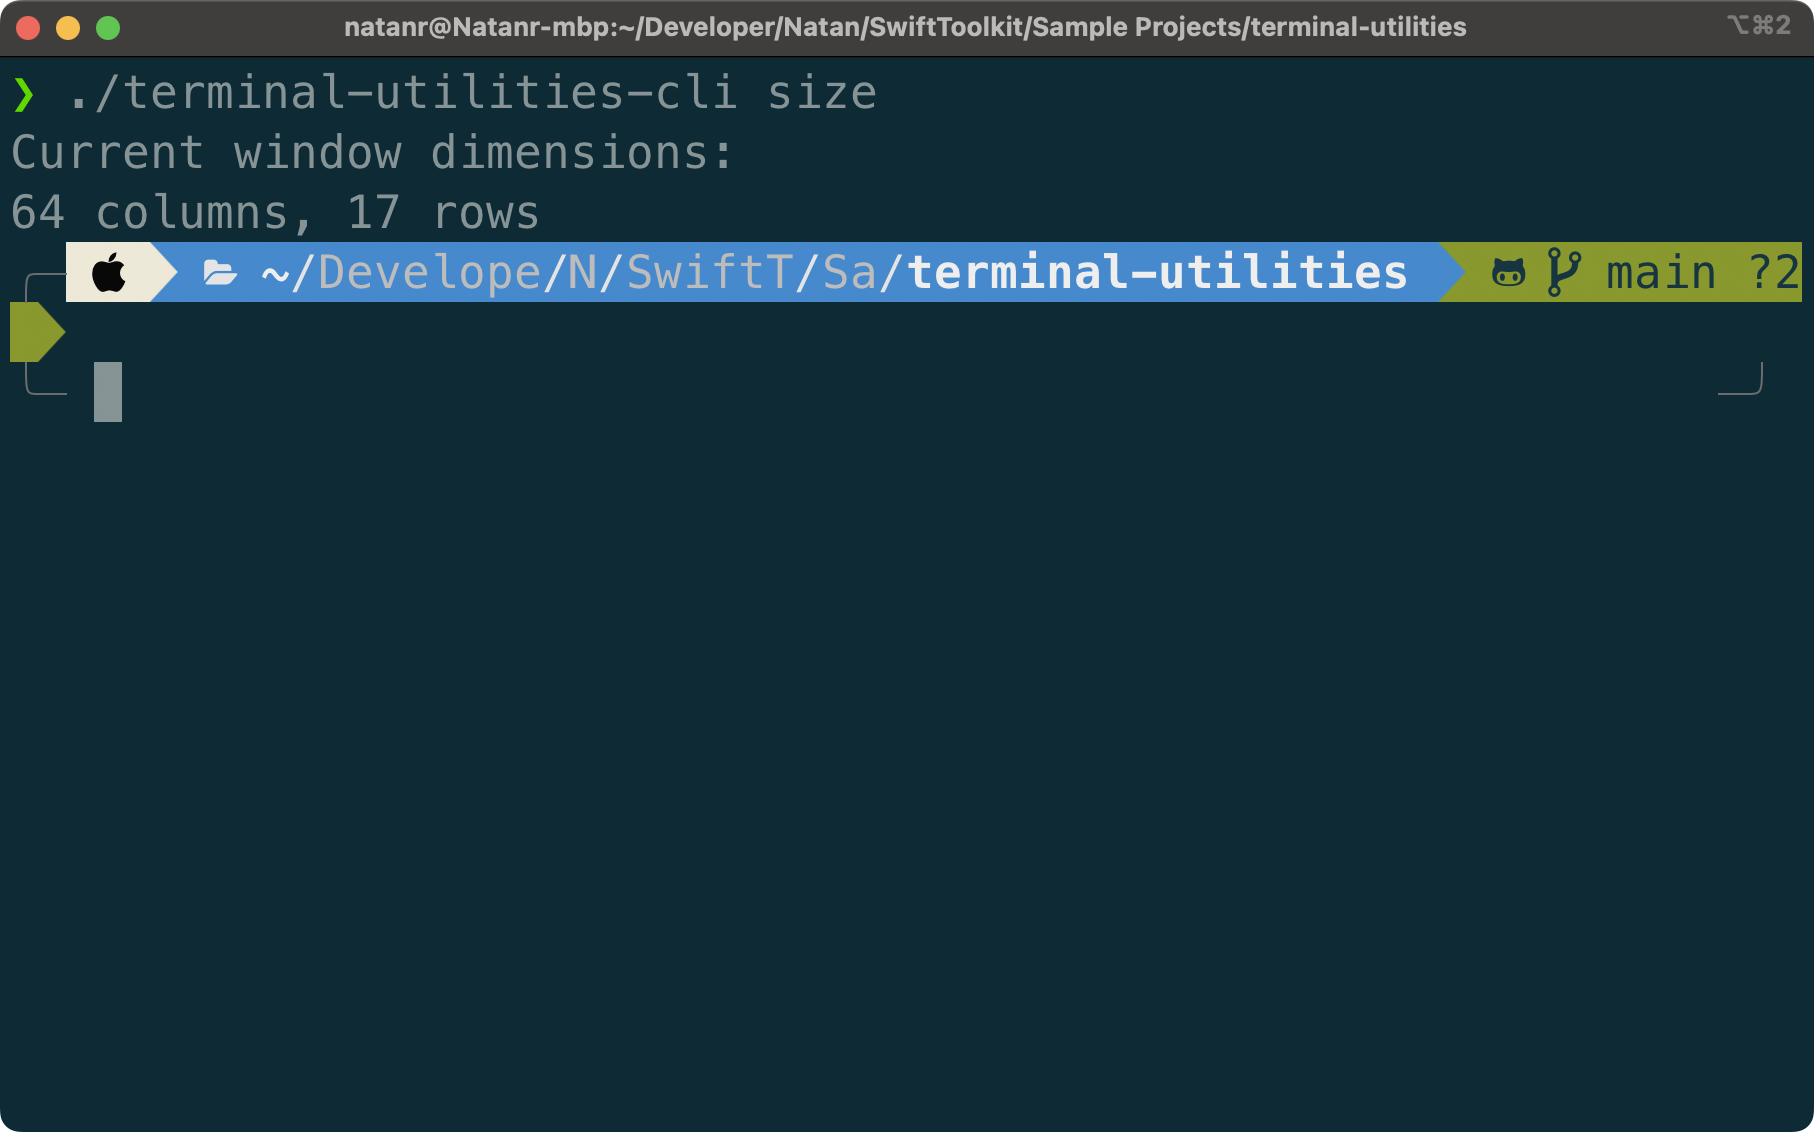
The terminal utilities package contains an executable target, which can be used to test the functionality. To check the window size, we can run the terminal-utilities-cli size command. Notice how the returned size, printed to the console, matches the size of the terminal window, and how increasing the font size affects the number of columns and rows:


Deleting Printed Characters
Command line applications can make use of a very useful capability: delete previously printed characters and lines. This can be used, for example to perform animations. Consider the following loader:

In case you wondered how it works, this is achieved by printing a character, and after a given delay, deleting it, and printing the next “frame” of the animation. In this case, these are the characters that can be used as frames: ⠋ ⠙ ⠹ ⠸ ⠼ ⠴ ⠦ ⠧ ⠇ ⠏.
Deleting characters is done in a similar way to styles and colors (check this post for more details), by submitting “commands” as ANSI escape codes. Notice how the terminator here is an empty string, to avoid printing a newline character (the default parameter of the print function).
func eraseChars(_ length: Int) {
    guard length > 0 else { return }

    // Move cursor left by the number of characters we previously drew
    print("\u{001B}[(length)D", terminator: "")
}
Another option is to clear the entire screen:
static func eraseScreen() {
    print("\u{001B}[2J", terminator: "")
}
There are more commands to clear parts of the screen, such as clearing the current line. We’ll leave them out, as the goal of this package is not to be an exhaustive reference of all the available ANSI escape codes.
Hiding the Cursor
Another interesting possibility is to hide the cursor. To indicate that no input is expected during a given time, your app can hide the cursor, and show it once the user can type again.
This is also done by submitting ANSI escape codes (again with an empty string as terminator):
func showCursor(_ show: Bool) {
    if show {
        print("\u{001B}[?25h", terminator: "")
    } else {
        print("\u{001B}[?25l", terminator: "")
    }
}
Performing Animations
With these two capabilities, deleting characters and hiding the cursor, you can perform animations as explained above. The Terminal Utilities package comes with a sample CLI executable target, terminal-utilities-cli, that can demonstrate both how to use the available functions, and to see the final result in action.
If you cloned the repository, you can run the following command:
swift run terminal-utilities-cli animateWhich will result in the following animation:


And here’s how to implement it:
Start by importing the package. Hide the cursor, and use defer to show it again when exiting the function.
import TerminalUtilities

func animateGoal() async throws {
    Terminal.showCursor(false)
    defer { Terminal.showCursor(true) }

    // animation code below...
}
Then, go ahead with the animation:
// 1
var index = 0

while index <= 40 {
    // 2
    let toPrint = String(repeating: "_", count: index) + "⚽"
    let spaces = String(repeating: "_", count: 40 - index) + "🥅"
    print(toPrint + spaces, terminator: "")

    // 3
    fflush(stdout)

    // 4
    try await Task.sleep(for: .seconds(0.04))
    if index == 40 { break }

    // 5
    Terminal.eraseChars(toPrint.count + spaces.count + 2)
    index += 1
}
Breaking down the code to make it easier to understand:
- Define a variable to keep track of the current frame, and use a
whileloop in combination with atry awaitto wait for a short time, for 40 iterations (for the 40 frames of the animation). - Print the underscores, the ball emoji, the rest of the underscores, and the goal emoji.
- Use the
fflushfunction to ensure the contents are printed, even when execution is suspended due to theawaitstatement in the next line. - Use
Task.sleepto wait for 40 milliseconds, and if we reached the last frame, break the loop. - Here comes a central piece of the animation: clear the characters that were printed, and bump the index.
And with that, you now can animate your own CLI applications as well!
Bonus Additions from Reader Feedback
After publishing this post, Vasiliy Kattouf suggested on Mastodon a few improvements to the package, and went ahead implementing them. We’ll describe them and their implementations below.
Observing the Terminal Size
Although this article showed how to obtain the terminal size, it didn’t even mention that it’s possible to subscribe to changes in the terminal size. This can be done in just a few lines of code.
// 1
let signalHandler = DispatchSource.makeSignalSource(signal: SIGWINCH)

// 2
signalHandler.setEventHandler {
    let newSize = Terminal.size()
    // handle changes to the new size
}

// 3
signalHandler.resume()
Another piece of code with weird acronyms, but no worries, we can read it step by step:
- Create a signal handler for the
SIGWINCHsignal: SIGnal WINdow CHange - Set a handler for this signal - this is where you’ll handle changes to the terminal size
- Activate the handler by calling
resume
The package wraps this behavior internally using a SizeObserver class, exposing the observation in an easy to use API:
Terminal.onSizeChange { size in
    print("Terminal size changed to (size)")
}
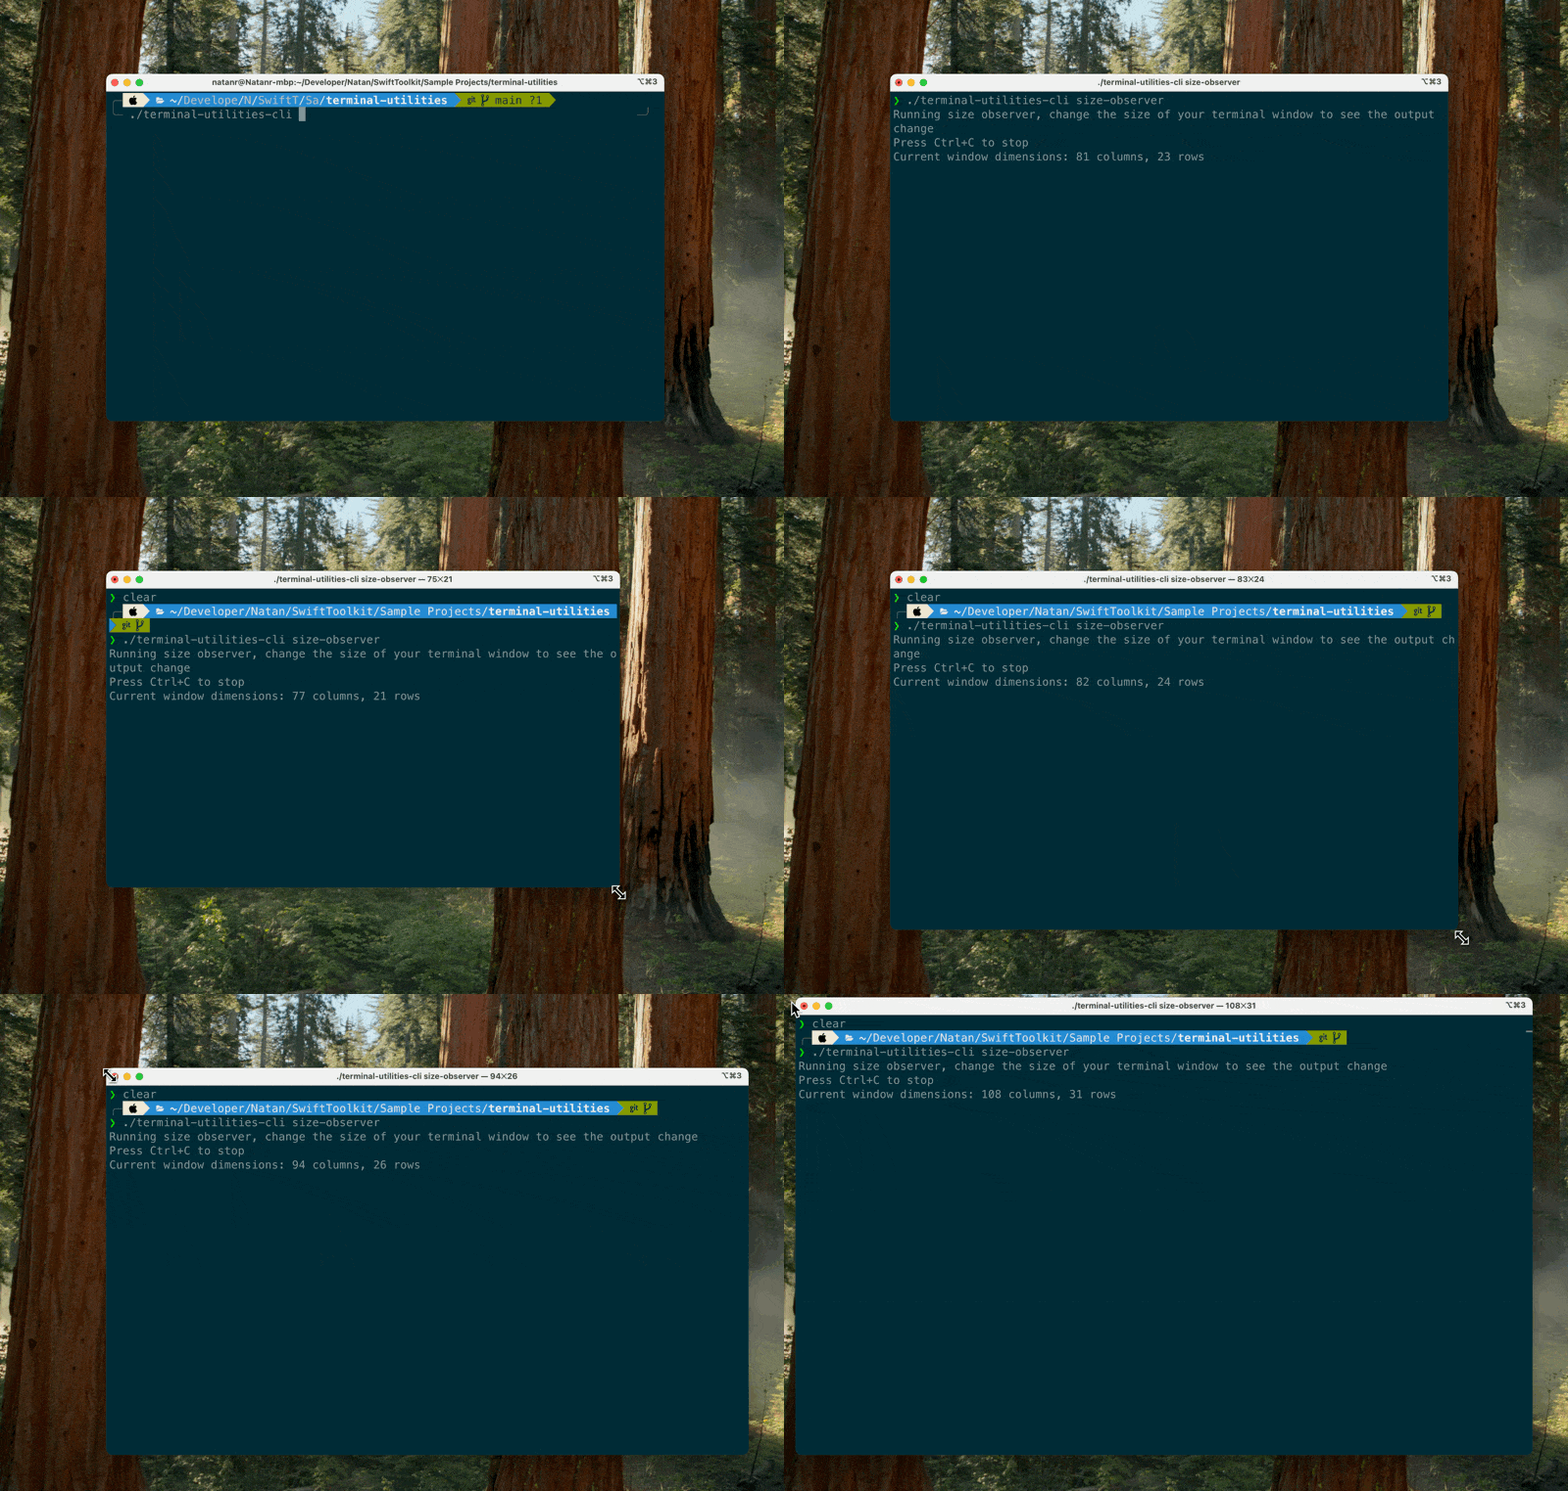
And here’s how it looks like in the sample CLI, with the size-observer command:

Observing Interruption Signals
Vasiliy noted an interesting possible flaw when hiding and then showing the cursor in the code below:
Terminal.showCursor(false)
defer { Terminal.showCursor(true) }
If the user presses Ctrl + C while the cursor is hidden, the application will exit before running the defer block, without showing the cursor again.
To fix this, a similar handler can be used to notify the application when a SIGINT signal is received, which happens when the user pressed Ctrl + C.
let signalHandler = DispatchSource.makeSignalSource(signal: SIGINT)
signal(SIGINT, SIG_IGN)

signalHandler.setEventHandler {
    print("Application interrupted")
}
signalHandler.resume()
This code is almost identical to the one used to observe the terminal size, but with two changes: First, the signal used is different. Second, and also more importantly, with the signal(SIGINT, SIG_IGN) call, we ask the system to ignore the signal, to allow responding to it before the application exits gracefully.
And with that, when hiding the cursor, you should subscribe to the termination event, and show the cursor again before exiting:
Terminal.showCursor(false)
defer { Terminal.showCursor(true) }

Terminal.onInterruptionExit {
    Terminal.showCursor(true)
}
This way, if the user presses Ctrl + C while the cursor is hidden, the application will show the cursor again before exiting.
Explore Further
For a recap of how ANSI escape codes work, check the Understanding Colors and Styles in Terminal Output post.
Other Swift packages that wrap ANSI escape codes are:
- ConsoleKit by Vapor
- Noora by Tuist
- ANSIEscapeCode by Jason Nam
Thanks to Vasiliy for the suggestions and the Pull Request implementing them and improving the package!
You can check the Digital Rain post, the first one using the Terminal Utilities package, for a more complex example.
See you at the next post. Have a good one!
