Let's Build: The tree Program - Part I
Today SwiftToolkit is starting a new series: Let’s Build. This is heavily inspired by a series of posts, written by one of the brightest authors in the Cocoa community: Mike Ash. In these posts, Mike guides the reader on how to build many components of the Objective-C world, such as NSObject, NSNotificationCenter, NSAutoReleasePool, and also from Swift, such as Array. Even though his last post was in 2015, there is so much to learn from them and I strongly recommend you to check them out!
Here, the focus will be slightly different: an existing tool will take the spotlight, and the aim will be to replicate it in Swift!
To start this series, the first one to cover is tree: a command-line utility that recursively lists the files in a directory, in a graphical tree format.
The Program: tree
Available in most Linux distributions, the tree command can also be installed on macOS with Homebrew: brew install tree.
This executable receives a single argument: the path to the directory to be listed. If no argument is provided, it will list the files in the current working directory. The goal of this post is to replicate the basic functionality of the program. It has many options and flags, which will be covered in the next post.
To serve as the example directory, a Vapor server will be used, as it contains a reasonable amount of files and folders that can fit well in screenshots. When running the program, this is what it outputs:
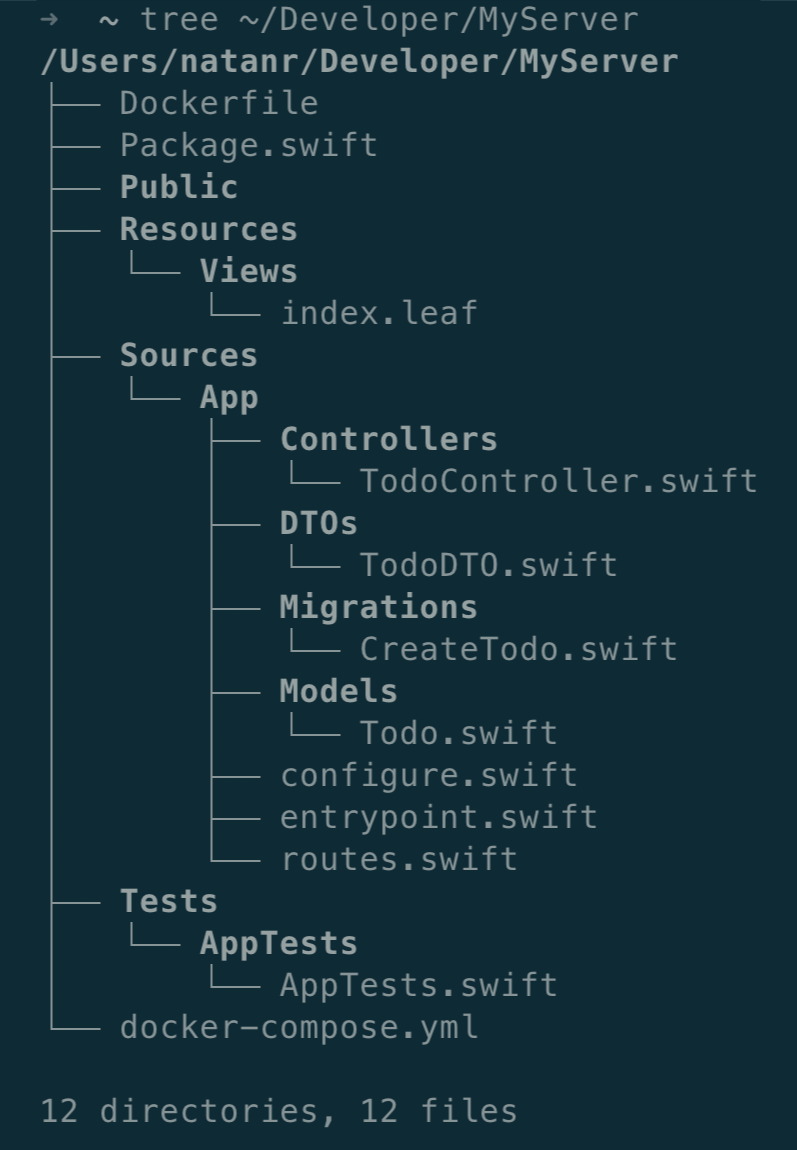

Now, let’s build it!
Creating the CLI
To start, you can use SPM to initialize a new tool, which will include the Swift Argument Parser. In an empty folder, run:
swift package init --name tree-swift --type toolAfter SPM is done, open the directory in your favorite editor, and go to the Package.swift file.
To help navigating the file system and dealing with file paths, the PathKit package will be very helpful. Add it to the dependencies array:
dependencies: [
    // existing dependencies
    .package(url: "https://github.com/kylef/PathKit", from: "1.0.1"),
]
Next up, open the Sources/tree_swift.swift file. This is the single file at the moment, and it contains the @main entry point of the tool. To certify this is working, run the tool, in the root of the project:
swift run tree-swiftYou should see it printing a Hello, World! message to the console.
Accepting the Single Argument
The program can receive a single argument: the path to the directory to be listed. To accept this argument, add an @Argument property to the existing struct, after importing PathKit in the top of the file:
import ArgumentParser
import PathKit

@main
struct Tree: ParsableCommand {
    @Argument
    var path: Path = .current

    // func run()...
}
This adds an optional path argument, which defaults to the current working directory. Arguments are not named, different than flags and options, which are named.
If you try to build, the compiler will complain: Path cannot be used as an argument, as it does not conform to ExpressibleByArgument. To fix this, conform Path to ExpressibleByArgument:
extension Path: @retroactive ExpressibleByArgument {
    public init(argument: String) {
        self = Path(argument)
    }
}
This will initialize a Path from a string argument. PathKit is smart enough to handle relative paths, such as .. and ~, so the user can pass them without problems.
Validating the Path
Although the user can pass a directory, two things can go wrong: the path can be invalid, or the user can pass a file instead of a directory. To represent these two cases, create an enum that conforms to Error:
extension Tree {
    enum Error: Swift.Error {
        case invalidPath(Path)
        case notADirectory(Path)
    }
}
To make the Argument Parser print the error message, conform Tree.Error to CustomStringConvertible:
extension Tree.Error: CustomStringConvertible {
    var description: String {
        switch self {
        case let .invalidPath(path):
            "The path "(path.absolute().string)" does not exist."
        case let .notADirectory(path):
            "The path "(path.absolute().string)" is not a directory."
        }
    }
}
To finalize the validation, implement the validate() method. This is a method that the Argument Parser will call before running the command:
func validate() throws {
    if !path.exists {
        throw Error.invalidPath(path)
    }

    if !path.isDirectory {
        throw Error.notADirectory(path)
    }
}
To test this, you can run the tool passing either a path that does not exist, or a file instead of a directory:

Notice how the error messages are exactly the ones the CustomStringConvertible conformance returns!
Listing the Files
After validating the path, it’s time to use the run() method, and implement the logic to list the files in the directory.
Inside the run() method, start by replacing the Hello, World! message with the path that will be listed:
func run() throws {
    print(path.absolute().string)
}
Next, create an extension on Path that will list all the files in the directory. Notice how this is a recursive function, and it will list all the files in the directory and its subdirectories.
extension Path {
    // 1
    func listChildren(level: Int = 0) throws {
        // 2
        try children().sorted().forEach { child in
            // 3
            let indentation = String(repeatElement(" ", count: level * 4))

            // 4
            if child.isFile {
                print(indentation, child.lastComponent)
            } else {
                print(indentation, child.lastComponent)
                try child.listChildren(level: level + 1)
            }
        }
    }
}
Breaking apart the code helps understanding the logic:
- The
listChildren(level:)method receives alevelparameter, which defaults to0. This parameter will be used to calculate the indentation of the current file or directory. - The
children()method returns an array ofPathobjects, which represent the children of the current path: both files and subdirectories. Before iterating over them, use thesorted()method to sort them by name. - Create an indentation string, by repeating a space character 4 times for each level of indentation.
- If the path is a file, print the indentation and the file name. Otherwise, if it’s a directory, Call this function recursively to list its contents, with an increased level of indentation. The print call is currently duplicated in both branches, but they will change in the next steps, so it’s fine to keep it as is.
Now, in the run() method, call listChildren() in the starting path:
func run() throws {
    print(path.absolute().string)
    try path.listChildren()
}
Running it generates the following output:
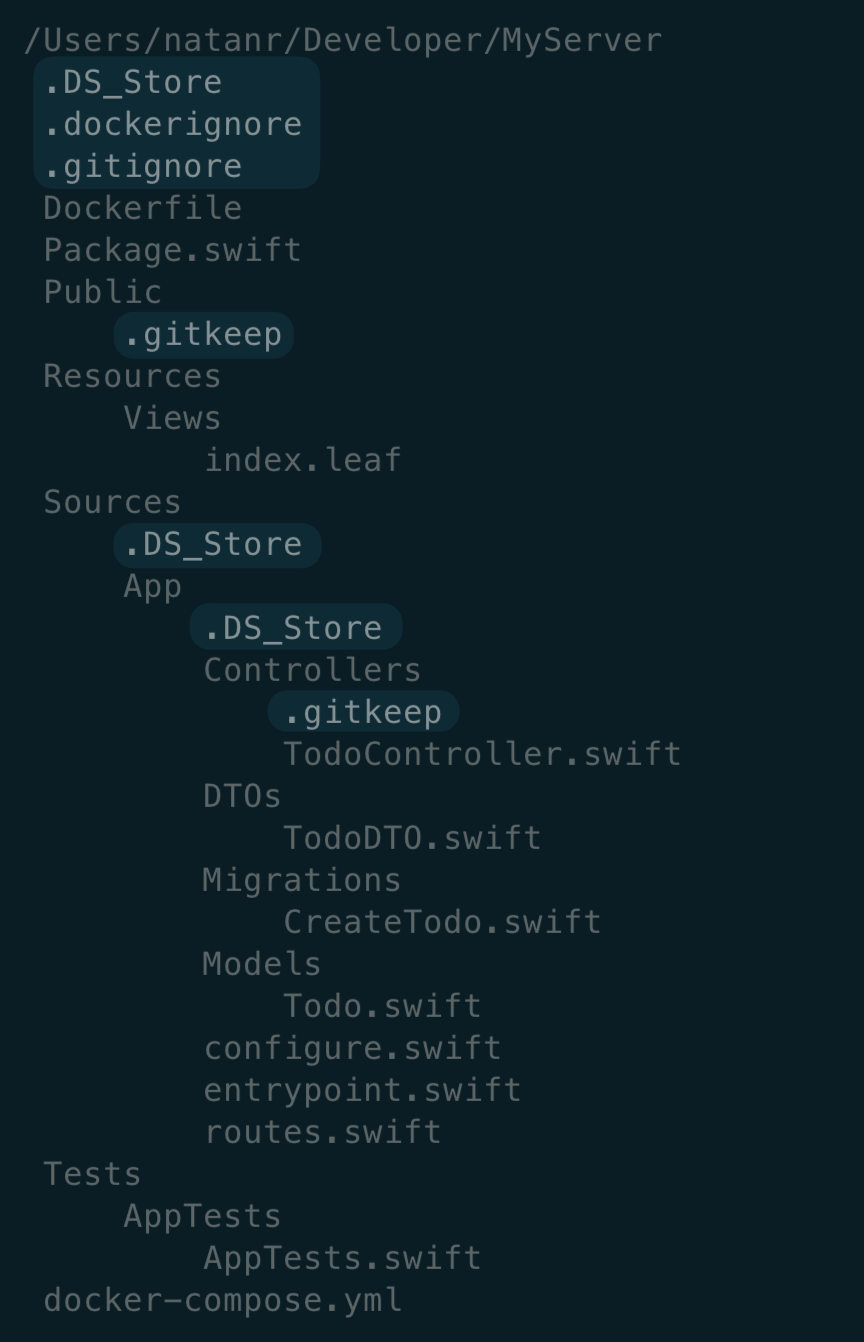

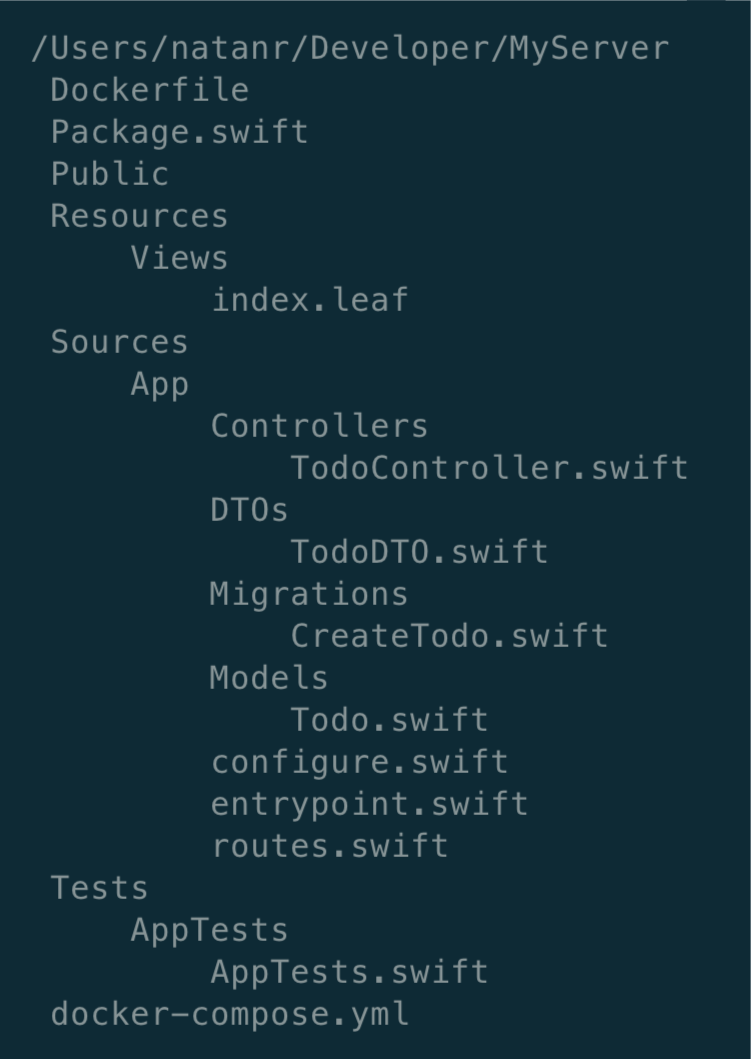
Great! The basic structure is there, but there’s a little problem you notice quickly: hidden directories and files are being listed. In tree, they are not listed by default. Fix this easily by adding this condition in the forEach loop:
if child.lastComponent.hasPrefix(".") {
    return
}
And voilà! Hidden files are not listed anymore:

Drawing the Tree Branches
When looking at the output of the original tree, the subdirectories and files are connected by lines, forming a tree structure:
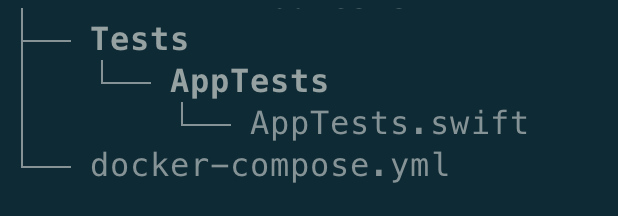

Implementing this behavior is the next step. Those lines are actually characters: ├, │, ─, and └.
We’ll replace the indentation, which was purely whitespace-based, with these characters. Declare an extension on String to represent these characters. One property will be purely represent an indentation level, while the other will represent a child branch (for subdirectories and files):
extension String {
    static let levelLine = "│   "
    static let child     = "├──"
}
Still in that same extension, add a method that will return the correct string for a given indentation level:
static func indentation(level: Int) -> String {
    var indentation = ""

    (0 ..<  level).forEach { _ in
        indentation.append(levelLine)
    }

    indentation.append(child)

    return indentation
}
Now, in the listChildren(level:) method, replace the indentation with this extension method you just created:
let indentation = String.indentation(level: level)And this is the result, in which you can quickly spot a few issues:
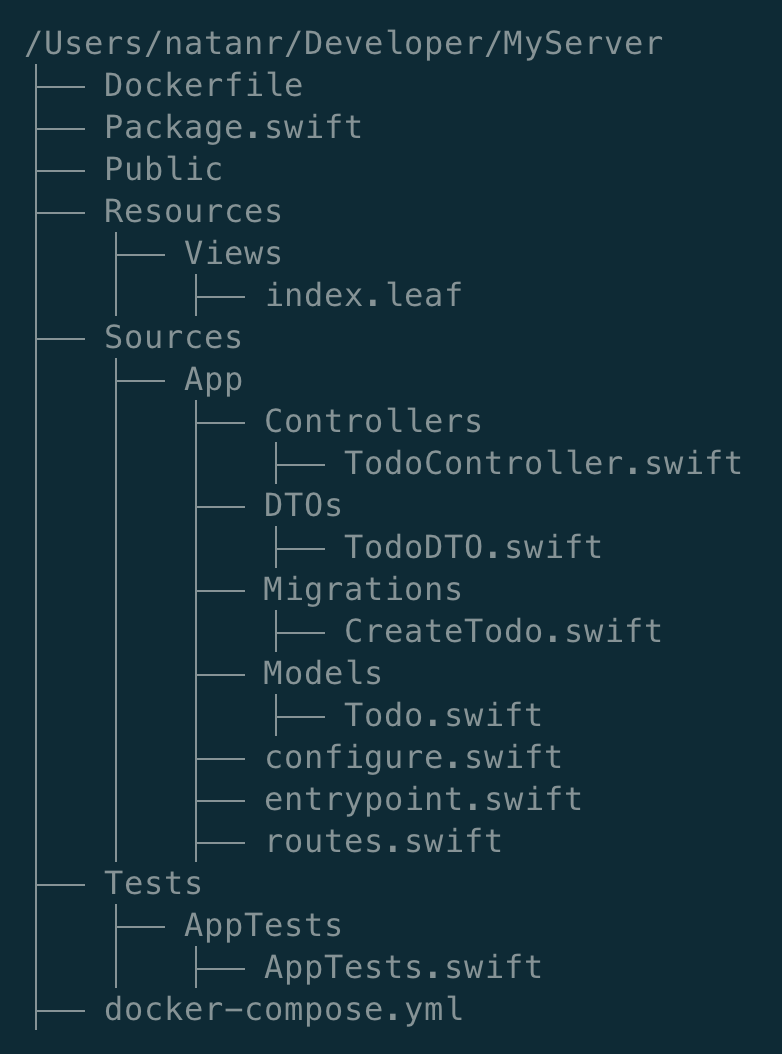

The first thing you can notice in the screenshot above, is that the last the “leaf” of the last child is not being printed correctly. Additionally, the branches continue all the way down, even though there are no siblings left.
Fixing the Last Child Leaf
We missed a one of the special characters: └. Add it to the String extension:
extension String {
    static let lastChild = "└──"
}
And the indentation method needs to be updated to use the new character, when the current child is the last one:
static func indentation(level: Int, isLast: Bool) -> String {
    var indentation = ""

    (0 ..<  level).forEach { _ in
        indentation.append(levelLine)
    }

    if isLast {
        indentation.append(lastChild) // └──
    } else {
        indentation.append(child)     // ├──
    }

    return levels
}
And accordingly, in the listChildren(level:) method, we need to check if a child is the last one, and use it when calling the indentation method:
func listChildren(level: Int = 0) throws {
    // 1
    let children = try children().sorted()
    let lastIndex = children.count - 1

    // 2
    let enumeratedChildren = children.enumerated()
    try enumeratedChildren.forEach { tuple in
        // 3
        let (index, child) = tuple
        let isLast = index == lastIndex

        if child.lastComponent.hasPrefix(".") {
            return
        }

        // 4
        let indentation = String.indentation(level: level, isLast: isLast)

        // print as before...
    }
}
This is what has changed:
- Extract the
children().sorted()result into a property, and get the index of the last child - Before enumerating over the children, use the
enumerated()method in order to get both the index of each child - When enumerating, deconstruct the tuple into
indexandchild, and check if the current child is the last one, by comparing theindexwithlastIndex - Finally, use the
isLastproperty in the updatedindentationmethod
And this is the result:
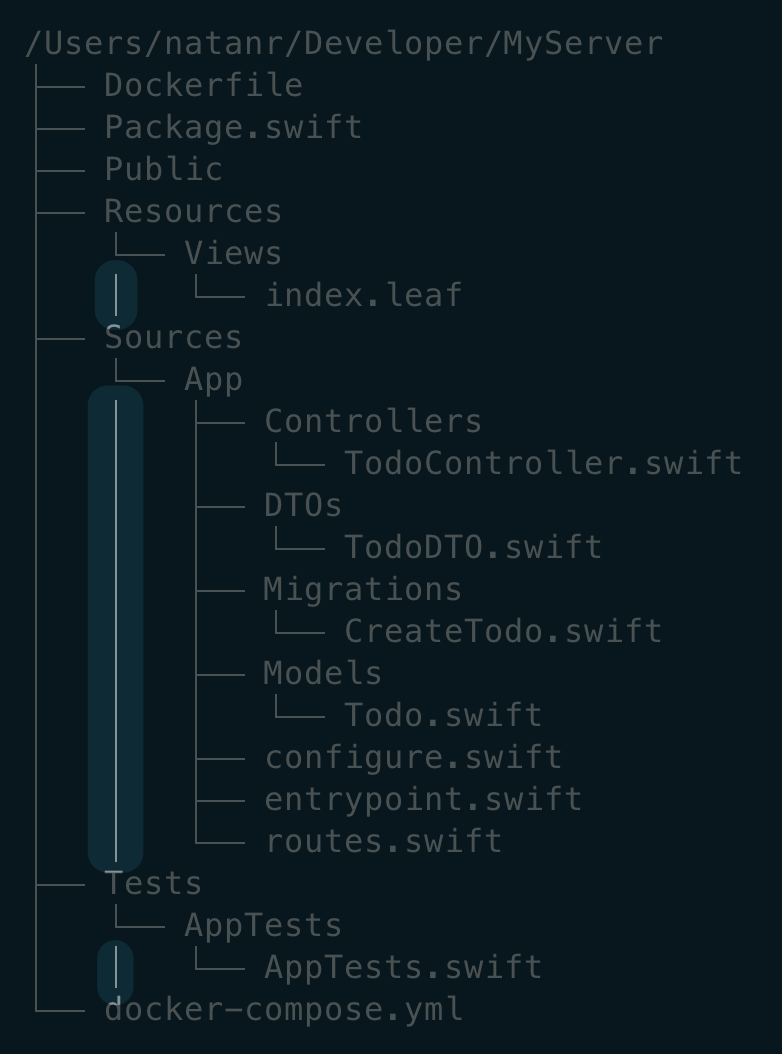

Now we can spot only the second problem: branches continuing even after the last child.
Fixing the Branches
Right now, the indentation method only iterates over the number of levels, without any knowledge about the ancestors. To fix this, we need to keep track of the ancestors, and use them to determine the correct indentation.
Therefore, the indentation method needs to receive an additional parameter, telling if the ancestors of a child are the last ones in their own hierarchy level.
typealias IsLastChild = Bool

static func indentation(
    isLast: IsLastChild,
    ancestors: [IsLastChild]
) -> String {
    var indentation = ""

    ancestors.forEach { isLastAncestor in
        if isLastAncestor {
            indentation.append(lastChildSpacing) // "    "
        } else {
            indentation.append(levelLine)        // "│   "
        }
    }

    // Add the correct character for the current level as before
    // Return the indentation as before
}
Notice how we use here a typealias, IsLastChild, instead of a regular Bool. The intention here is to make it clear what this array means. Also, see how the level parameter now is not necessary anymore, as we can use the ancestors array to determine the current level.
As this method has changed, we need to update the caller site, in the listChildren(level:) method:
Start by updating the function signature, to remove the level parameter and replace it with the new ancestors parameter as well:
func listChildren(ancestors: [IsLastChild] = [])Then, pass the ancestors as is when getting the indentation:
let indentation = String.indentation(isLast: isLast, ancestors: ancestors)Finally, when performing the recursion, update the try child.listChildren(level: level + 1) call, to pass the updated ancestors instead of the level:
var updatedAncestors = ancestors
updatedAncestors.append(isLast)
try child.listChildren(ancestors: updatedAncestors)
This should be enough to achieve the desired result. Running the tool again leads to the following output:
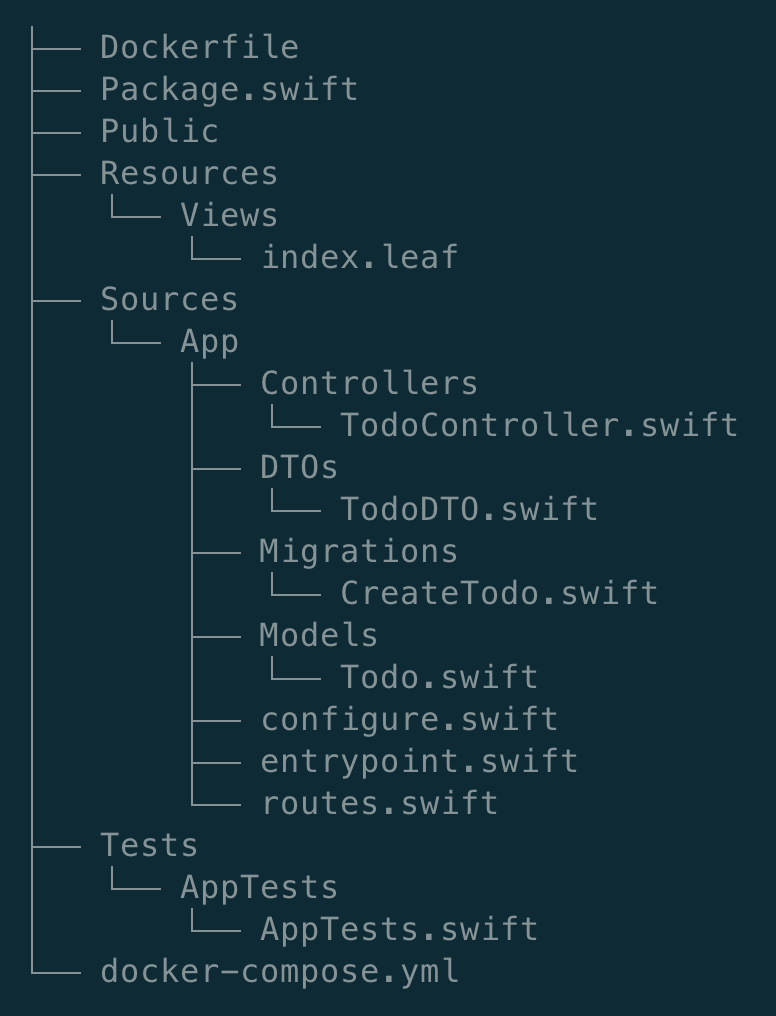

Yay, success! The branches are fixed, and the last child is also correctly printed!
Explore Further
This has been a fun one, and we’ve covered a lot so far! You can read the 2nd part, to add more capabilities to tree.swift.
You can find the code for this post in the tree.swift sample project repository.
If you’re feeling adventurous, try to implement all the logic without PathKit, purely with the FileManager class.
Have a suggestion for a tool to replicate? Ping us on X @SwiftToolkit or Mastodon!
See you at the next post. Have a good one!
