Let's Build: The tree Program - Part II
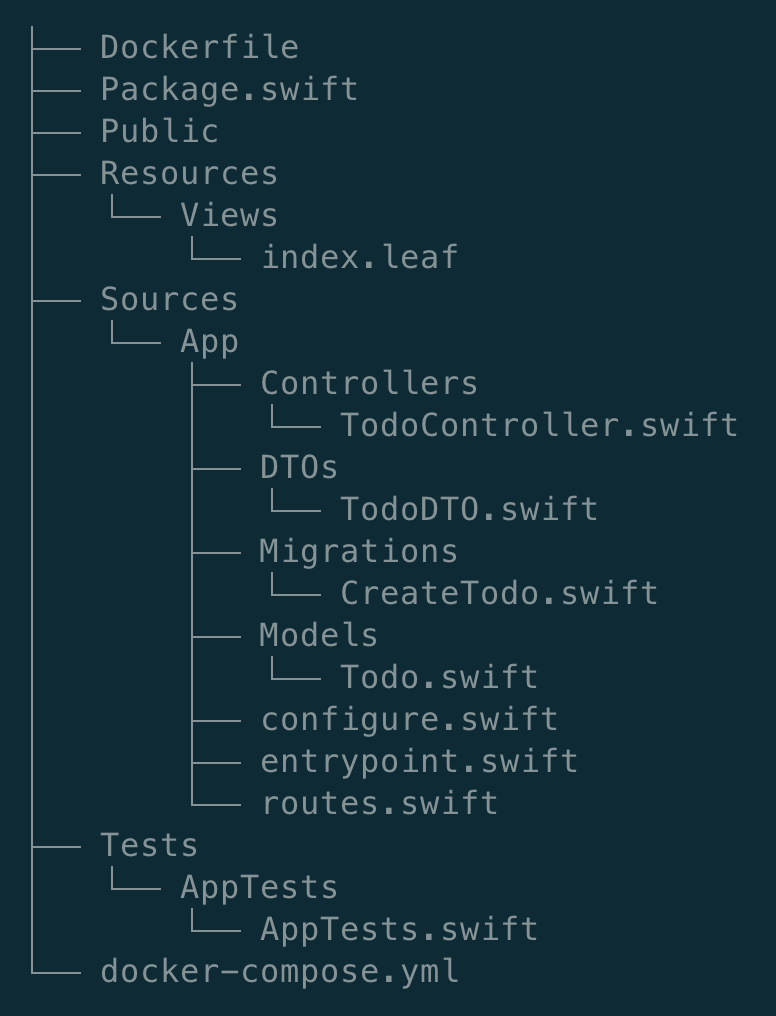
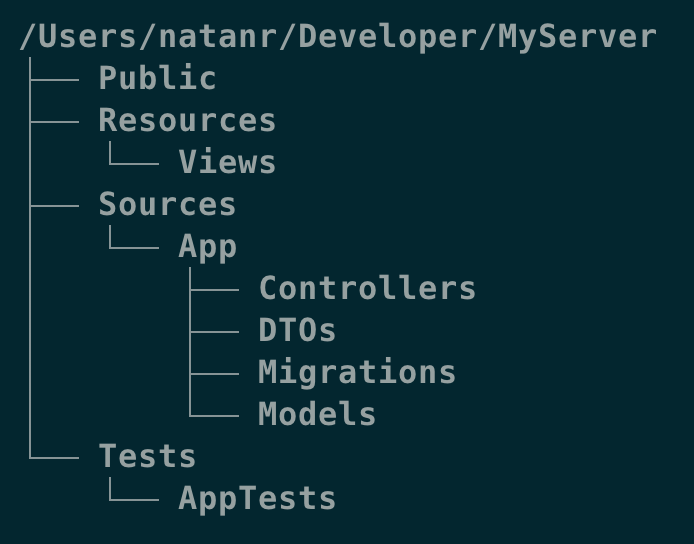
In the previous post, we built a basic version of the tree program: a command line tool that prints a visual representation of a directory tree, given a path to a directory. If you haven’t read it yet, I strongly recommend you do that first, and then come back here. We stopped at the point where our implementation was able to print the following:

It’s time to add more features - matching some of the options that the real tree program supports. It has tens of options, so the goal here won’t be to implement all of them, but rather to add some interesting and useful ones.
Making Directories Stand Out
When comparing the output of our implementation with the real program, you can see that directories are not highlighted in any way. Here’s a comparison between the two:
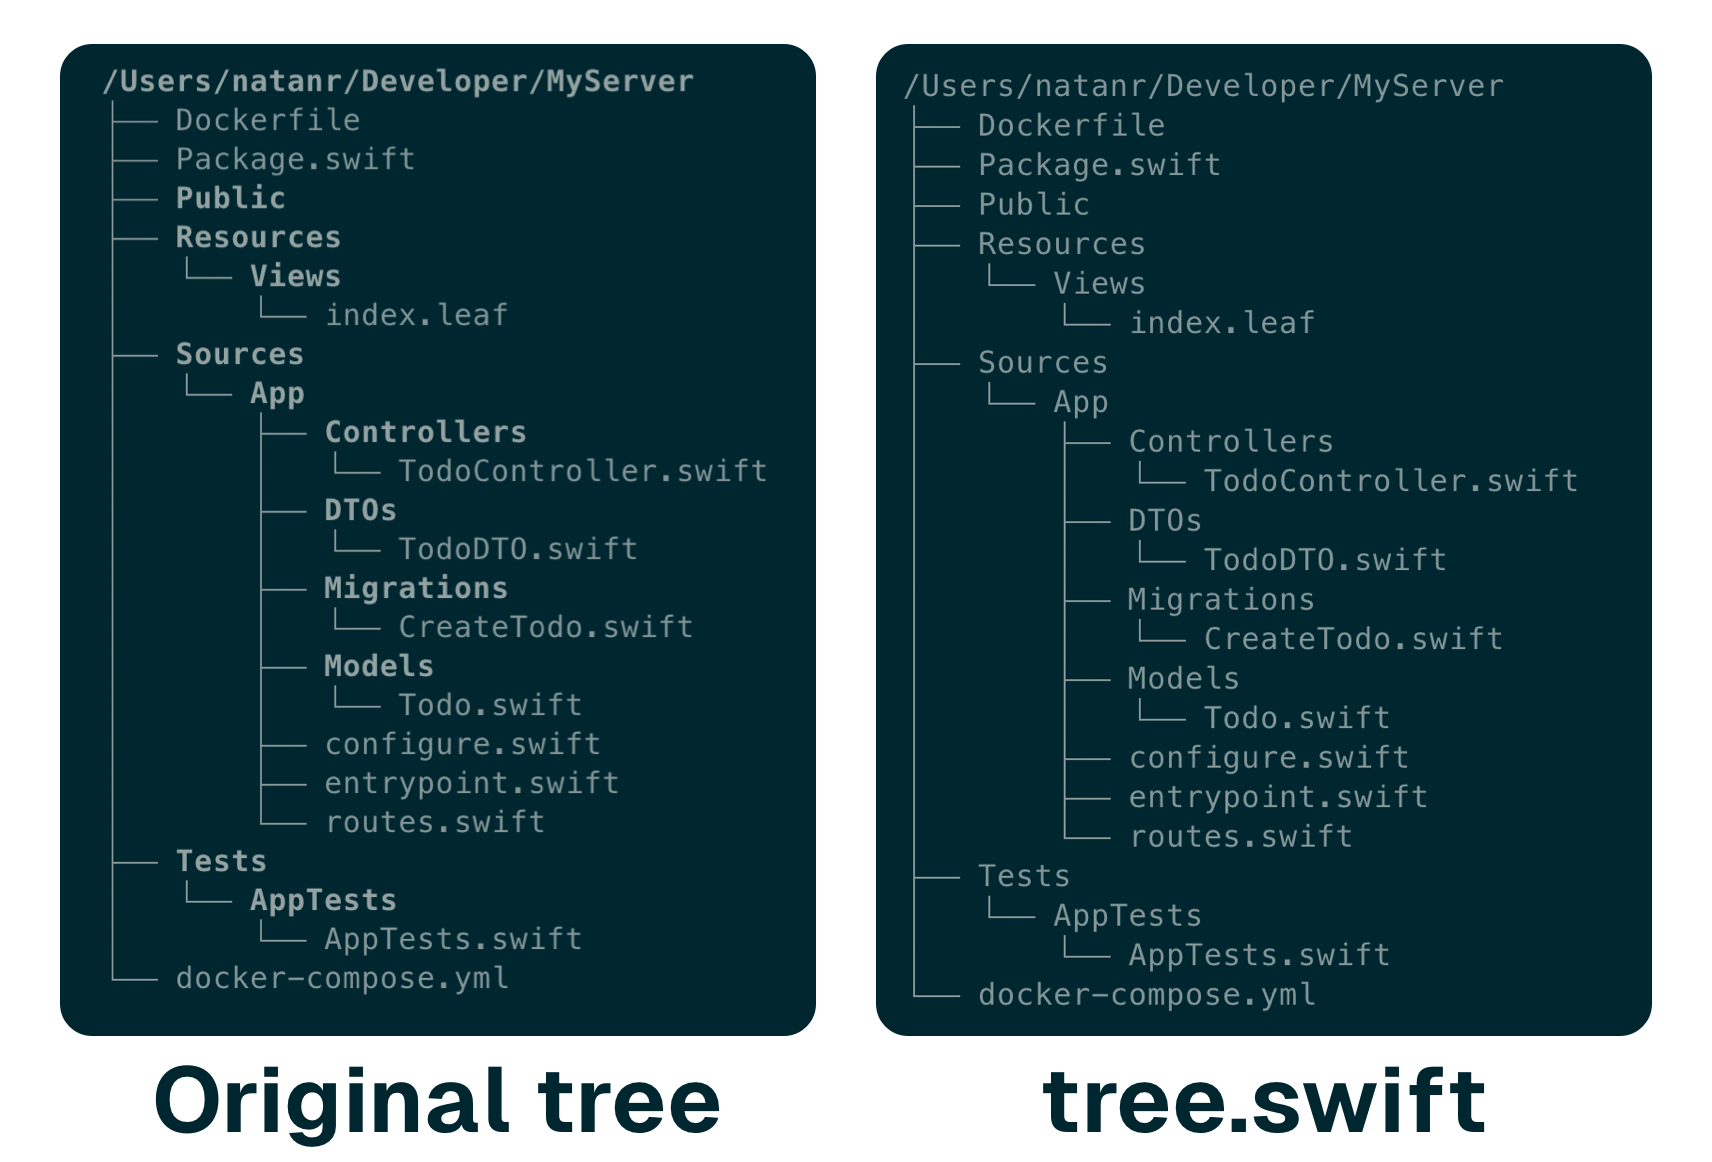

The real program lists directories in bold, which makes them stand out more than files. If you’ve read the Understanding Colors and Styles in Terminal Output article in the past, you know that this is feasible - and not as complicated as it may seem.
To add support for this, first add an extension on String, that wraps self in the ANSI code for bold, and resets it back to normal:
extension String {
    var bold: String {
        "\u{001B}[1m" + self + "\u{001B}[0m"
    }
}
There are two places in the code where directory names are printed. First, in the initial, starting path of the tree. And second, in the else branch of the if statement that checks if the current item is a file or a directory.
if child.isFile {
    print(indentation, child.lastComponent)
} else {
    print(indentation, child.lastComponent.bold)

    // handle the directory recursively
}
Running this code will now print directories in bold, just as intended.
Adding Custom Options
As the introduction mentioned, we won’t be implementing all the options that the real tree program supports. There are more than 50, and it lies far beyond the scope of this series.
But here are a few options that we chose:
-L levelDescend only level directories deep: limits how many levels the tree descends into the directory tree.-aAll files are listed: which includes hidden files and directories.-dList directories only: only lists directories, not files.--noreportTurn off file/directory count at end of tree listing: this one we have to add support for displaying a summary of the tree, and the ability to turn it off.
Using @OptionGroup
The argument parser allows a group of options to be structured together. Although this is not necessary, it can be handy when passing the options around between functions. This is exactly what we’ll do here.
Start by creating a new struct that will hold the options. For each item listed above, create a property as in the following code:
import ArgumentParser

extension Tree {
    struct Options: ParsableArguments {
        @Option(name: .customShort("L"))
        var maxLevel: Int?

        @Flag(name: .customShort("a"))
        var includeHidden = false

        @Flag(name: .customShort("d"))
        var directoriesOnly = false

        @Flag(name: .customLong("noreport"))
        var disableReport = false
    }
}
The only option that accepts a parameter is the level option - so it will use the @Option property wrapper, and be optional. The other ones are flags, that by default are off, so assign them to false.
Next, inside Tree struct, add a property that will hold all the options:
@main
struct Tree: ParsableCommand {
    @OptionGroup
    var options: Options

    // existing code
}
Notice how the Tree.Options struct has to conform to ParsableArguments. By declaring it in Tree, the executable entrypoint, it can be automatically parsed from the command line arguments, and accesible through the options property.
Limiting the Depth of the Tree
In directories where there are many nested subdirectories, it can be useful to limit the depth of the tree, and only print up to a certain number of levels down the hierarchy.
This is the maxLevel property the Options struct has. When it’s nil, it means that there is no limit, and the tree will print as many levels exist.
In the Path.listChildren extension method, there is a parameter named ancestors. We can leverage the count of that array to know how many levels down the hierarchy we currently are, and decide whether to iterate over its children or not.
In the first line of the listChildren method, adding a simple guard statement is enough to achieve this:
if let maxLevel = options.maxLevel,
    ancestors.count >= maxLevel {
    return
}
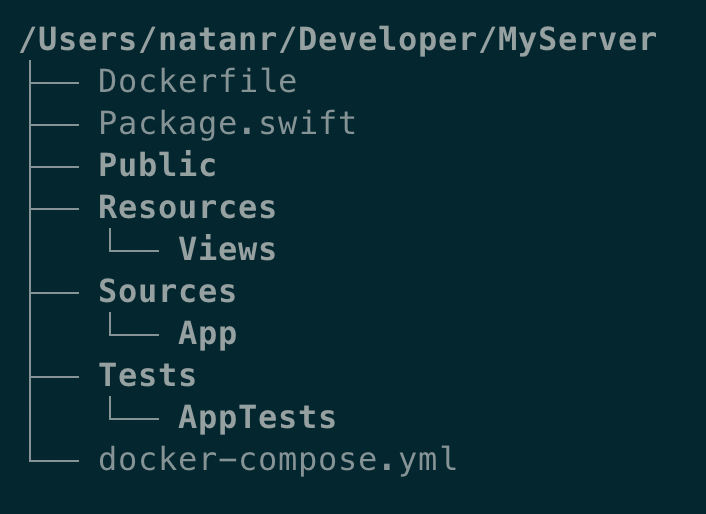
With this code, we can pass -L 2 when running, and we’ll have the following output:

Listing Hidden Files & Directories
In the first post, we had to actively skip over hidden files and directories. Now that we have the includeHidden flag, we can use it to include them in the output when the flag is on.
In the listChildren method, we already added a check for files that start with a dot:
if child.lastComponent.hasPrefix(".") {
    return
}
We need to add another condition: checking if includeHidden is false, and if so, skip over the hidden files and directories. When true, the execution will skip over the if statement, and move on to listing the file or directory, even it starts with a dot.
if !options.includeHidden, child.lastComponent.hasPrefix(".") {
    return
}
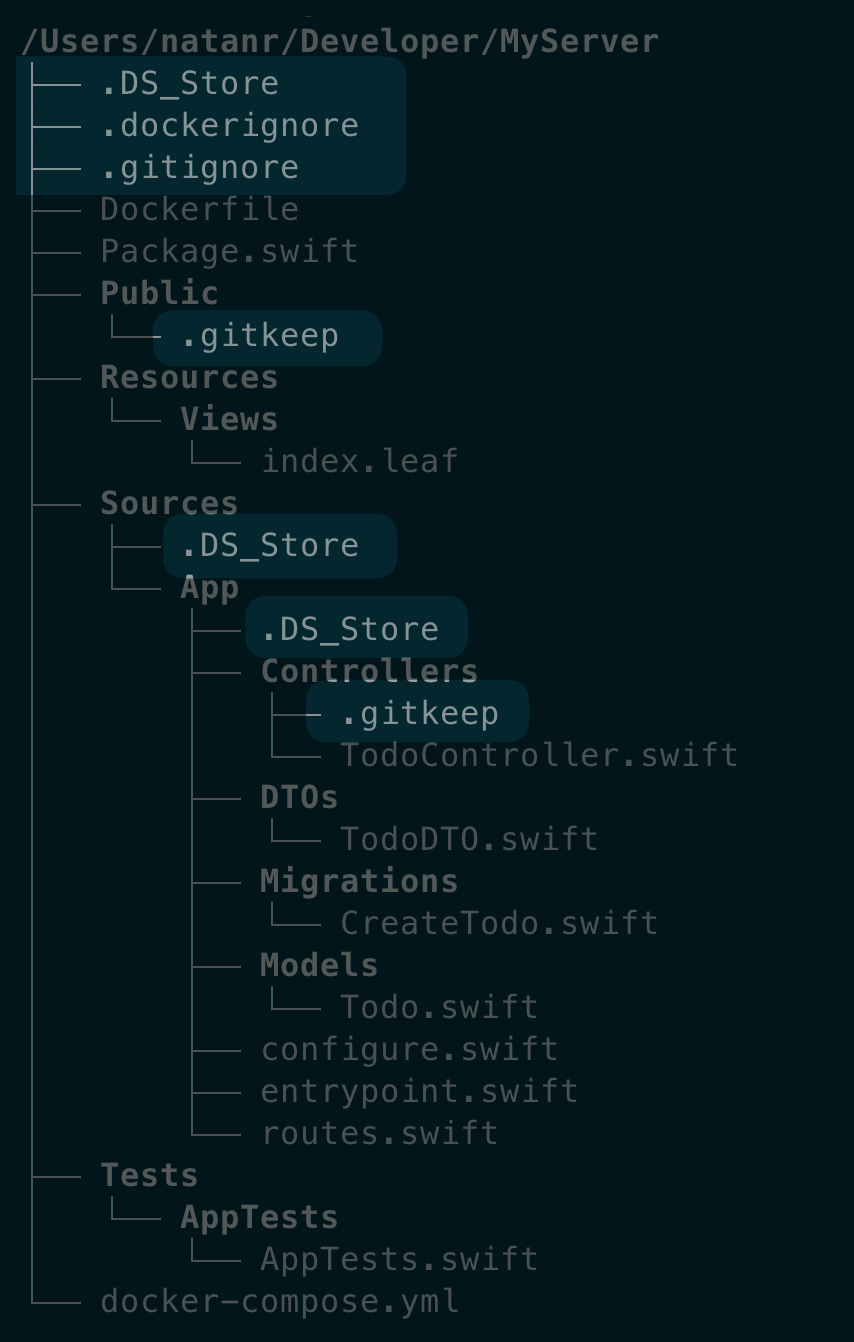
Passing -a when running results in the output below:

Listing Only Directories
This one also doesn’t require much code. Also in the listChildren method, for every path being iterated over, we get all the children, and sort them:
let children = try children().sorted()To list only directories, we can filter the children array, and only keep the directories. Modify the line above to the following:
var children = try children().sorted()
if options.directoriesOnly {
    children = children.filter { $0.isDirectory }
}
Passing -d when running results in an output with only directories, and no files:

Summarizing the Tree
We reached the last option left to implement: the ability to turn off the summary at the end of the tree listing.
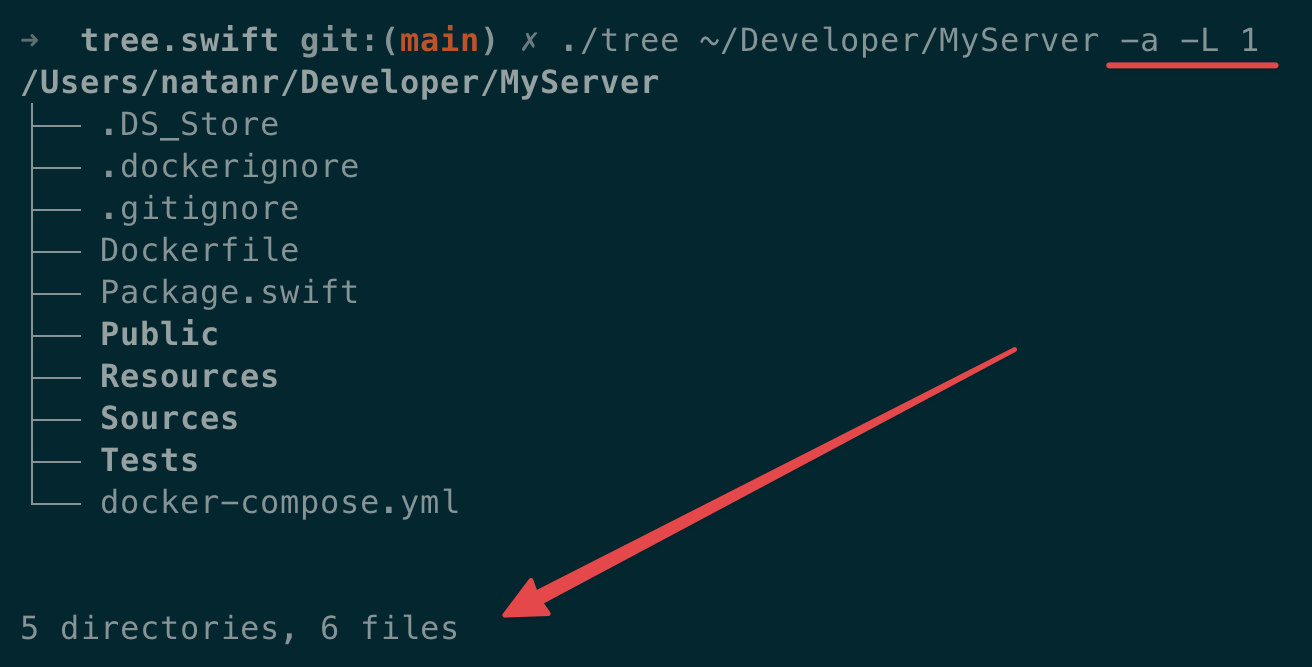
Actually, before allowing to turn it off, we need to add the code that prints the summary in the first place. The summary includes the total number of directories and files that were listed. When no files are listed, only the number of directories is printed. It looks like this:
12 directories, 19 filesTo add support for this, whenever we visit a directory, or print a file, we need to increment a counter, one files and one for directories. But this variables needs to be passed from the first call of the listChildren method, and subsequently to all the recursive calls it makes.
In Swift, parameters values are immutable, and cannot be changed in the function body. Luckily, this is not the case for inout parameters, which are passed as a reference, meaning any changes to the variable will reflect on the original property.
This is the final signature of the listChildren method:
func listChildren(
    ancestors: [IsLastChild] = [],
    filesCount: inout Int,
    directoriesCount: inout Int,
    options: Tree.Options
) throws
In the first line of the function body, add an increment to the directoriesCount variable, as we’re about to visit the current directory:
directoriesCount += 1In the line where we print a file, after the isFile check, increment the filesCount variable:
filesCount += 1Now, in the initial call site in the run() method, declare two mutable variables (var instead of let), and pass them to the listChildren method:
var files = 0
var directories = 0

try path.listChildren(
    filesCount: &files,
    directoriesCount: &directories,
    options: options
)
Notice how the filesCount and directoriesCount parameters are passed with the & sign, as these are inout parameters. Also don’t forget to update this method call in the recursive calls.
Finally, still in the run() method, print the summary of the tree (unless the disableReport flag is true):
if !options.disableReport {
    print("\n")

    if files == 0 {
        print("(directories) directories")
    } else {
        print("(directories) directories, (files) files")
    }
}
When the -d option is missing, the program will print the summary of the tree. Mixing a few of the options together, we have the desired output:

🎉 The basic implementation of tree, with some customization options, is now complete! 🎉
Explore Further
As always, you can find the code for this post in the tree.swift sample project repository.
There are plenty of options that we left out. As a challenge, you can try to implement one or more of the following:
- Custom sorting: tree allows sorting the files and directories in different ways.
-vSort files alphanumerically by version.-tSort files by last modification time.-cSort files by last status change time.-ULeave files unsorted.-rReverse the order of the sort.--dirsfirstlists directories before files, and--filesfirstdoes the opposite, files before directories.
- Custom output: instead of a graphic tree, the ouput can be in other formats:
-Joutputs in JSON format.-H baseHREFoutputs in HTML format, with a base path/URL.
- Listing files: the program also supports listing files in a different way:
-P patternlists only files that matches a specific regular expression pattern.-I patternignores files that matches a specific regular expression pattern, listing only the ones that don’t match.--gitignorefilters out files that are listed in the.gitignorefile.
Do you have any feedback for this post and series? Maybe a suggestion for a tool to replicate? Ping us on X @SwiftToolkit or Mastodon!
See you at the next post. Have a good one!
