The New Container Tool: Docker-free Swift on Linux?
Last week, as part of WWDC 2025, Apple announced two new open source projects, with almost identical names. As they explain in session 346, the Containerization package allows applications to use Linux containers. Containerization is written in Swift and uses Virtualization.framework on Apple silicon. This is a more low-level package. Built on top of that, they released a tool called Container, which allows you to build and run Linux images, including pushing them to a registry. And all that natively, without having to rely on Docker.
Because this tool is OCI-compliant (Open Container Initiative), it is able to both consume and produce images compatible with Docker. In more practical terms, this means that container-based platforms such as Heroku, Fly.io, and others, will be able to run the containers you build with it. As a prerequisite, you’ll need an Apple Silicon Mac to run it.
Although still in its initial 0.1.0 release, it already has a lot of potential. In this tutorial, you’ll learn how to deploy a sample Vapor application using the Container tool. Starting from installing and configuring it, up to using it to build the image (for Linux and cross compiling for amd64), and pushing it to Fly.io’s container registry.
Installing Container
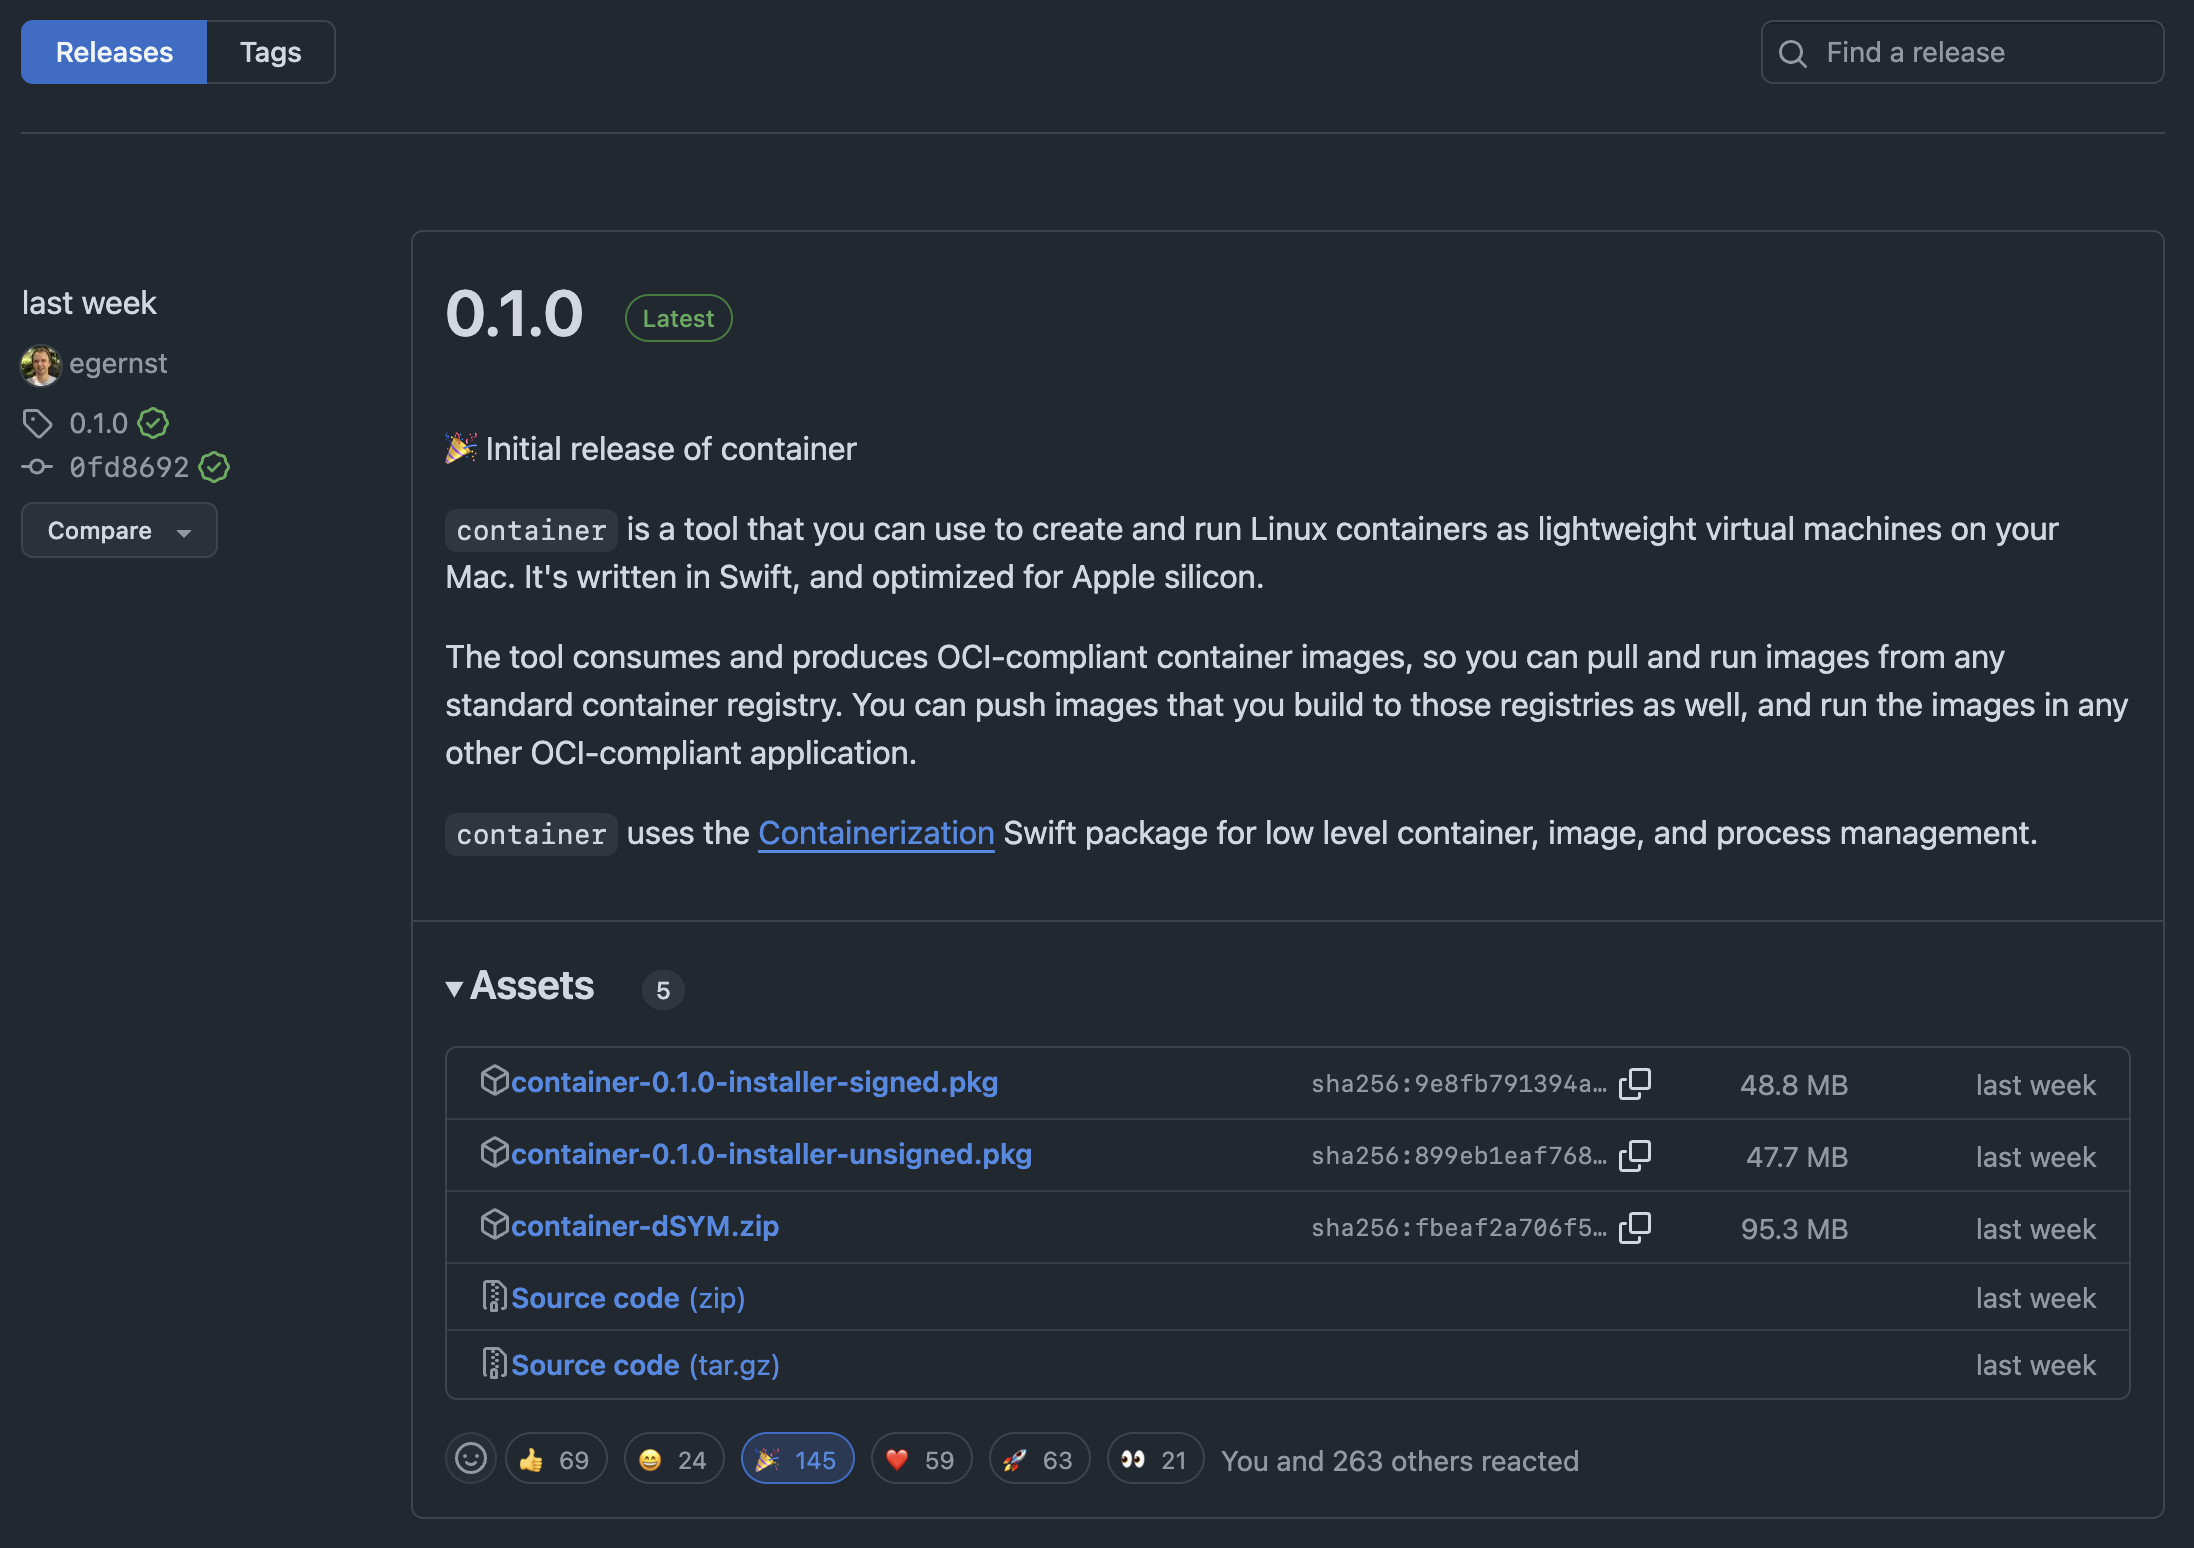
Although you could build the tool from source, there’s no need to do that. You can manually download the pre-built release from its GitHub. Once downloaded, open the .pkg file and follow the instructions.

Having said that, the easiest way to install it is using Homebrew. The formula uses the GitHub release behind the scenes.
brew install containerTo confirm a successful installation, you can run container --version:


After that, you’ll need to start the services that the tool depends on:
container system startThe first time you run this command, it’ll take a while, mostly due to downloading the buildkit image. After the command is finished, you can confirm buildkit is available locally:
container list --allBuilding the Sample Project
Now it’s time to build a Swift application. For this tutorial, we’ll use once again the template project generated with Vapor’s CLI. Assuming you have it installed, you can get a minimal Vapor starter project with this command:
vapor new my-app --no-fluent --no-leafOne great advantage of creating a Vapor app with its CLI, is that you’ll get a Dockerfile for free. Even though you won’t be using Docker itself, container is able to read the Dockerfile, pull the base image, and perform all the necessary steps to build the image.
To build an app image (for now to run locally), use the build command:
container build --tag container-local-test --file Dockerfile .After container finishes all the build steps, you’ll get a success message:
Successfully built container-local-test:latest
And when you run container image list, you’ll see 3 images in the list: buildkit, the base swift 6.0:noble image, and the image for the app you just built.
To run the image locally, you can use the container run command, passing the image name as the first argument:
container run container-local-testAnd then you’ll see a log with the output of the app:
[ NOTICE ] Server started on http://0.0.0.0:8080
Although it says 0.0.0.0, you cannot access the app from your localhost, because the app is running inside a container. To find the IP address of the container, run container list (or container ls in a shorter form).
Using the IP address of the output, you can access the app at http://<ip>:8080:


Authenticating with Fly’s Registry
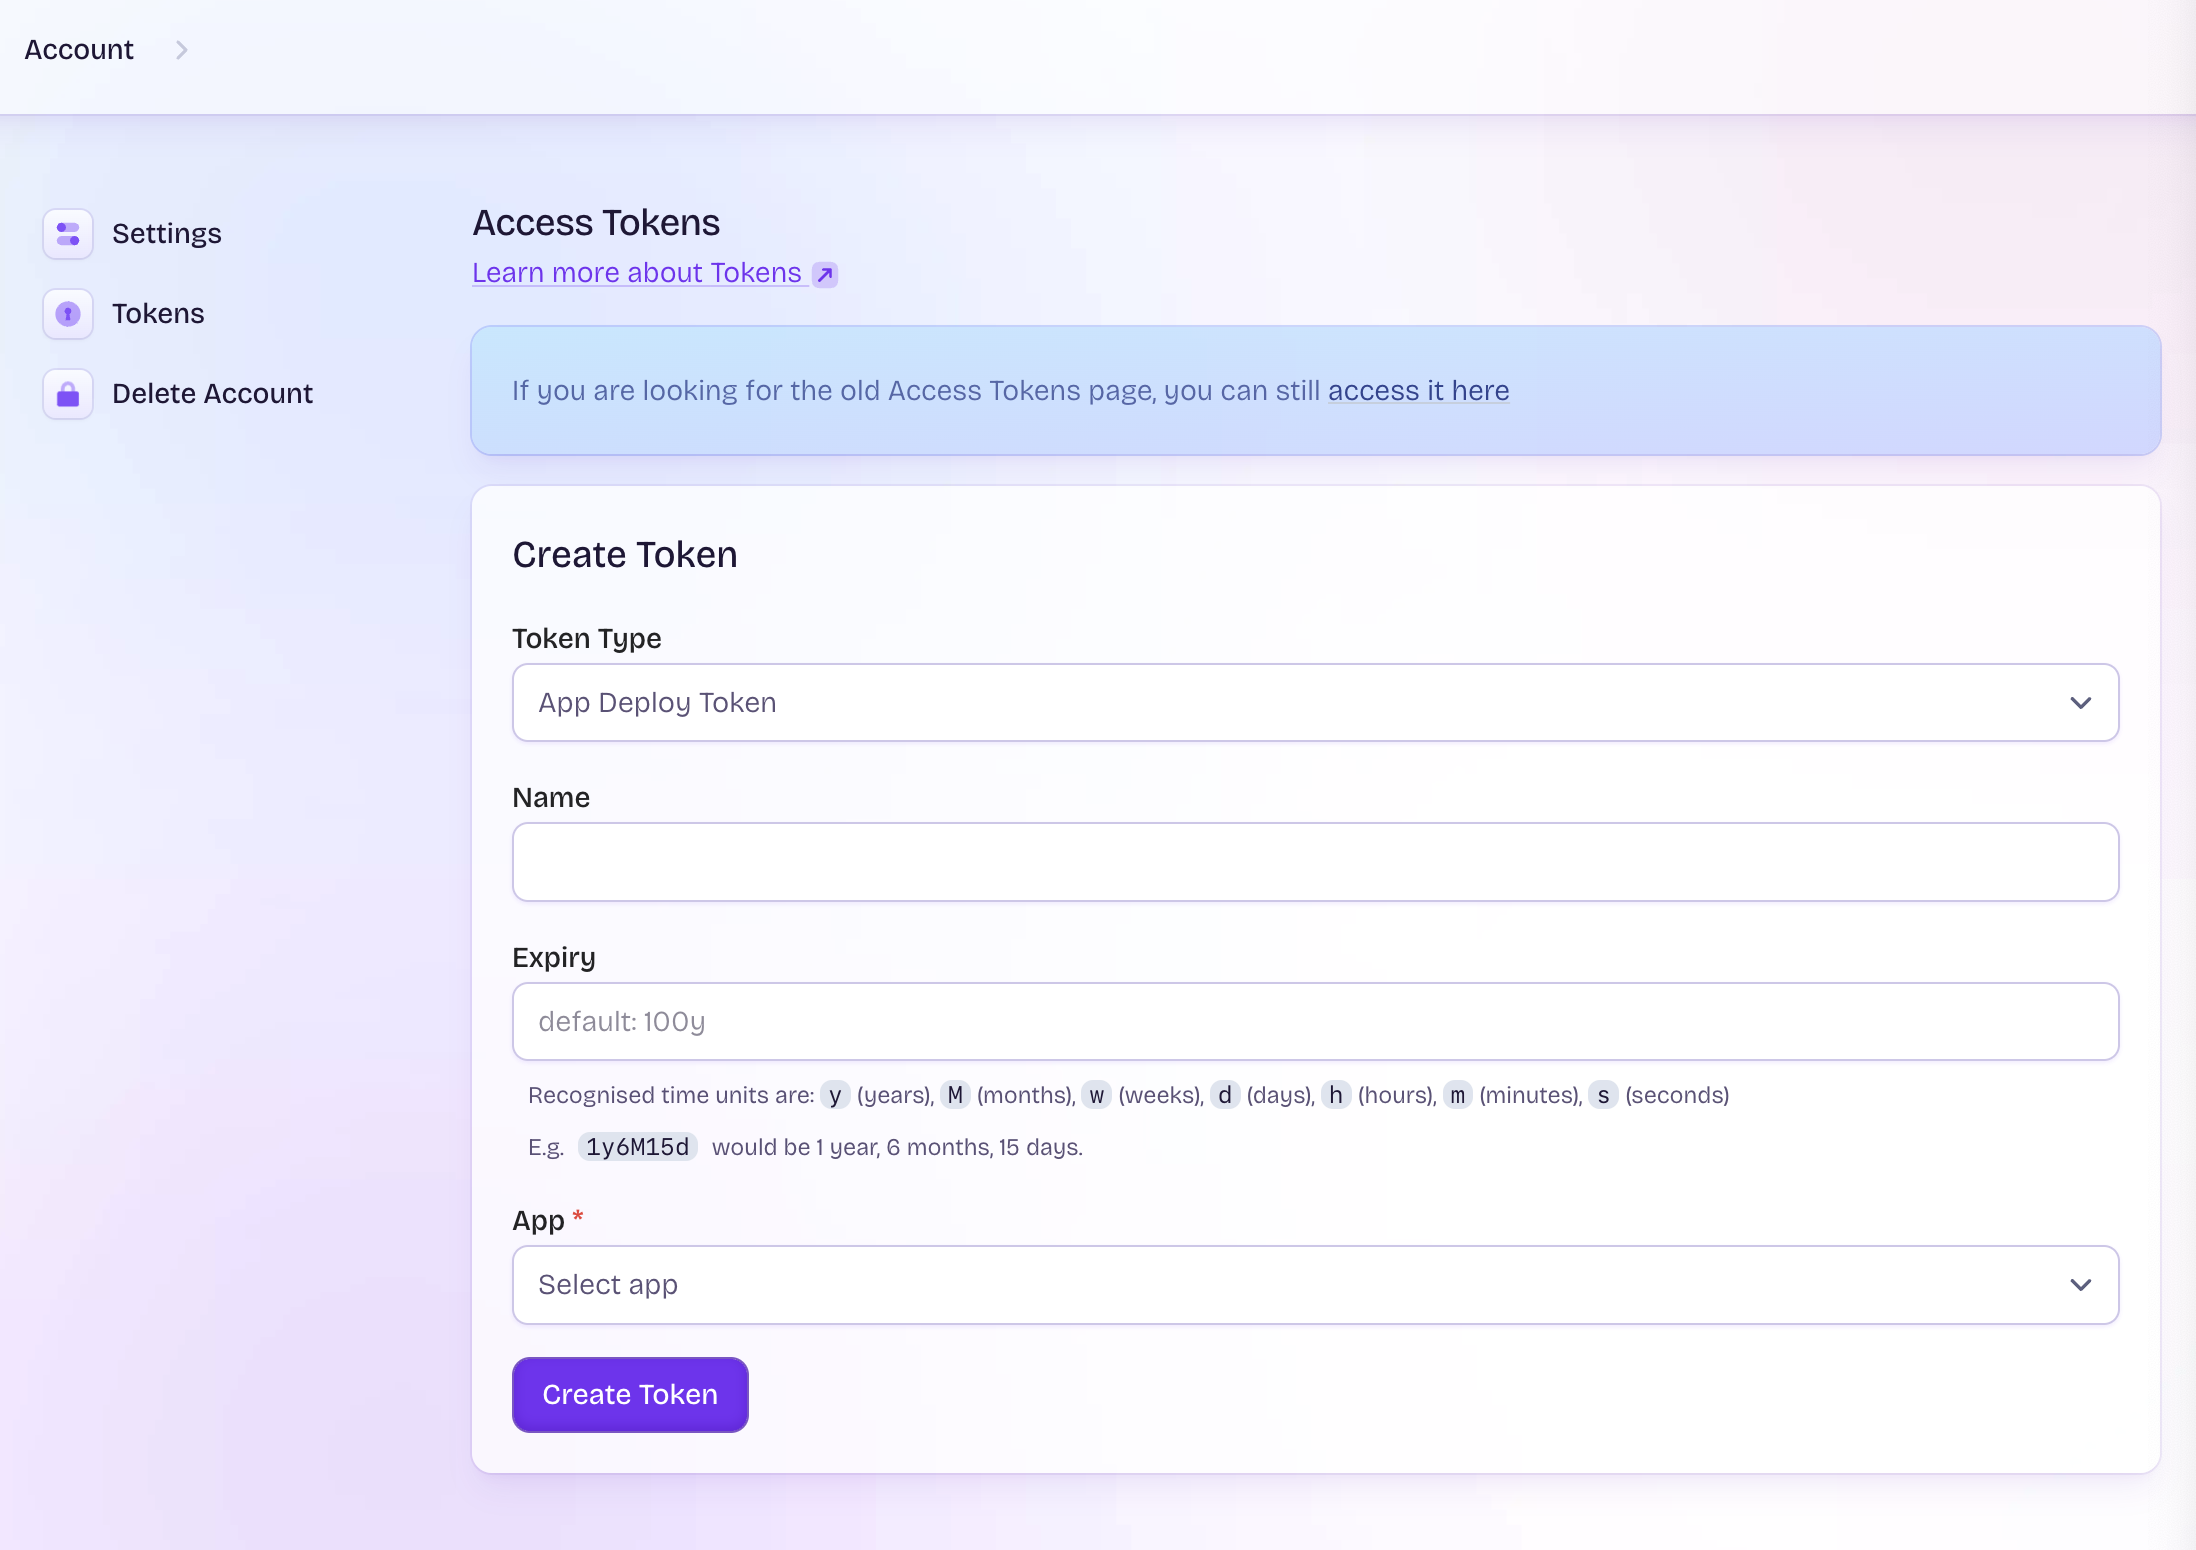
Before pushing the image to a registry, you’ll have to authenticate the tool with the registry. For this tutorial, we’ll use Fly.io’s registry. Under Account > Access Tokens, create a new token for the desired app:

After creating the token, use the registry login command to authenticate:
container registry login registry.fly.ioThis command will prompt you to enter a username first. Using the actual username didn’t work for me - and after digging a bit with how Docker does this, I found that using x as the username works.
After that, you’ll be asked to enter the token you just created, and you should be good to go.
Pushing the Image and Deploying
Another important fact to consider, is that Fly.io doesn’t provide arm machines, and when running Apple Silicon, the images are built by default for arm64. To build an image compatible with Fly.io, the --arch parameter is needed.
This means that container will use cross-compilation to build the image for amd64, even though you’re running on Apple Silicon. This makes the build process much slower. To alleviate this, you can increase the amount of memory and cores available to the build process:
container build --tag registry.fly.io/<your-app-name>:<version> --memory 4096MB --cpus 4 --arch amd64 --file Dockerfile .Notice that you have to use the app name and the version as part of the tag. After this command finishes (it took me around 15 to 20 minutes), you can push the image to the registry:
container images push registry.fly.io/<your-app-name>:<version>Although this pushes the image to the registry, you still need to actively deploy it, using the flyctl CLI tool:
fly deploy --app <your-app-name> --image registry.fly.io/<your-app-name>:<version>If you configured the fly.toml file with the correct parameters (you can see one example here, but remove the [build] section and change app_name to match yours), and allocated an IP to the app, you should be able to access it at https://<your-app-name>.fly.dev, from either the browser or using curl:


Final Thoughts
Building the image, especially when cross compiling for amd64, took a really long time. For the sample project, which is just a simple app, it took between 15 to 20 minutes, on an M4 Pro MacBook! On the project’s issues on GitHub, there’s already an open issue raising concerns about slow build times, when compared to Docker.
Being an initial 0.1.0 pre-release, it’s more than expected to have some rough edges and other compatibility issues, especially when compared to Docker. When going over the current open issues and discussion threads on GitHub, you can get a sense of the most important areas that aren’t yet covered, such as Docker Compose compatibility. Simultaneously, the community is already contributing with projects in the same area, such as a docker-compose clone for Apple Container, by Morris Richman.
Overall, Container is still very promising, and it’s quite impressive that in the first pre-release, it already succeeds in building and pushing images to a registry.
Explore Further
If you’re interested in learning more about the Container tool, check out the current documentation available on GitHub at the time of writing:
Supporting Linux and using Swift beyond Apple platforms is a long journey. Even if they are still in their early stages, the containerization package and the container tool are great steps in the right direction. We’re excited to see what it’ll bring to the community!
If you have any questions or suggestions, feel free to reach out on Mastodon or X.
See you at the next post. Have a good one!
