Using Postgres with Hummingbird in a Dev Container
The first post of this series explored how to take advantage of Dev Containers, a useful VS Code feature that enables to run and debug Swift command line or server apps in a Linux container.
In this post you will take it a step further by having a more complex scenario: instead of storing the todos temporarily in memory, the app will store them in a PostgreSQL database. And to test it locally, you won’t need to install and run a Postgres server directly in your machine.
This is because Dev Containers allow specifying a docker-compose file, where you can list the different services your app needs, and “connect” them. Instead of having to install and configure different services locally manually, this file lists all of them, and docker takes care of pulling the images ready to be used.
Requirements: before starting, ensure the following programs are installed on your machine:
- Docker: on macOS, you can either install Docker Desktop, or use a faster and lighter alternative: Orbstack.
- VS Code: download here
Although this tutorial is focused on macOS, it can work on any machine and OS with Docker and VS Code.
Note: This article will continue to use the sample project and the concepts explored in the first part of this series. It is highly recommended to read it first to understand the basics of Dev Containers in VS Code and how to set it up. The sample project of this article will continue where the previous left off. If you want to follow only this part, you can check out the simple-container branch in the sample project repository.
Adding the docker-compose file
Docker Compose, a part of the Docker ecosystem, simplifies the management of multi-container apps, having each service in in its container, and interconnecting them. It’s very useful when you want your app and different services in isolation, for example an app with a database and a cache system. By describing the services, and how they depend on each other, Docker Compose takes care of building or pulling the images, and spinning up the container.
This is where you’ll start: open the sample project in VS Code. In the already existing .devcontainer directory, add a file named docker-compose.yaml.
In this file you’ll declare two services: the app and the database. Start with the app, and insert the contents below:
#1
services:
  app:
    image: swift:6.0
    #2
    volumes:
      - ..:/workspace
    #3
    depends_on:
      - postgres
    environment:
      POSTGRES_HOST: postgres
      POSTGRES_DB: todos
      POSTGRES_USER: todos_app
      POSTGRES_PASSWORD: some_secret_password
    #4
    command: sleep infinity
(It’s alright, I’m also not a fan of YAML files, but here is what this part means):
- Define an array of services, where the first one is named app. The docker container for the app will be based on the
swift:6.0image. - The volumes key specifies a volume mapping, where the root directory of the app (..) on the host machine is mounted to the /workspace directory inside the container. Setting a workspace folder is required when using docker compose files.
- You will soon define the
postgresservice, but for now, declare a dependency from the app on it. Also, pass some environment variables for configuration: the host (docker takes care of DNS resolution between the containers), the database name, a user and a password. - Last, set the container to keep running indefinitely, so the debugger can always run the app.
The second part left in that file is the configuring the database container, and it is a bit shorter. Add the following code, above the contents starting from the first comment:
services:
  app:
...

  #1
  postgres:
    image: postgres
    restart: unless-stopped
    #2
    volumes:
      - postgres-data:/var/lib/postgresql/data
    #3
    environment:
      POSTGRES_DB: todos
      POSTGRES_USER: todos_app
      POSTGRES_PASSWORD: some_secret_password
    #4
    ports:
      - 5432:5432

#5
volumes:
  postgres-data:
Pay attention to the indentation, as it is super important in yml files. The postgres and the app services should have the same indentation, while volumes should have no indentation at all. This is what this code does:
- Define a service named
postgres, using the latest image of it available. Also, set it to restart automatically in case it crashes, but not if you explictly stop it. - Docker allows you to create a volume (a directory) that is created in the host machine, and used by the container. Map the directory /var/lib/postgresql/data in the container, which is where PostgreSQL saves data, to the volume you’ll create in item number 5. This will persist the data across container restarts.
- Configure the PostgreSQL database with a database name, user and password. These are the same parameters you inject as environment variables in the
appservice. - To allow external connections from the host machine, expose the port 5432, the default Postgres port. More on that in a section later.
- Create the volume for persisting data, as explained in item 3 above.
Save this new file, and before being able to connect to the database, you’ll have to do small changes to the dev container configuration.
Updating the Dev Container Configuration
Although you have defined the services in the docker compose file, VS Code still has the old configuration, for a single container instead of multiple ones. First you’ll have to update the configuration file to tell which docker compose file to use.
Open the .devcontainer/devcontainer.json file. Previously you had this line:
{
    // name...
    "image": "swift:6.0",
    // other settings...
}
Now you don’t want a single image anymore, but rather the services you specified in the docker compose file. Remove the line above from the JSON, and add these instead:
{
    // name...
    "dockerComposeFile": "docker-compose.yaml",
    "service": "app",
    "workspaceFolder": "/workspace",
    // other settings...
}
With these three lines, you set the path of the docker compose YAML file, the name of the main service, in this case the app, and the directory in which the app contents are located in the container.
The second change, this one smaller, is about updating the ports exposed by the dev container. Previously, for the key forwardPorts, the only port present in the array was 8080. Update this value to include also the port 5432 from Postgres:
{
    // other settings...
    "forwardPorts": [8080, 5432]
}
Rebuild the Container
When doing changes to the docker compose or dev container configurations files, VS Code might detect them automatically, and suggest rebuilding the container:


Click the Rebuild button and wait for VS Code to relaunch the container. If it hasn’t suggested automatically, open the command pallete (⌘ + shift + P), and search for Dev Containers: Rebuild container:


Connecting to the PostgreSQL DB
After this setup is complete and the container is built, you can see the both containers up and running. You can do so either using the docker via CLI, or with a UI such as Docker Desktop. I recommend using OrbStack instead:
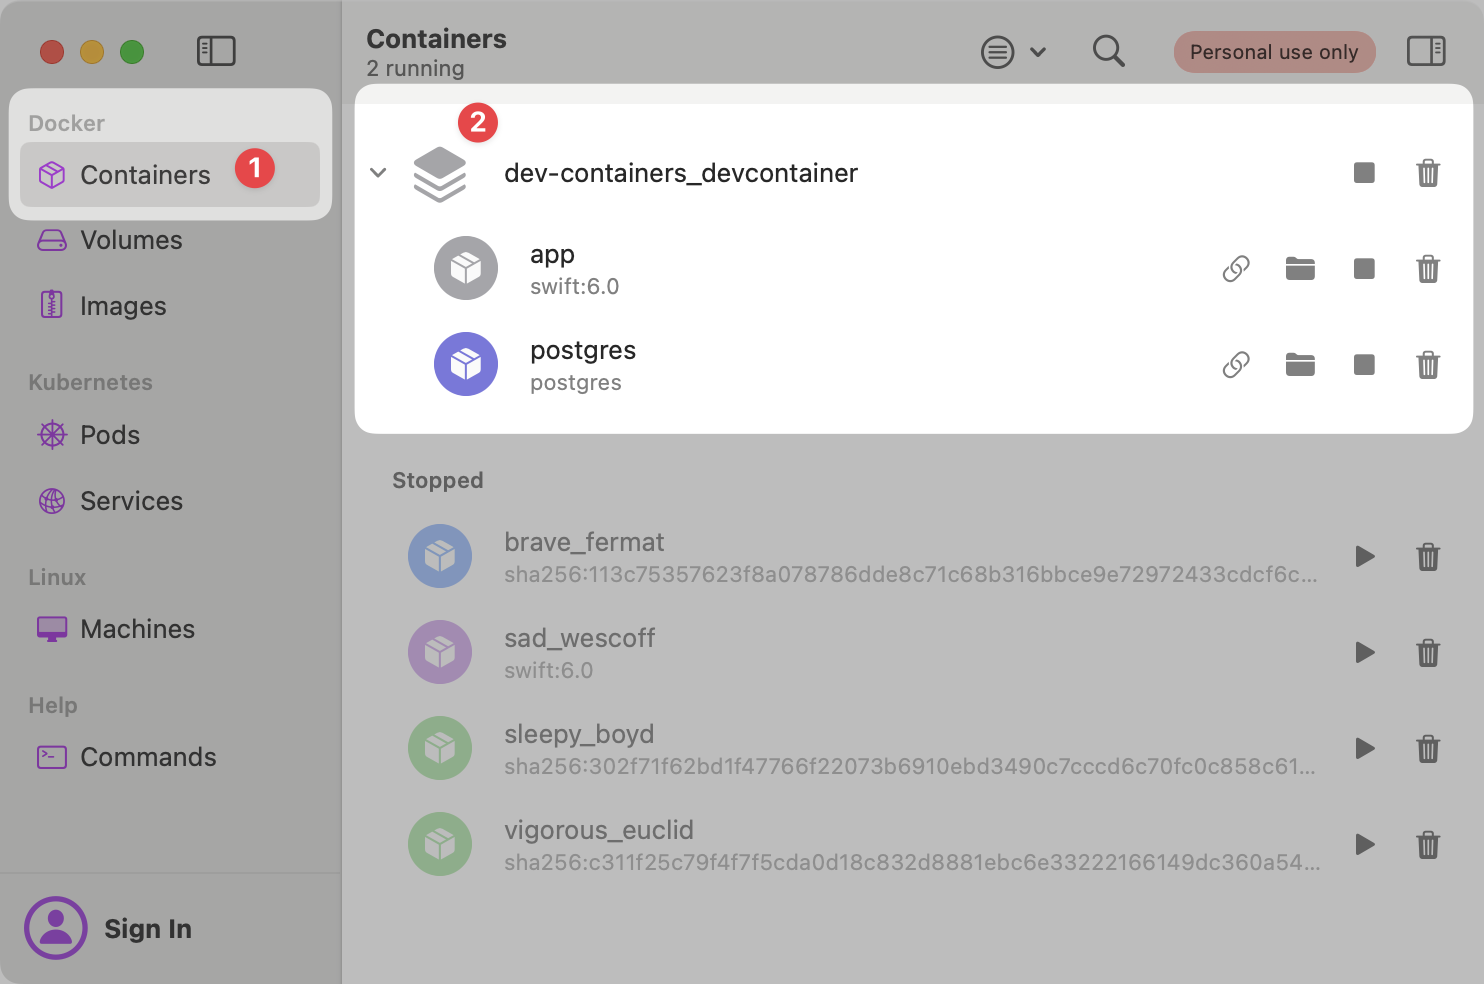

Notice how both containers are grouped together, as they’re part of the same docker compose file. Also, notice how both containers should show the stop button, due to the fact they’re running. Therefore, you should be able to connect to the database with a Postgres client, such as TablePlus.
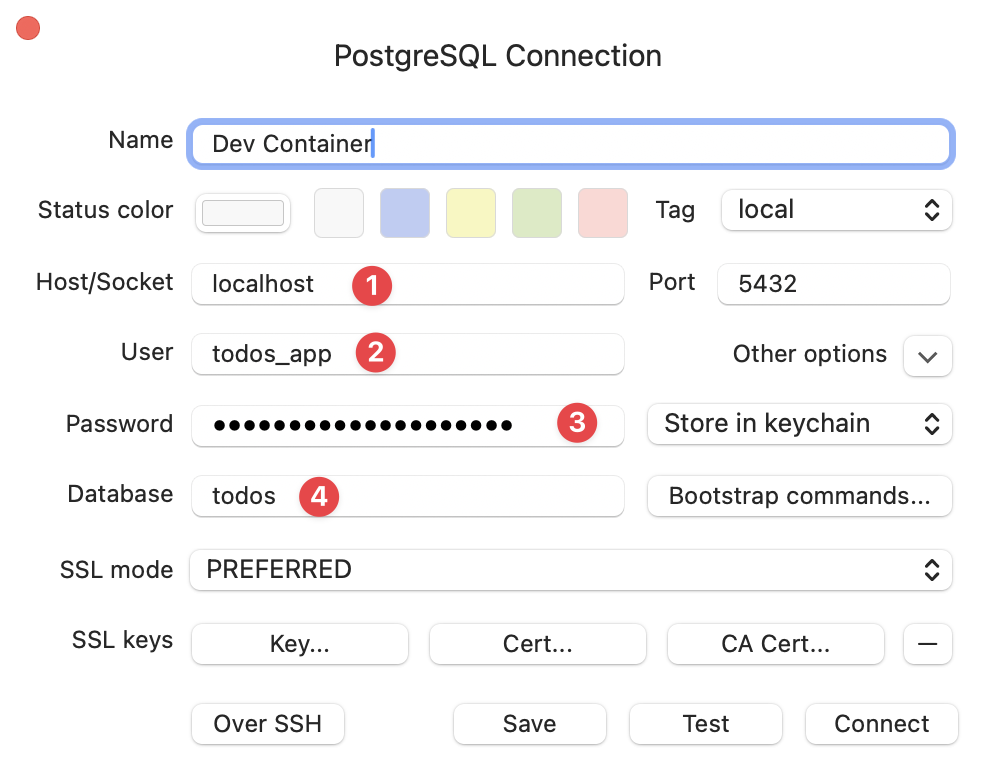
To connect to the database, create a connection using the parameters you described in the environment variables. The (1) host should be localhost, as it’s running in the container but Docker exposes it to the localhost. Set also the (2) user, (3) password, and (4) the database name as the values present in the docker compose file:

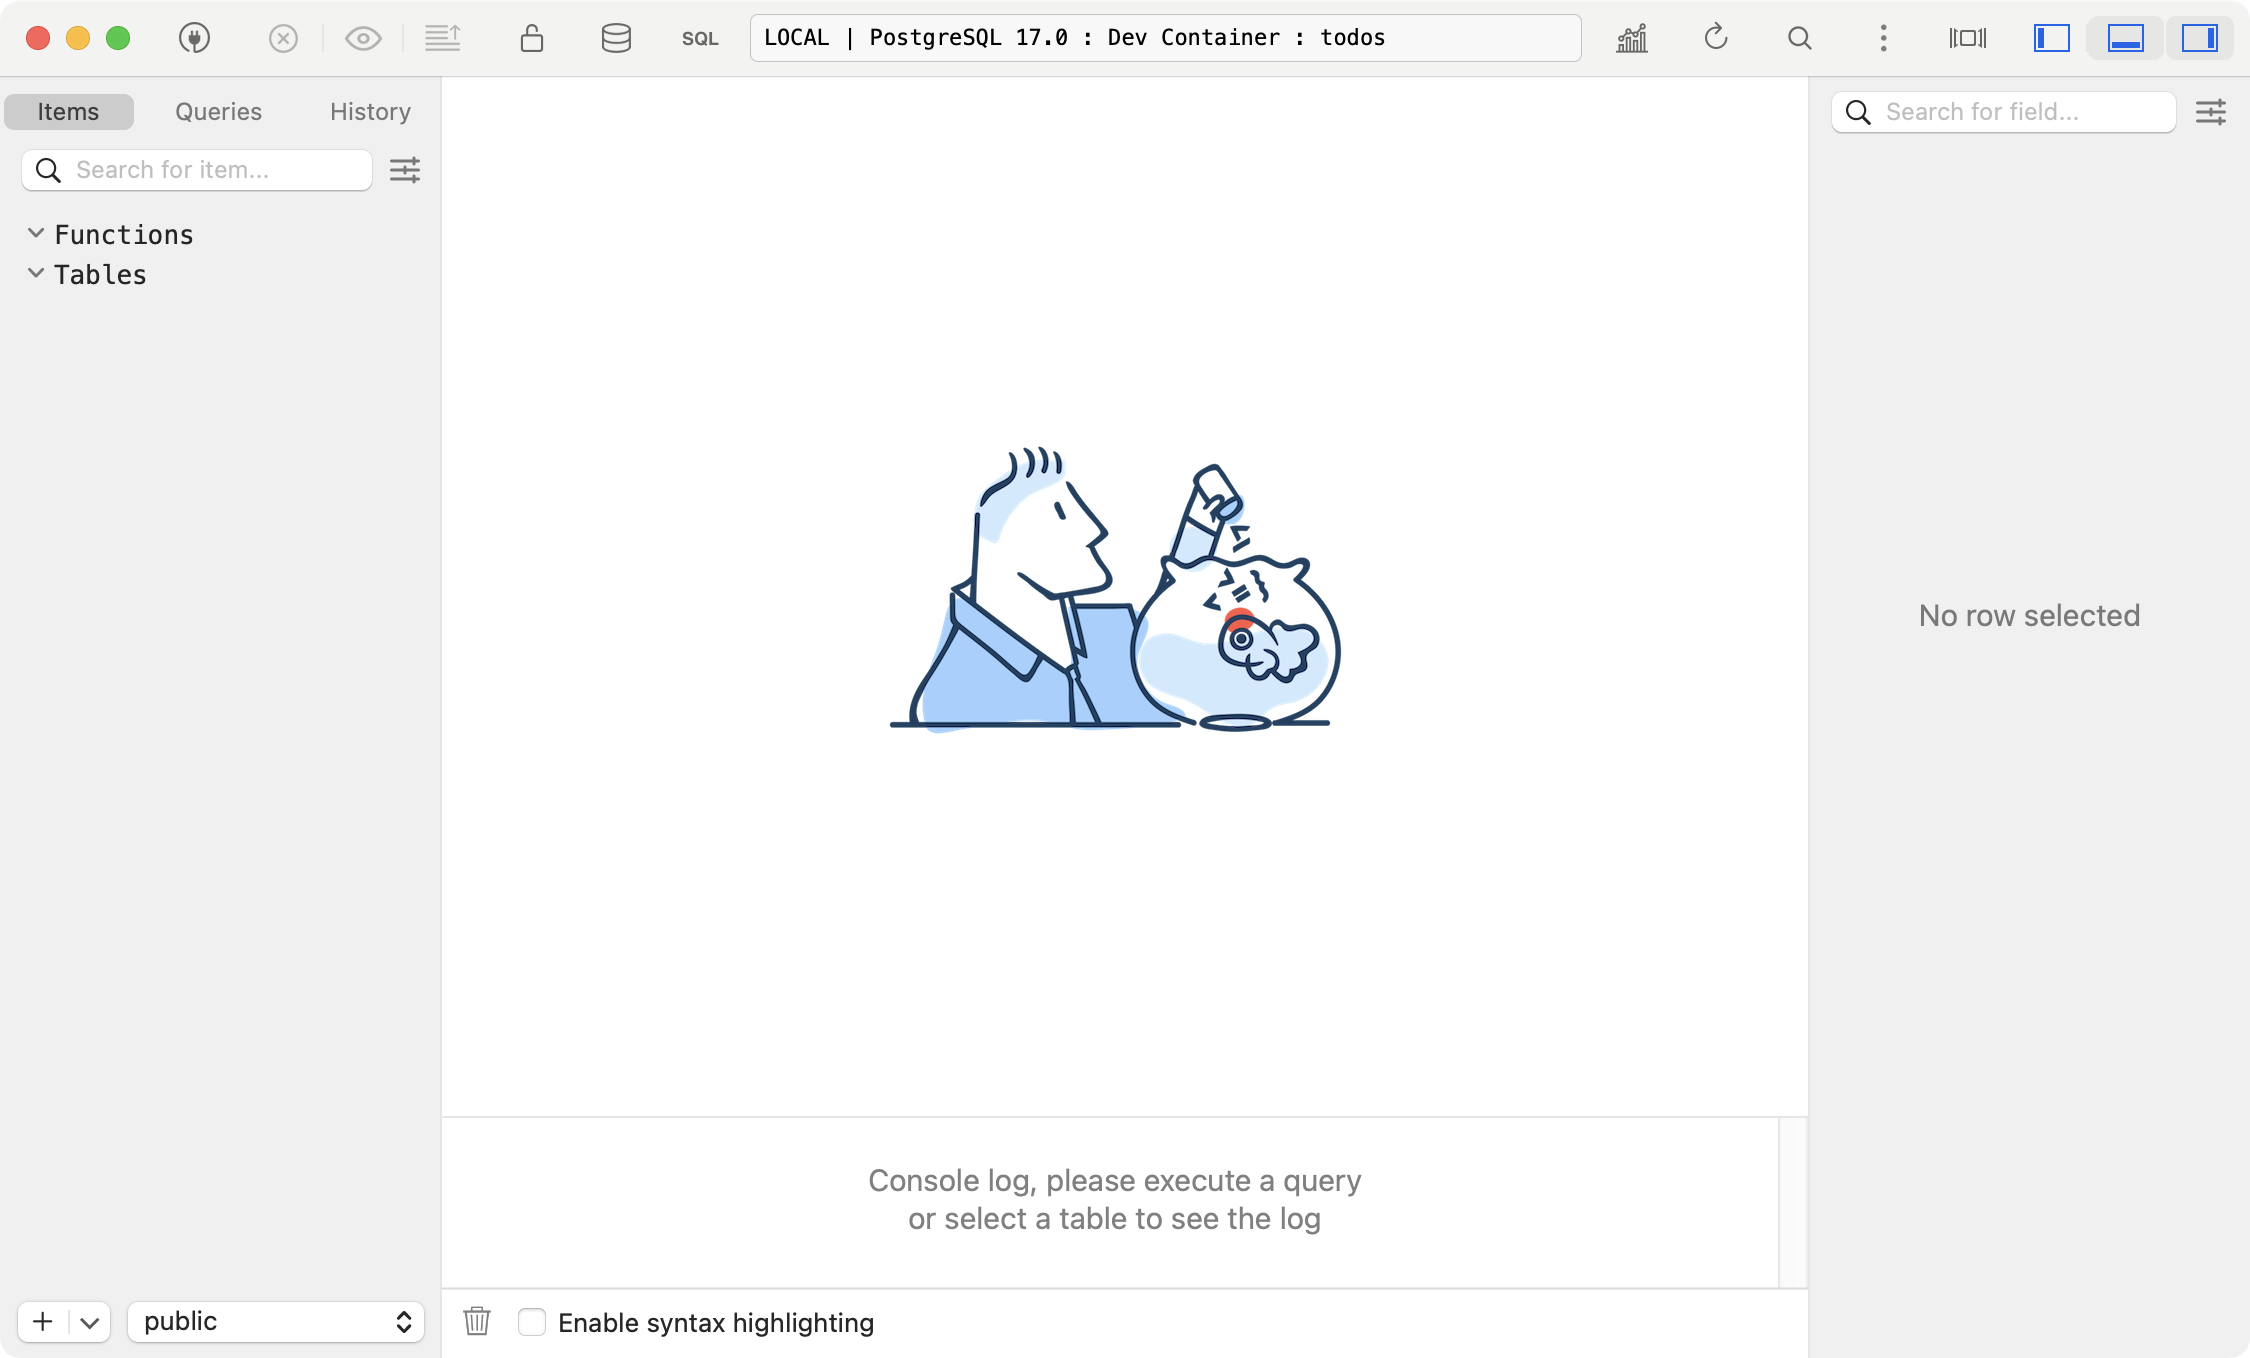
After connecting, you’ll se an empty database, with no tables in it yet:
Updating the launch.json File
Back to VS Code, the Swift extension will detect that you made some changes to the workspace, and suggest updating the .vscode/launch.json file. The changes there are two:
The first one is automatically done by the Swift extension, and it updates the workspace path. Everywhere that ${workspaceFolder:dev-containers} was present, should be now ${workspaceFolder:workspace} instead.
The other change is related to the arguments. Remember you used the --in-memory-testing flag to tell the app to not use Postgres? Now is the time to remove it:
{
    "configurations": [
        {
            "type": "lldb",
            "request": "launch",
            "args": [], // old value was ["--in-memory-testing"]
            ...
        },
        ...
    }
}
Updating the App Code
The last set of changes left now is to actually update the app, with instructions of how to connect to the database. Open the Sources/App/Application+build.swift file. Before the line where you declare the PostgresClient instance, (line 46), define a PostgresClient.Configuration:
let config = PostgresClient.Configuration(
    host: environment.get("POSTGRES_HOST") ?? "localhost",
    username: environment.get("POSTGRES_USER") ?? "todos",
    password: environment.get("POSTGRES_PASSWORD") ?? "",
    database: environment.get("POSTGRES_DB") ?? "todos",
    tls: .disable
)
This uses all the environment variables you previously declared in the docker compose file. Use this configuration in the client initializer, by removing the hardcoded configuration,and replacing it with the new config property:
let client = PostgresClient(
    configuration: config,
    backgroundLogger: logger
)
After saving these changes, you can build and run the app. Open the Debug sidebar and click the run button, or just use the ⌘ + R shortcut. Once the app is running and successfully connected to the database, you should see these two logs:
[App] Starting application - Linux Ubuntu 24.04.1 LTS
[HummingbirdCore] Server started and listening on 127.0.0.1:8080
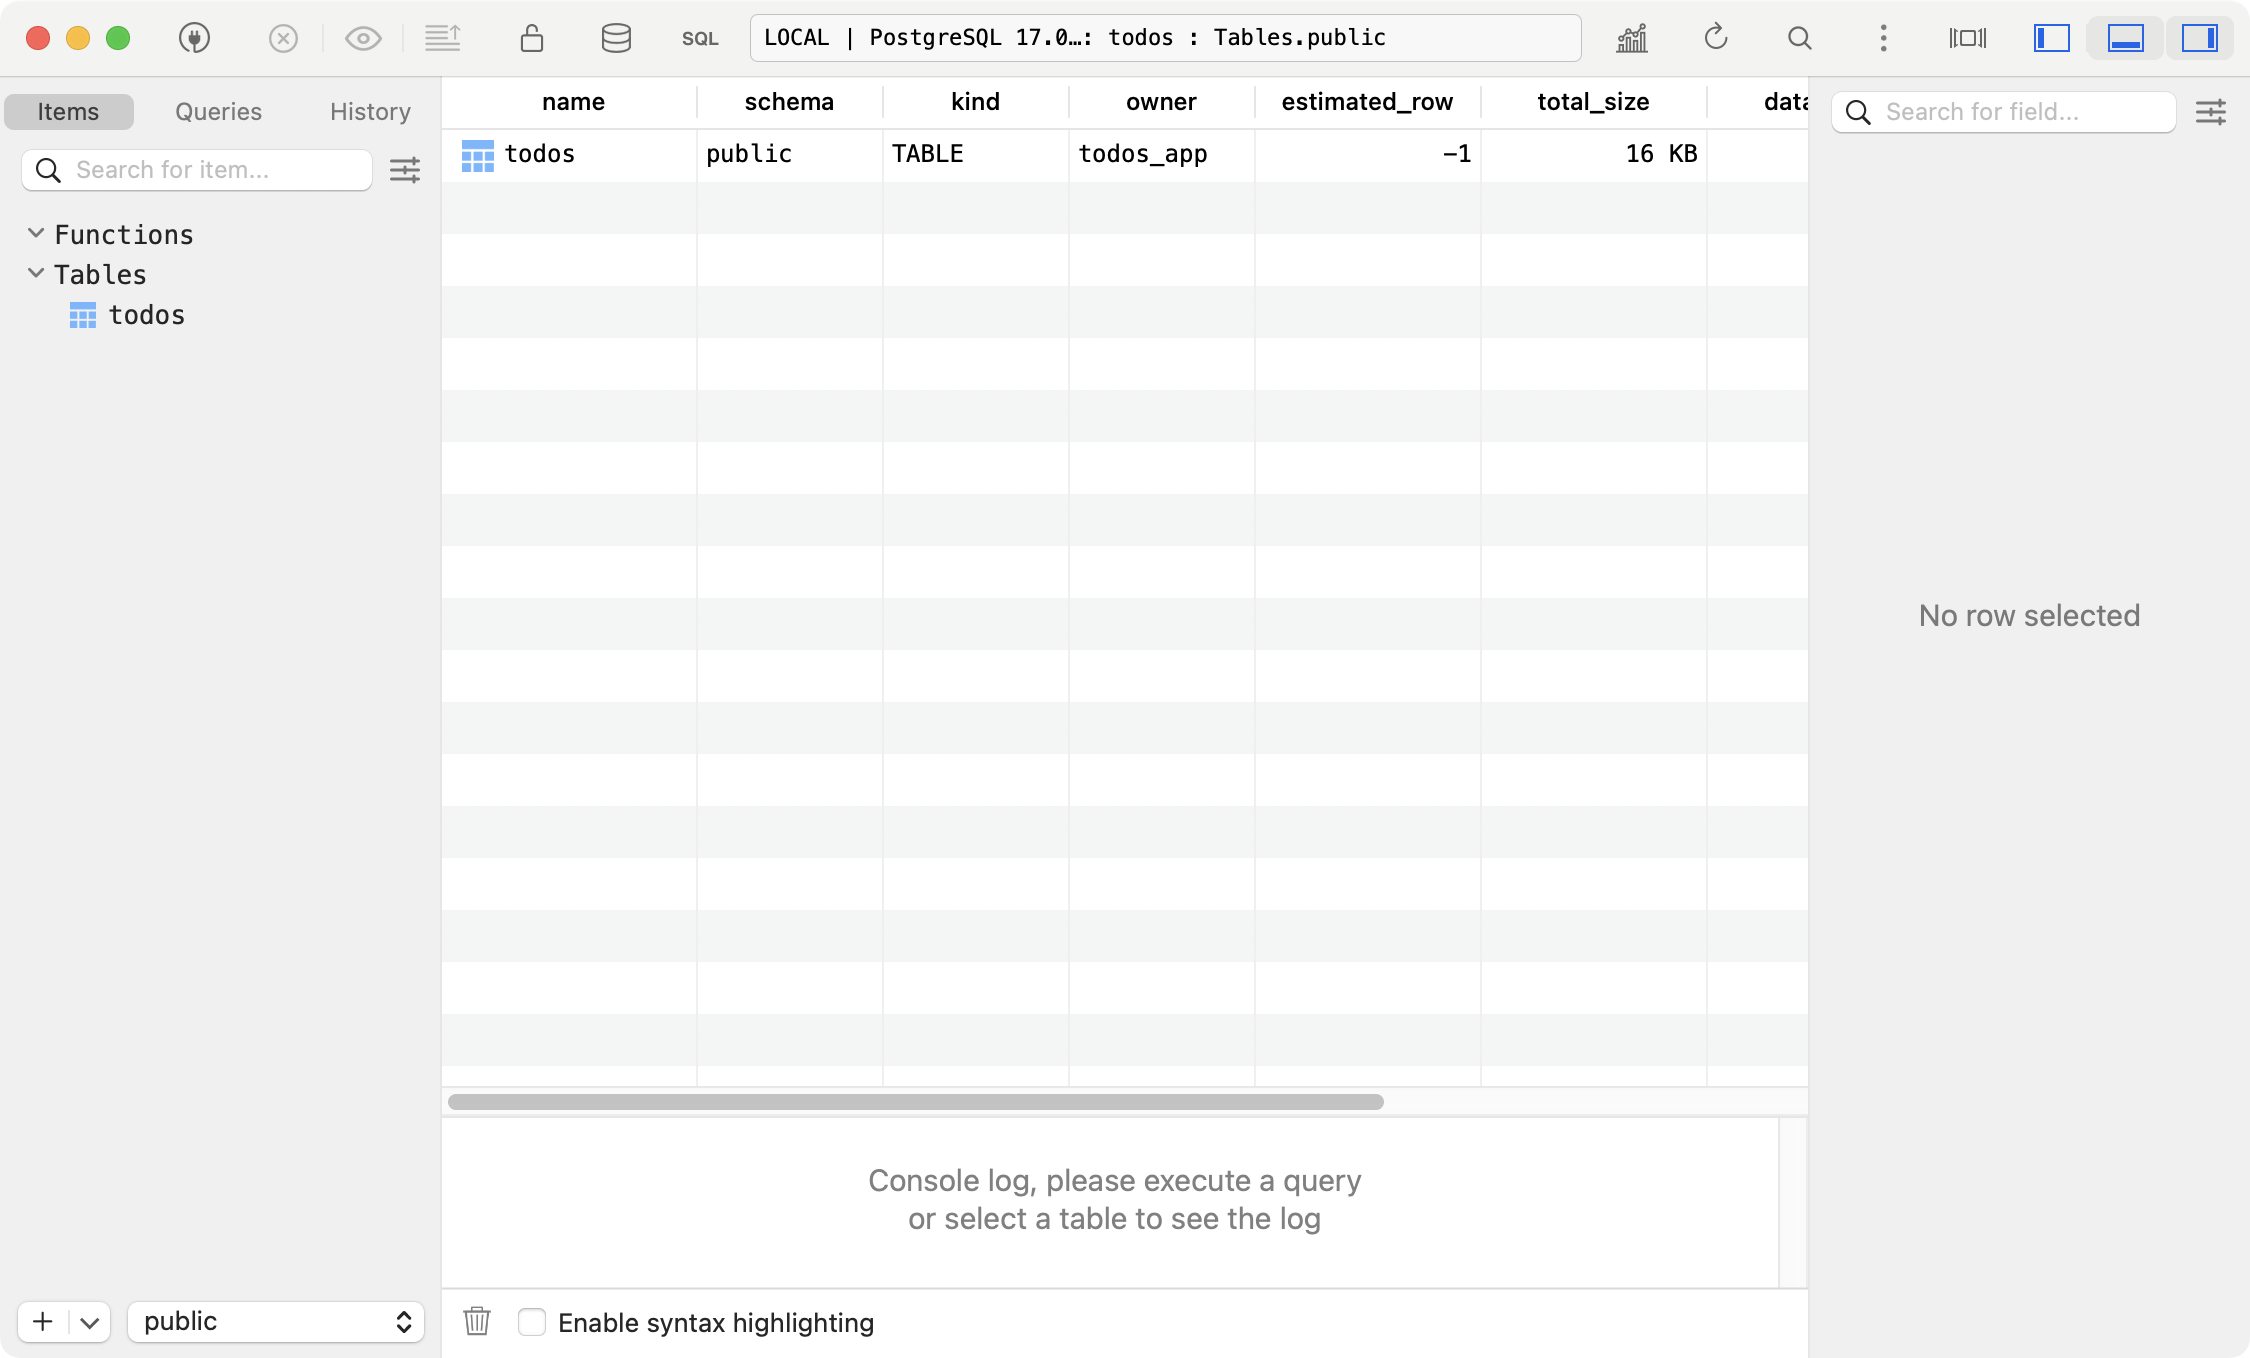
The TodoPostgresRepository struct creates the table in the first run. You can confirm the table exists now after the app launched. In TablePlus, it’s enough to refresh the workspace (⌘ + R):
It’s time now to check things the API can read and write to the database!
Calling the HTTP API
To test the API, you’ll use the same commands as in the previous tutorial. You can use curl to post new todos:
curl -X POST http://127.0.0.1:8080/todos -d '{"title": "Learn manual SQL queries"}'In the response you can see the new object created:

You can check the items are persisted in the database:
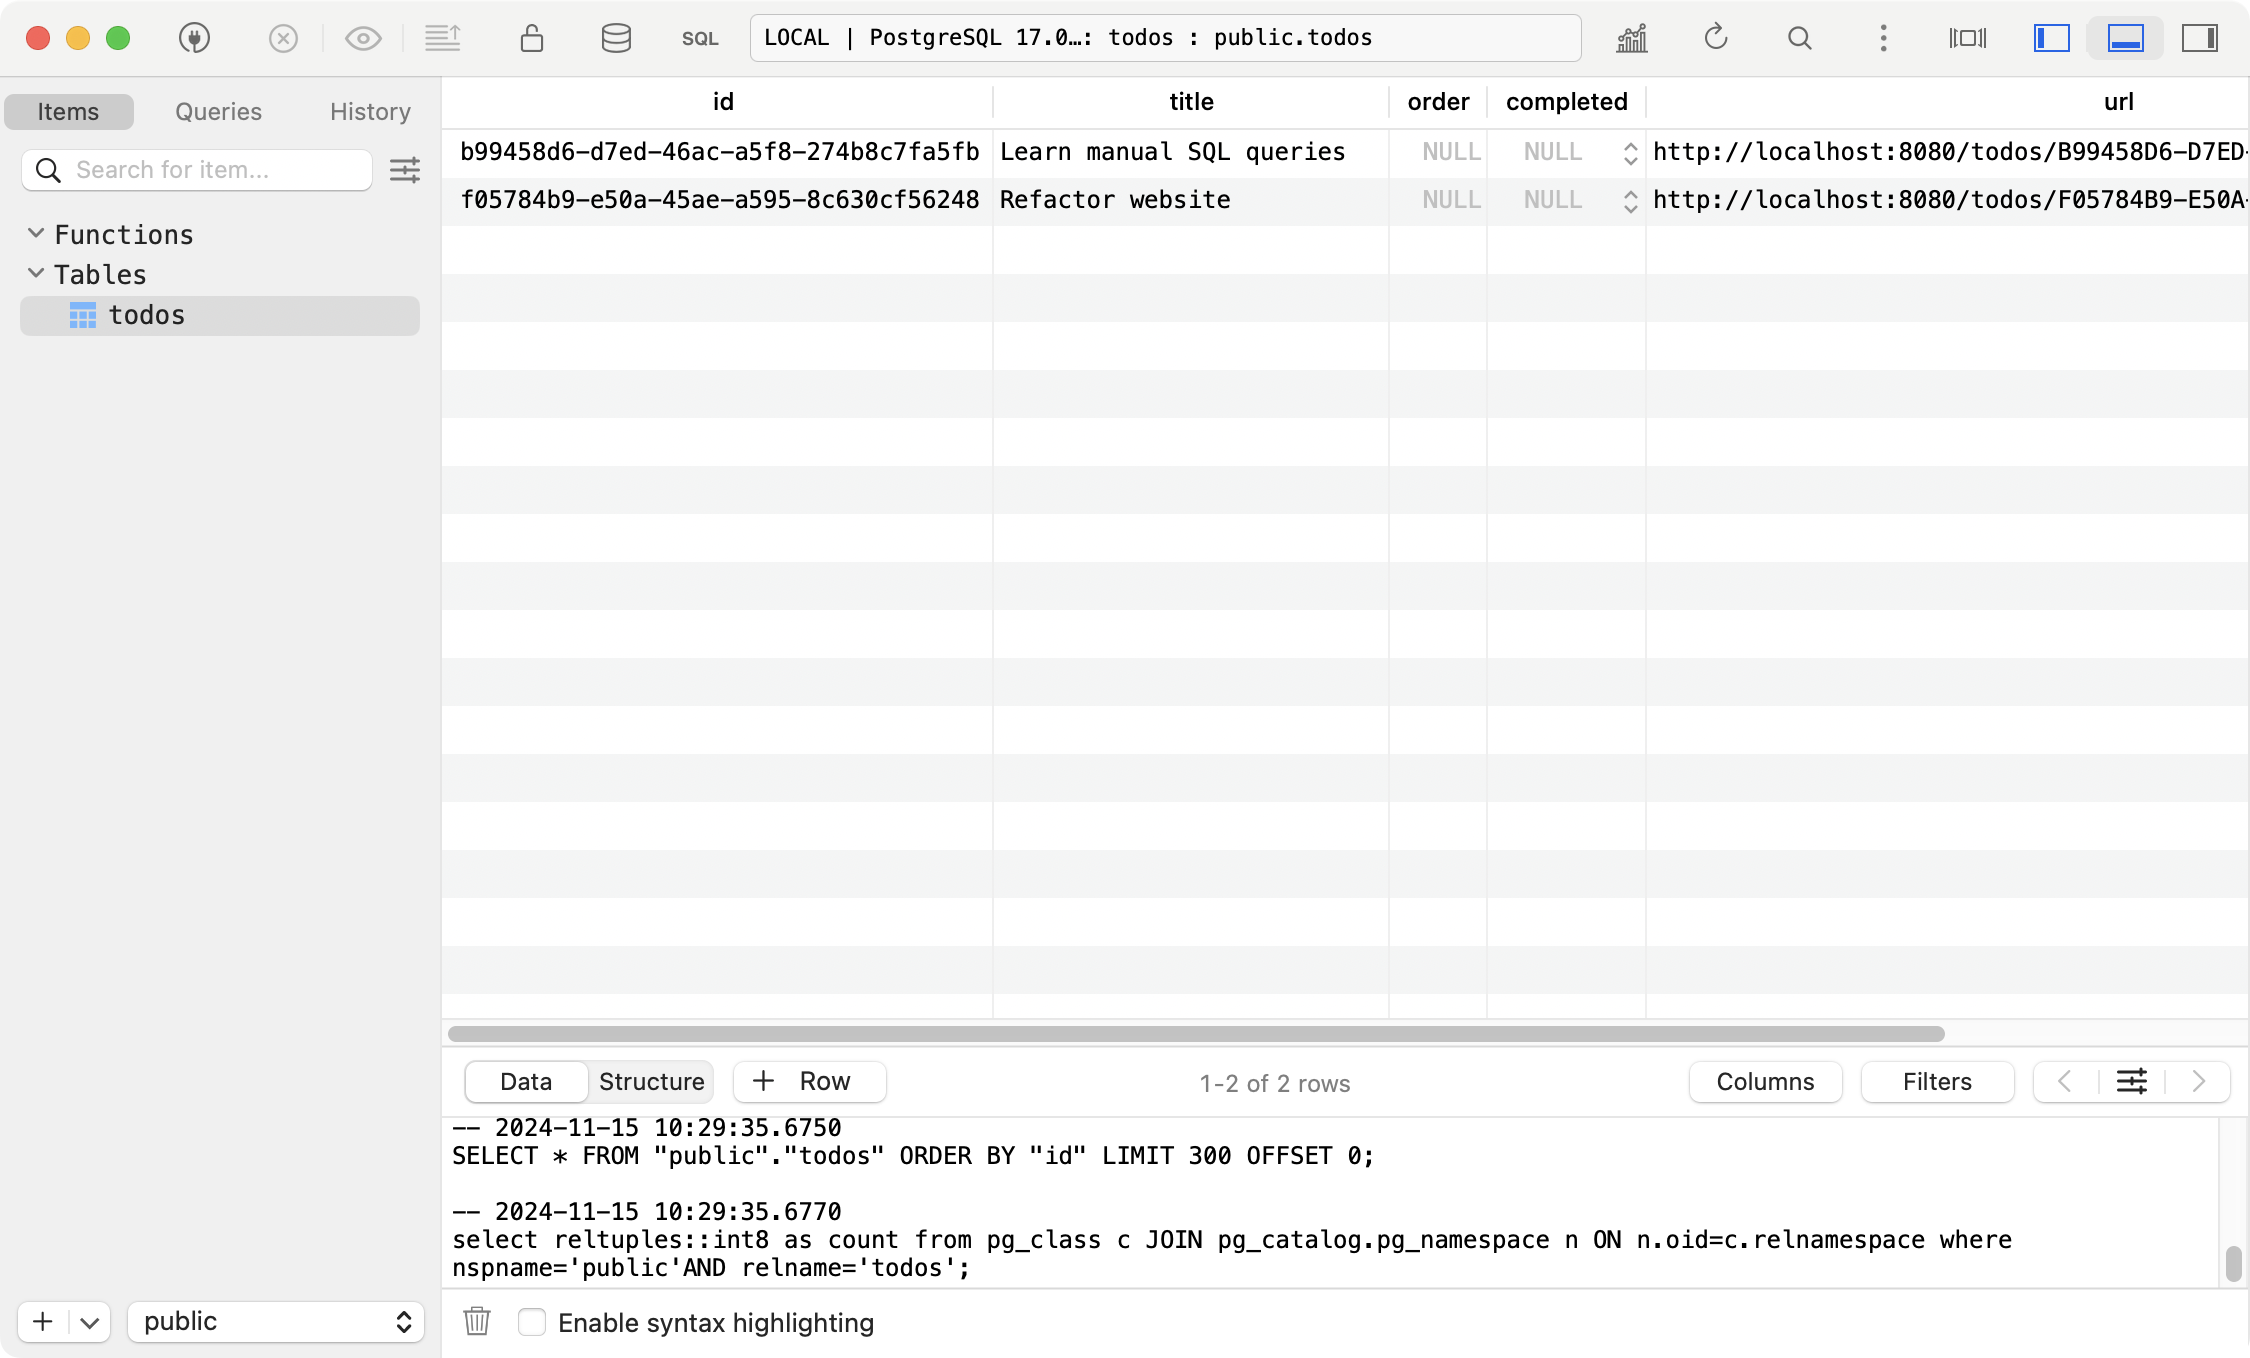
And the same items can be accessed with the GET /todos endpoint:
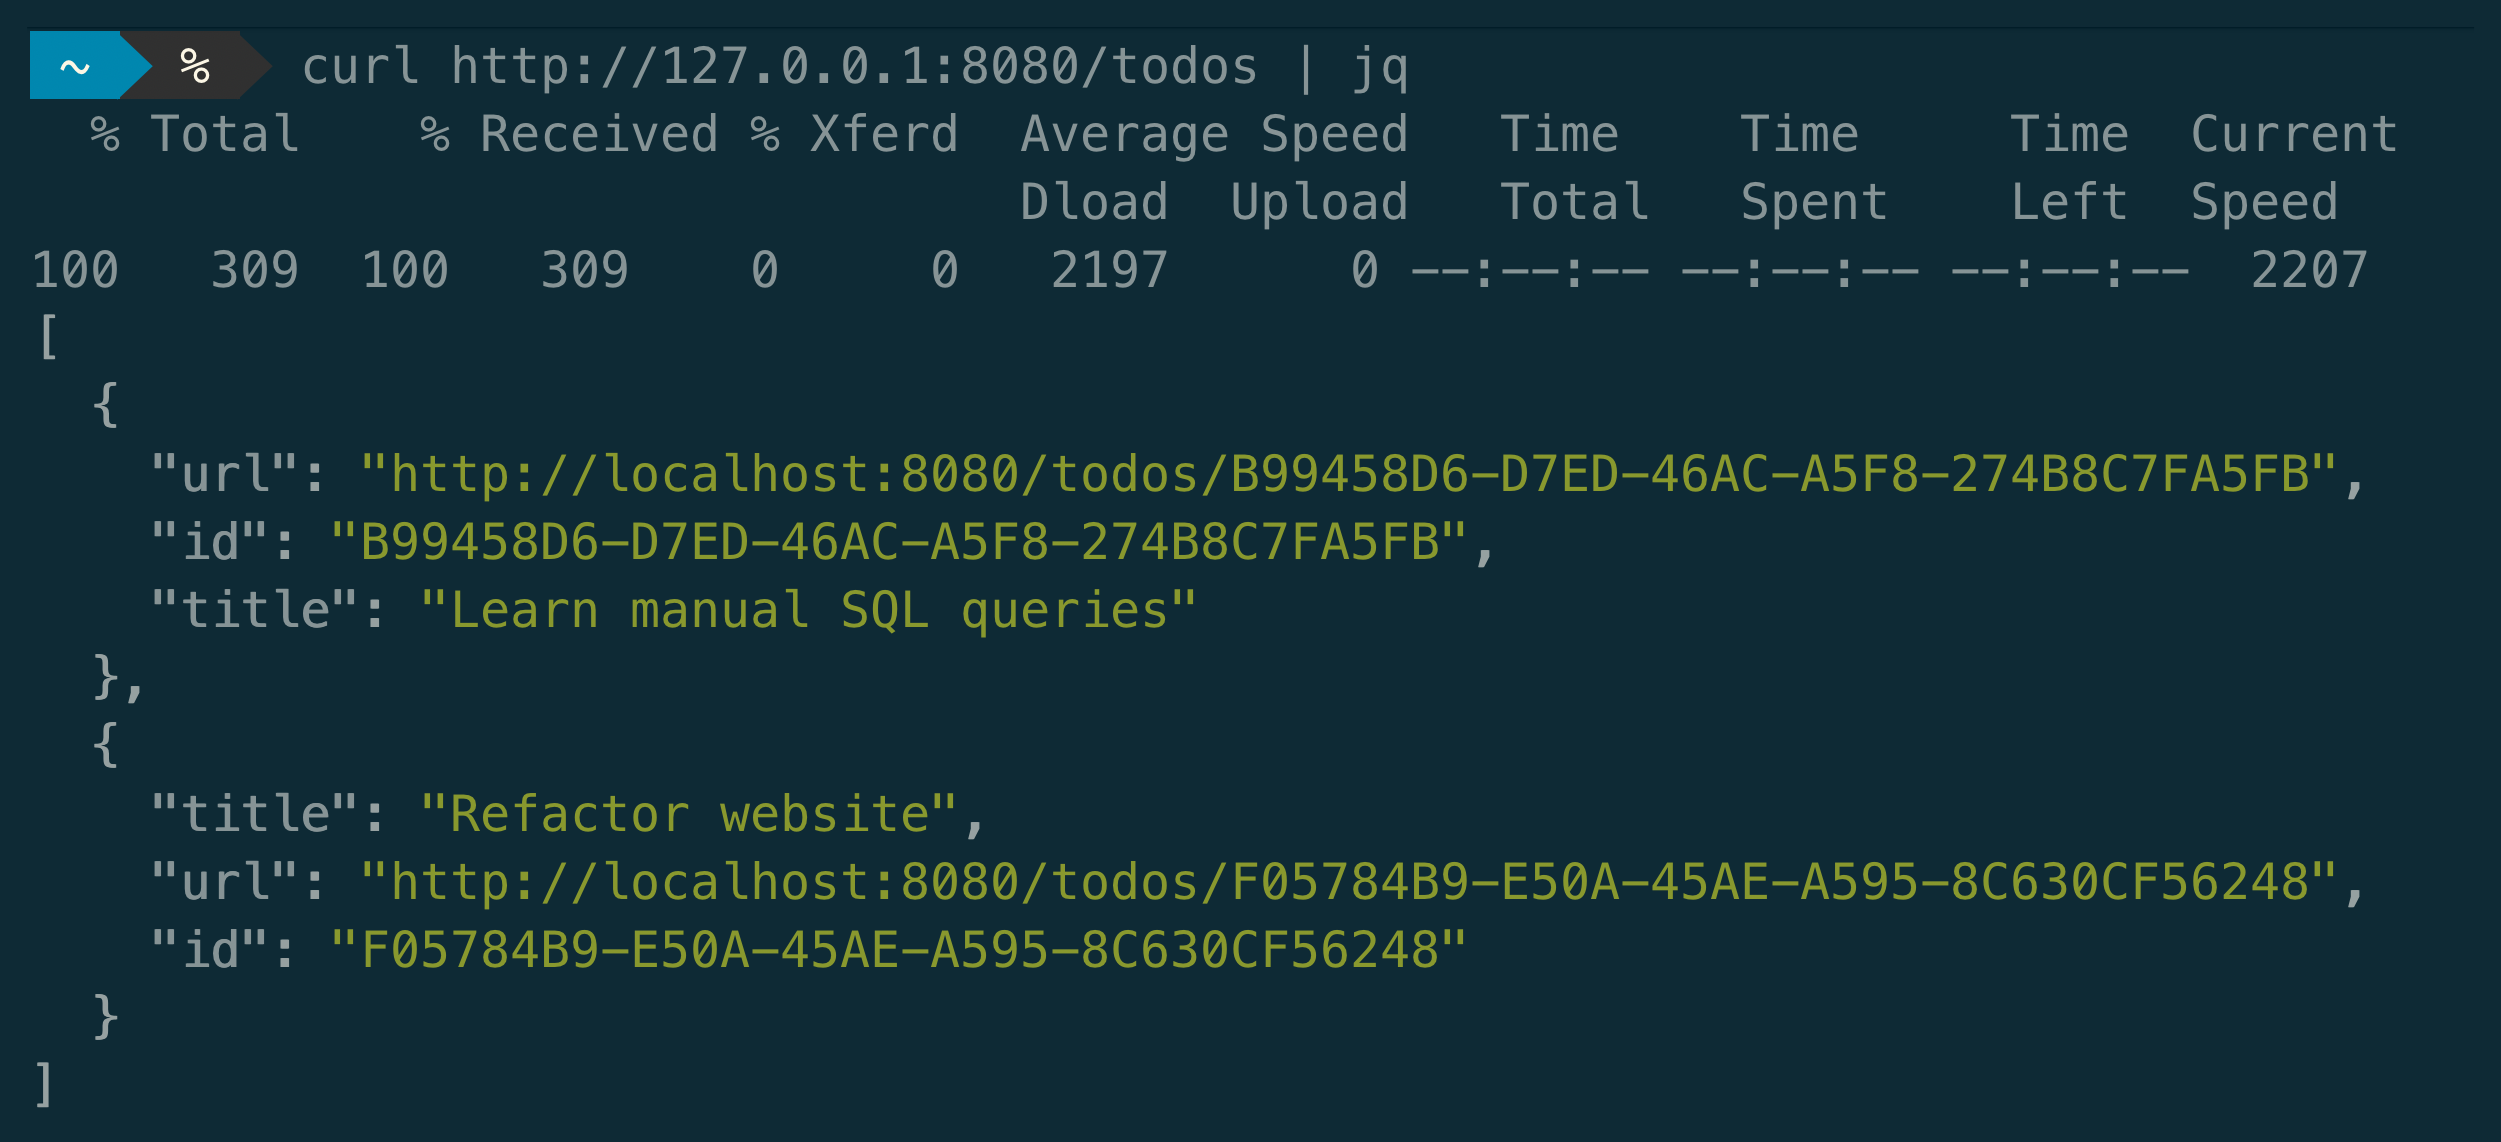
Debugging
There are two points that stood out while writing this article:
- If the database details are incorrect, or if the app cannot connect to the database for any other reason, the app will not start. The log message [HummingbirdCore] Server started and listening on 127.0.0.1:8080 will not be shown, as the app will not even reach the point of exposing the HTTP server, and you won’t be able to execute any requests. When that’s the case, you should look why the database connection is failing.
- To check that the database container is up and running, and execute queries against it, you can also use the SQLTools extension, providing the configuration parameters you used in the docker compose file. This might be especially useful if you aren’t using a UI like TablePlus to connect to the database.
Explore Further
Congrats for reaching the end of another article, adding knowledge about Docker Compose, Postgres and a more advanced Dev Container setup. Leave us your comments or questions at X or Mastodon.
Don’t miss the final article of this series, where you’ll learn how to develop the app on a remote server using GitHub Codespaces.
You can learn more about Docker Compose
Also you can try adding other services to your app, such as redis for a cache, or even a message queue like RabbitMQ.
Thanks to Adam Fowler for his help in writing this tutorial.
See you at the next post. Have a good one!
