Using Swift in GitHub Codespaces
In the previous posts of this series, we covered how to setup a VS Code Dev Container for a Hummingbird app, and also how to use Docker Compose to use PostgreSQL database in that same app.
In this post, you’ll learn how to develop the server app on GitHub Codespaces: a feature that is just like Dev Containers, except it runs remotely. Because the configuration, including Postgres, is ready from the previous posts, in this final part you’ll reap the rewards of code that is ready.
The advantages of Codespaces are many: you can develop on a remote server, but it will feel as if you’re developing locally. There’s no need to install anything on your local machine, and you also can work in collaboration with others, or expose your app to the internet and allow other people to call it.
Working on a codespace can be done on the browser, and also on VS Code using the GitHub Codespaces extension. For the sake of simplicity, this post will demonstrate how to do it on the browser.
Creating a Codespace
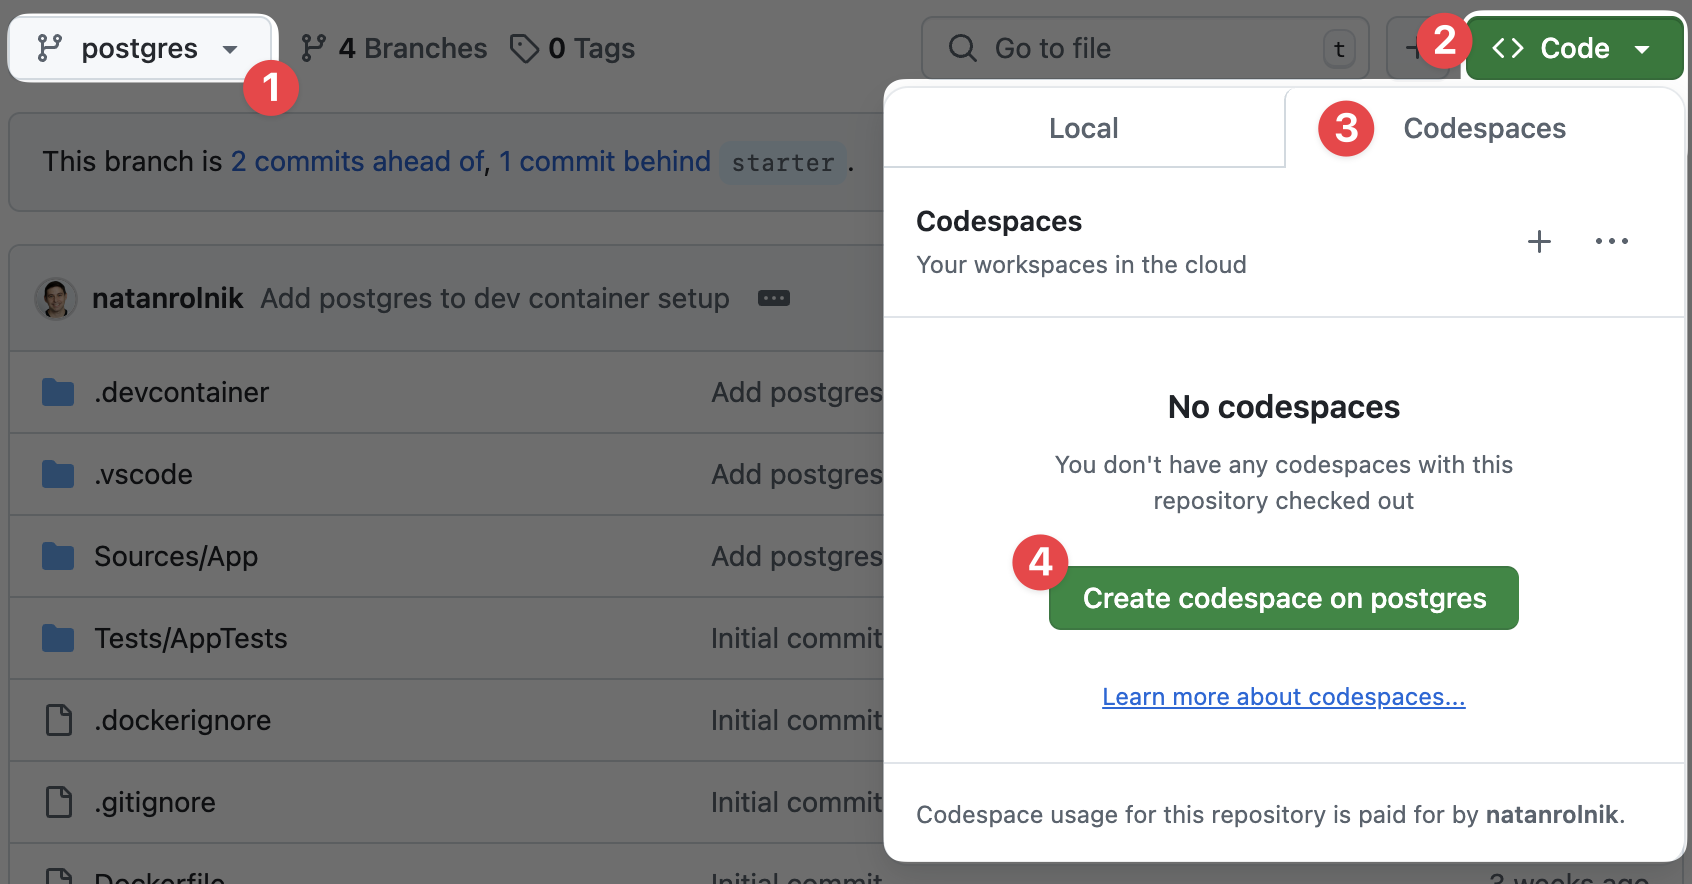
The first thing to do is to create a codespace. Open the repository on GitHub, and after making sure you’re on the correct branch (in this case, the final postgres branch), click on the Code button. Then, choose the Codespaces tab, instead of local, and click on the Create codespace on <branch> button:

GitHub will open the codespace in the same tab, and start building it. It might take a few moments to build the codespace for the first time, because it will use Docker to pull the base images and create the containers. This is what you will see in the Terminal tab:

After the codespace is ready, you’ll see the file explorer corresponding to the files in the repository in the primary sidebar.
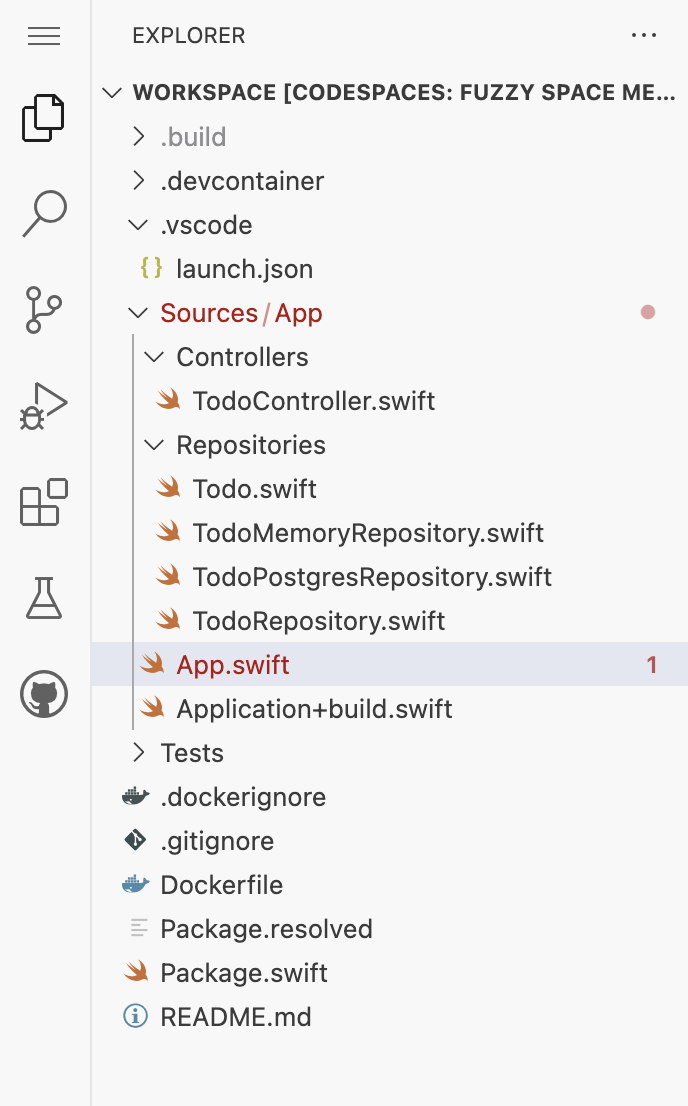

This means you can now start editing the files in the repository and running the app. In this tutorial, we’ll only focus on running the app, but you can also run tests using the Terminal inside the codespace.
Running the App
Before running the app, SPM needs to resolve the dependencies. This is what you’ll see in the Terminal tab, as the Swift for VS Code extension asks SPM to resolve the dependencies when the codespace is ready:

Once the dependencies are resolved (see the checkmark in the task in the image above d progress in the Terminal), you can run and debug the app. Use fn + F5 shortcut, or by open the Debug sidebar and click the run button. This will run the app in debug mode. You’ll see the same logs from the previous posts:

Exposing the 8080 Port
As the app launches, an interesting popup will appear in the bottom-right corner: it tells you that the app is listening on port 8080, but it’s not exposed. This is because the codespace is private, but you can expose the port publicly if you want to call the app from outside the codespace - for example, from your local computer.


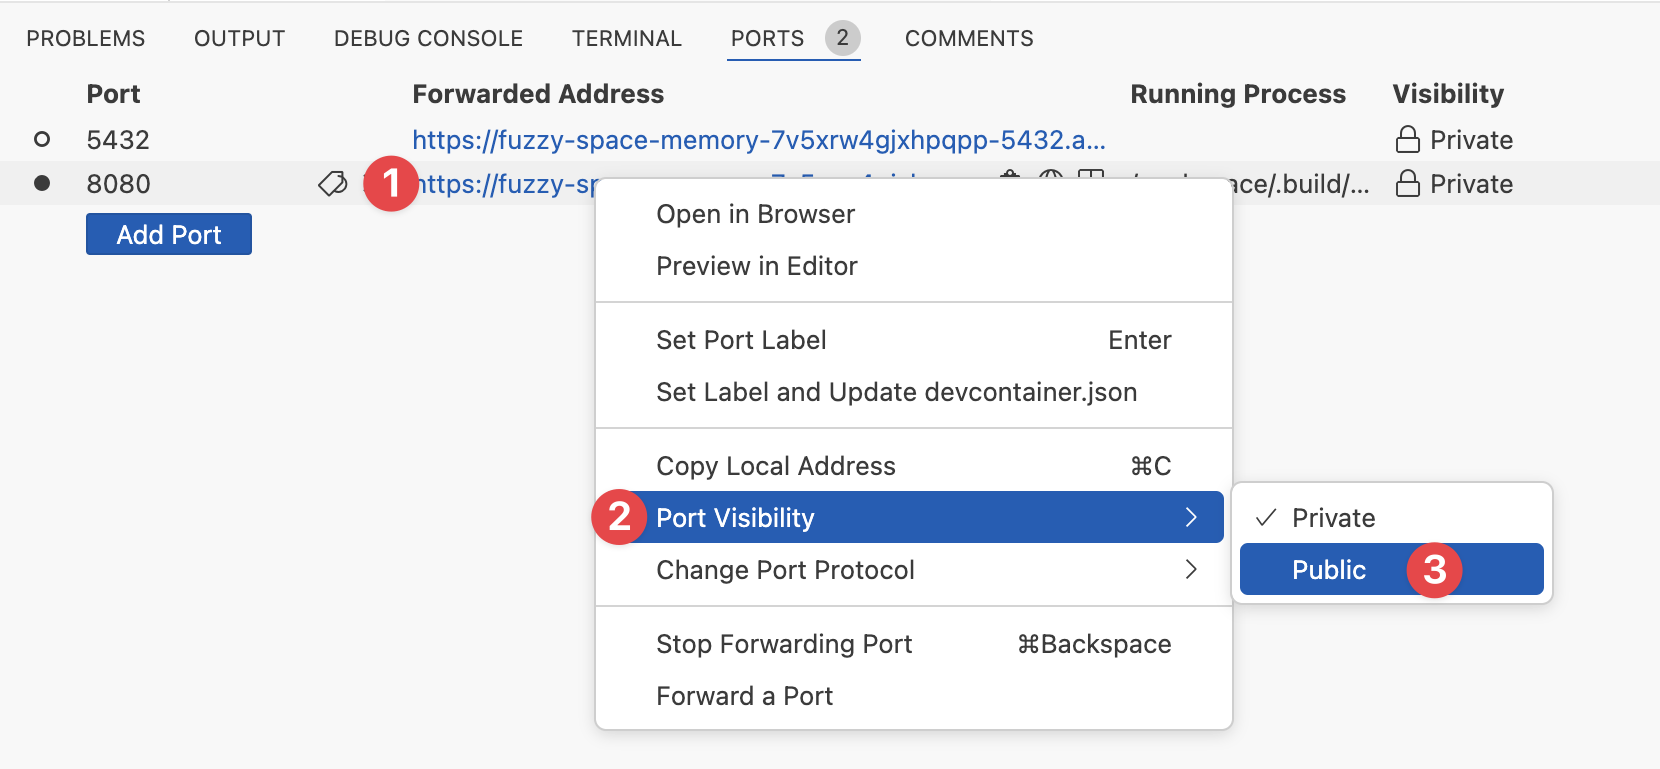
To expose the port, click on the Make public button. Alternatively, you can also do it manually. Look for the Ports tab in the bottom panel, and click on it to see all ports exposed by the codespace:

To change the visibility of a port, right click on it, choose Port Visibility, and then select Public (or Private if you want to hide it again):

Executing Requests
The app is running, and the port is exposed. now you have all you need to call the app from your local machine.
In the bottom panel, open again the Ports tab, and copy the URL for the port 8080. Notice how it contains the port number in the URL itself, as GitHub Codespaces redirects the request to the correct port in the remote container.
You can execute a GET request on the /todos endpoint, and see how the app returns an empty array, as there are no todos yet:

To add a new todo, execute a POST request on the /todos endpoint with a JSON body containing the title field:

If you execute the same GET /todos request again, you’ll see the new todo in the array:

Debugging
Just as regular Dev Containers, you can set breakpoints in the code, and inspect variables as the execution pauses at a breakpoint:

Pricing and Cleanup
GitHub Codespaces demand compute time, and therefore it is a free feature with limitations depending on the plan you have. You can read more here about the amount of Core hours per month and how to calculate them based on the machine type you choose.
Note: If you don’t stop or delete a codespace manually, GitHub will stop it after 30 minutes of inactivity, and delete it after 30 days.
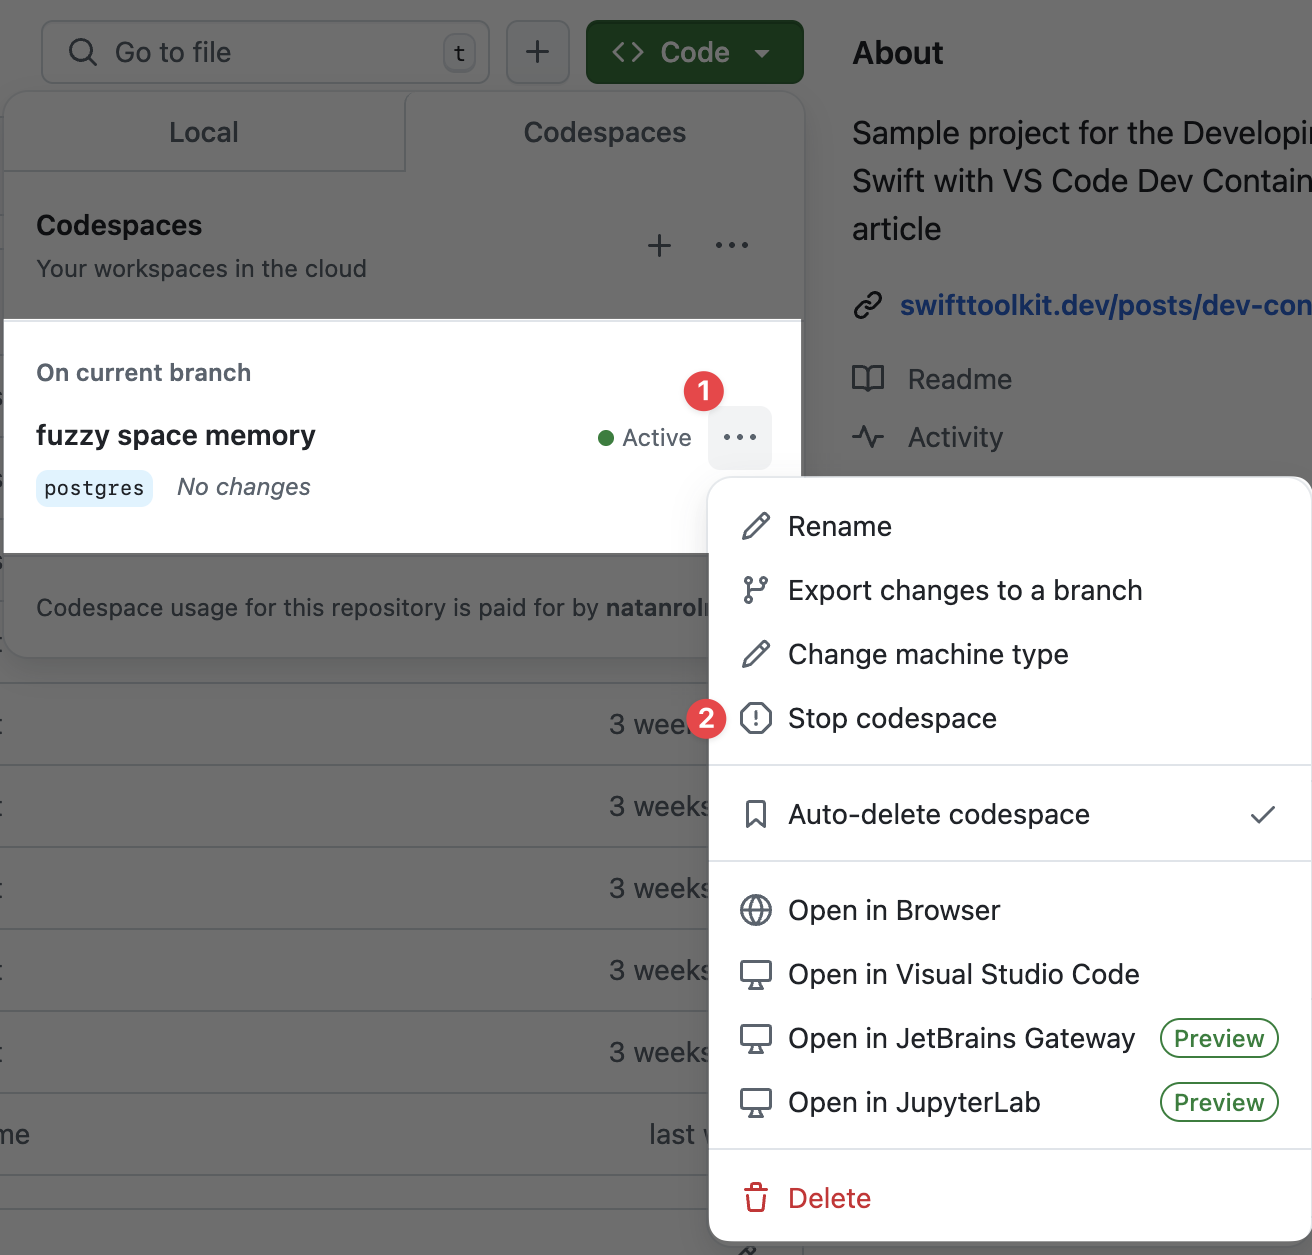
To avoid unnecessary costs, you should stop the codespace when you’re not using it. You can do it either from the repository page, or from this page that lists all your codespaces.
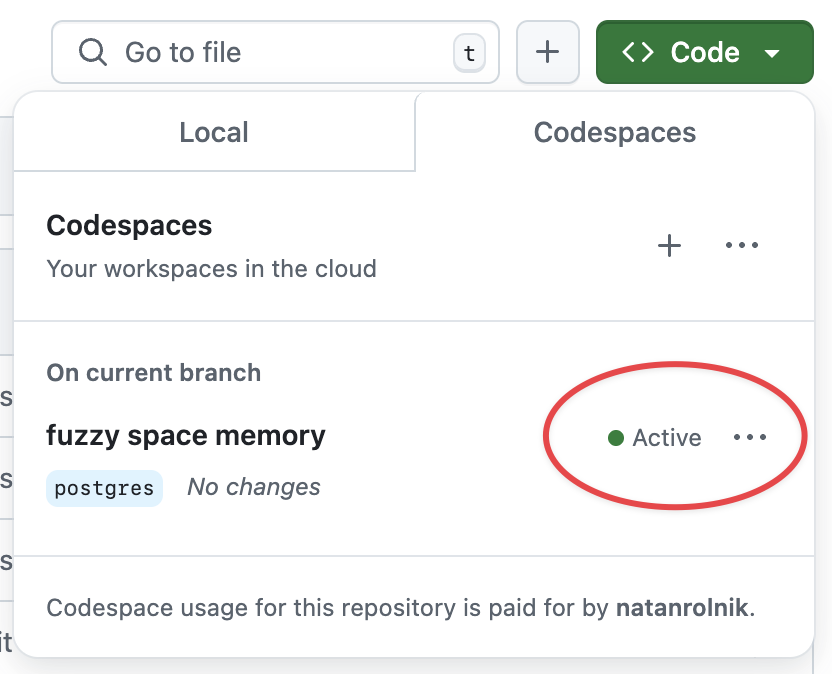

To stop it, click on the three dots on the right of the codespace, and choose Stop codespace:

Explore Further
Congrats, you reached the end of this series! We hope you enjoyed it and learned more about Hummingbird, Docker, PostgreSQL, VS Code, and GitHub Codespaces.
You can find all the code from this article in the sample project repository and the three different branches for each post: starter, simple-container, and postgres.
Please let us know what you think about this article and the series. You can leave us your comments or questions at X or Mastodon.
See you at the next post. Have a good one!
